【After Effects スクリプト】Audio Sync
- Digital2,500 JPY
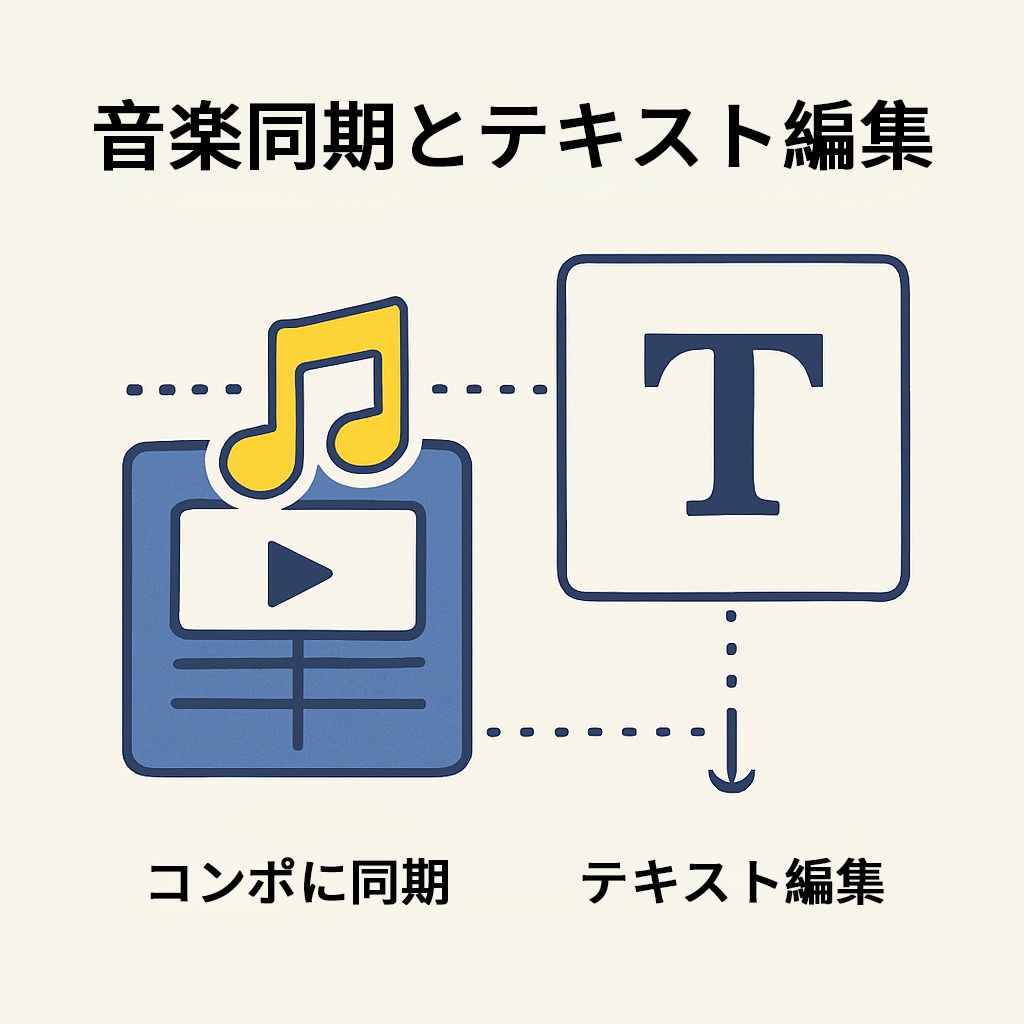

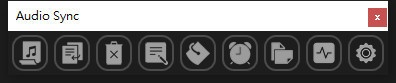
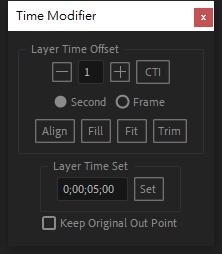
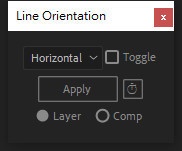
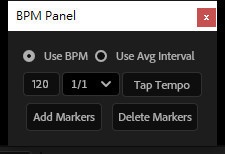
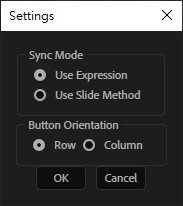


メインcompの音楽をPrecompに同期することができ、元のメインcompに影響を与えることなく、テキストレイヤーのシンプルなタイムライン機能も提供します。 同期モードは次の2種類が用意されています。 式を使用した同期 – メインコンポジションの音楽レイヤーのタイミングが変わったとき、式が自動的に他のプリコンポジション内の音楽レイヤーのタイミングを調整します。 レイヤータイミングの自動移動 – この方法では、ネストされたプリコンポジション内部まで掘り下げることができますが、メインコンポジションの音楽タイミングが変更された場合は、レイヤーを手動で更新する必要があります。 設定から好きな方式を選択して使用できます。 機能説明 – ボタンの機能(左から右へ) ボタン 1 – 同期元レイヤーを指定 同期の基準となるレイヤーを選択します。 ボタン 2 – 同期レイヤーを貼り付け プリコンポジションが選択されている場合、そのプリコンポジション内にある すべての プリコンポジションへ同期レイヤーを貼り付けます。 ボタン 3 – 同期レイヤーを削除 ・プロジェクト全体の同期レイヤーを一括削除、または指定したプリコンポジション内だけの同期レイヤーを削除できます。 ・ボタン 3‑1: 同期モードが Slide に設定されているときは 更新 ボタンが表示され、同期レイヤーのタイミングを更新できます。 ボタン 4 – テキストレイヤー入力 歌詞や SRT ファイルを貼り付けてテキストレイヤーを生成します。 ボタン 5 – プリコンポジション間の空白時間を検出 プリコンポジション同士の間にある無音部分(例:間奏)を見つけ、新しいプリコンポジションとして作成します。 ボタン 6 – プリコンポジションの時間を一括変更 複数のプリコンポジションの長さをまとめて調整し、楽曲の区間に合わせます。 ボタン 7 – テキストの縦横設定を一括変更 複数のテキストレイヤーの縦書き/横書き設定をまとめて変更します。 ボタン 8 – BPM または手動計算でマーカーを追加 テンポ(BPM)に合わせるか、手動で計算したビートに基づいてマーカーを挿入します。 ボタン 9 – 同期設定 同期を行う方式を選択できます。 可以把主comp的音樂同步到Precomp上,且不會影響本來主comp, 也提供了文字圖層的簡單排軸功能。 提供了兩種同步模式,一種為使用表達式,當主comp的音樂有改變時間時,可自動調整其他precomp中音樂圖層的時間。另一種則使用自動移動圖層時間,可以深入precomp內部的其他precomp,但若主comp的音樂有改變時間時,需要手動更新圖層。 可以自己透過設定選擇自己喜歡的方式。 功能解說 按鈕功能從左到右 按鈕1.指定要同步的來源圖層 按鈕2.貼上同步圖層,有選取precomp時,該precomp中的每個precomp都貼上 按鈕3.刪除同步圖層,可一次刪除專案中全部的同步圖層或只刪除指定precomp中的同步圖層 (按鈕3-1.當同步模式選擇為Slide模式時,會出現更新按鈕,用來更新同步圖層的時間) 按鈕4.文字圖層輸入,可貼上歌詞或SRT,產生文字圖層。 按鈕5.找出precomp與precomp間的空隙時間,比如間奏,產生新的precomp 按鈕6.批次修改precomp的時間,以符合歌曲的段落 按鈕7.批次修改文字的直橫設定 按鈕8.以BPM或是手動計算節奏加入Marker 按鈕9.設定,可選擇以何種方式同步。 You can sync the music of the main comp to the Precomp without affecting the original main comp, and it also provides a simple timeline function for text layers. Two synchronization modes are offered: Expression‑based sync – When the music layer in the main composition changes its timing, an expression automatically adjusts the timing of the music layers in the pre‑comps. Auto‑move layer timing – This mode can dive into nested pre‑comps, but if the music in the main comp changes its timing, you’ll need to update the layers manually. You can choose whichever method you prefer through the settings. Feature Description – Button Functions (left to right) Button 1 – Select Source Layer to Sync Choose the layer that will serve as the source for synchronization. Button 2 – Paste Sync Layers When a pre‑composition is selected, the sync layer is pasted into every pre‑comp contained in that pre‑comp. Button 3 – Delete Sync Layers • Delete all sync layers in the entire project, or delete only the sync layers inside a specified pre‑comp. • Button 3‑1: When the sync mode is set to Slide, an Update button appears; press it to update the timing of the sync layers. Button 4 – Text‑Layer Input Paste lyrics or an SRT file to generate a text layer. Button 5 – Detect Gaps Between Pre‑comps Finds empty time intervals (e.g., instrumental breaks) between pre‑comps and creates a new pre‑comp for each gap. Button 6 – Batch Adjust Pre‑comp Durations Modify the lengths of multiple pre‑comps at once so they match the sections of the song. Button 7 – Batch Adjust Text Orientation Change the vertical/horizontal settings of several text layers in one operation. Button 8 – Add Markers by BPM or Manual Calculation Insert markers according to the tempo (BPM) or by manually calculated beats. Button 9 – Sync Settings Choose the method by which synchronization will be performed. Audio Sync 1.34 (2026/04/13) 使用此檔案產生的任何問題均由使用者自行承擔風險與責任,下載即視為同意。 Any problems caused by the use of this file are at your own risk and responsibility. 【免責事項】 お客様は、自らの責任において、素材をダウンロードし、これを使用することに同意します。 素材の利用によってお客様に何らかの損害が発生したとしても、損害賠償義務及びその他一切の責任を負いません 不具合等により生じたいかなる損害に関しましては一切責任を負いませんのでご了承ください。