
【VRChat】ポンのポータルマーカー - Pon's portal marker
- Digital100 JPY


VRChat標準のポータル(VRCPortalMarker)に便利機能を追加し、ワールド説明文の記入やワールド名確認を行えるようにしたものです。 特にポータルワールドを制作される方におすすめ! ---- This adds convenient functions to VRChat's standard portal (VRCPortalMarker), allowing you to enter world descriptions and check the world name. Especially recommended for those creating portal worlds!
特徴
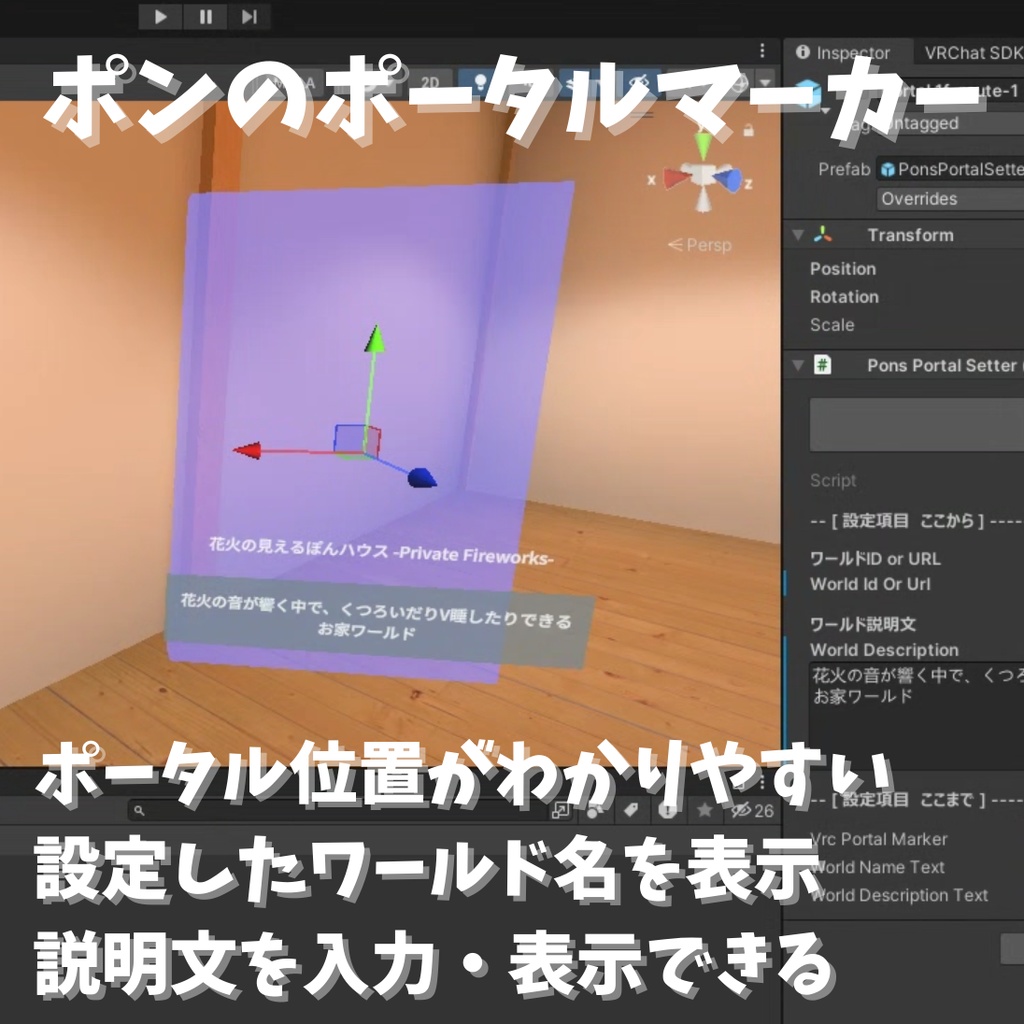
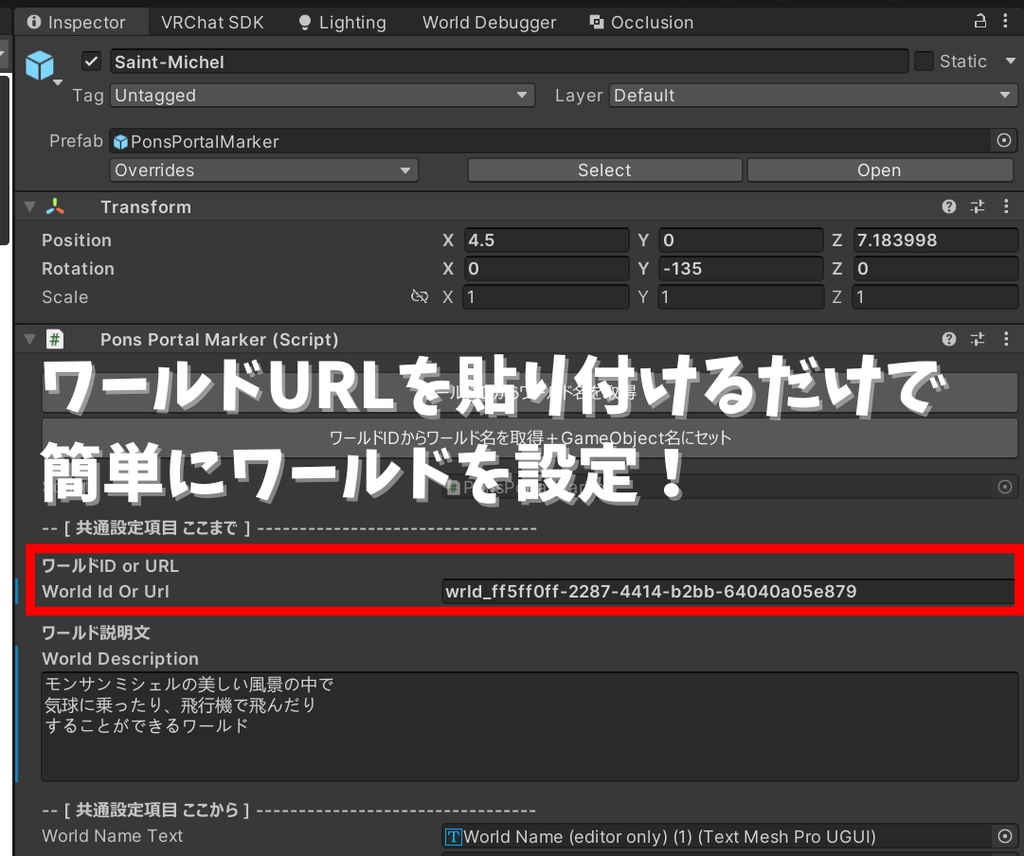
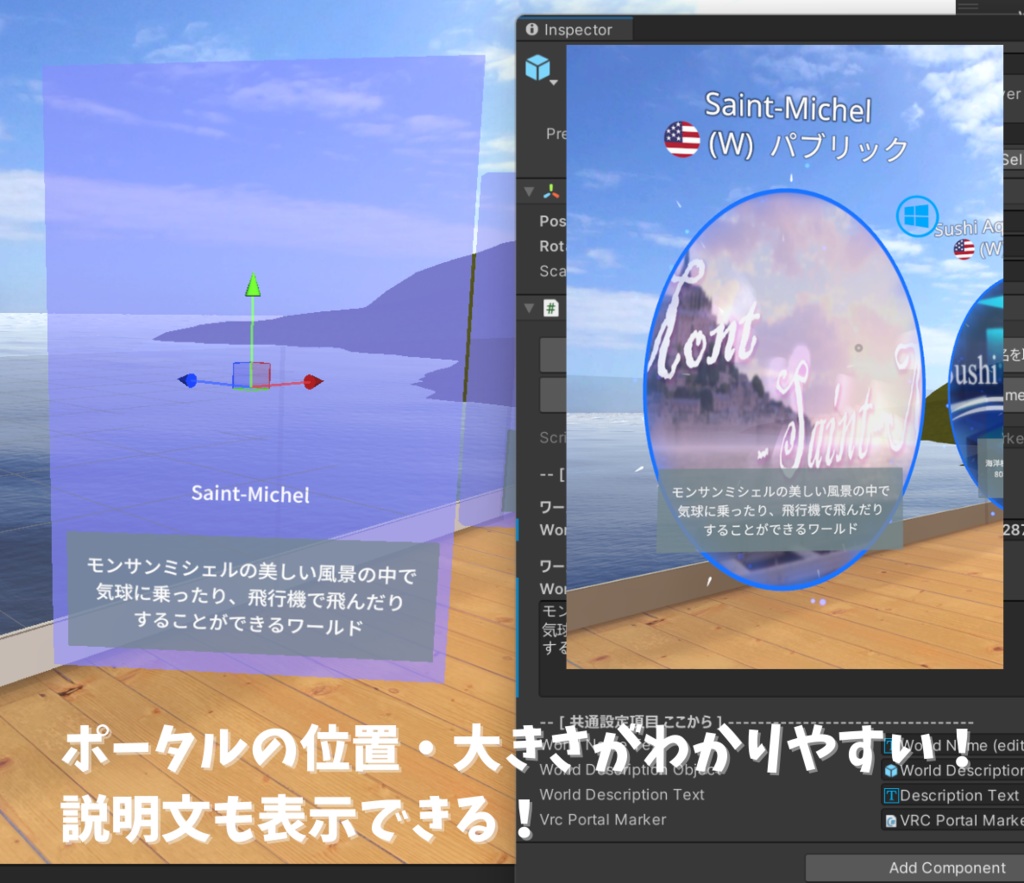
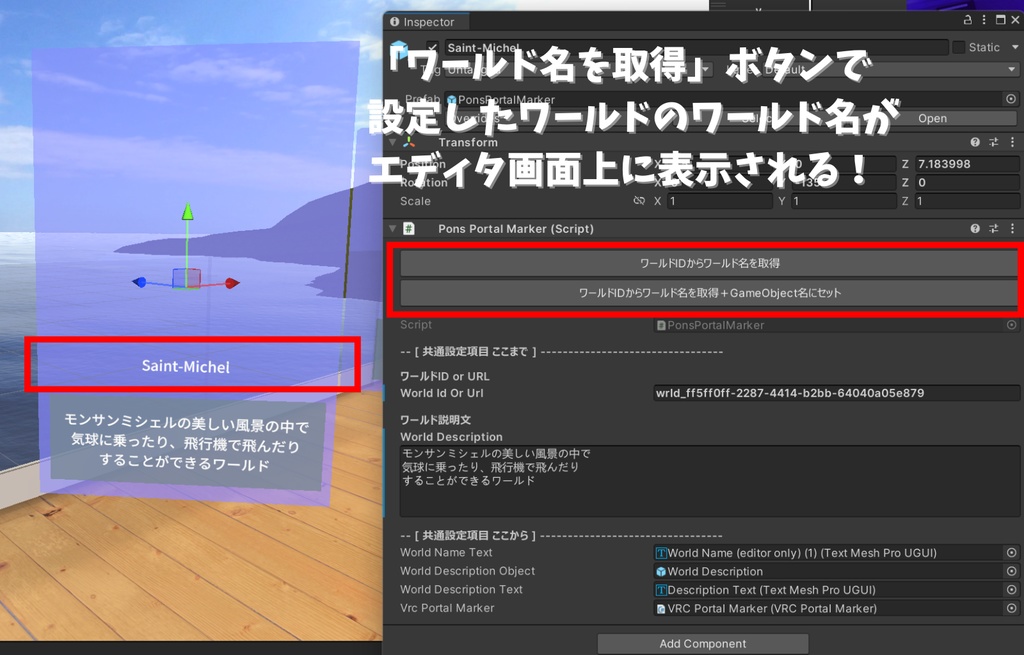
VRChat標準のポータルと比べて、以下の機能があります。 ・ポータル下部に説明文を入力・表示可能 ・Unityエディタ画面上での編集補助機能 ・ポータルの大まかな位置・大きさを表す青い四角形を表示 ・ワールドURLのコピー&ペーストだけでワールドを設定可能! URLからIDを切り出す手間がありません。 ・ID設定後、1ボタンでワールド名を取得・表示。「このポータルどのワールドのだっけ?」と困ることがなくなります なお、説明文の表示については、以下のポータルワールドで実際の動作例を確認可能です。 https://vrchat.com/home/world/wrld_8d6e690a-7c38-4bc7-88b5-8752dbeb22da/info
前提条件
VRChatのワールドプロジェクトであること プロジェクトに以下のものがインストールされていること ・TextMesh Pro VRC Fallback Font JP(無料) https://github.com/Narazaka/tmp-fallback-fonts-jp (ワールドのファイルサイズを増やさずに、美しいフォントで文字を描画するためのアセットです)
導入・使用手順
1) VCCを用いて、プロジェクトに奈良坂さんの「TextMesh Pro VRC Fallback Font JP」をインストールし、「Tools > TextMesh Pro VRC Fallback Font JPを設定」を実行してください。 また、このタイミングで 「Import TMP Essentials」 の実行を促された場合は、こちらを実行してから再度「Tools > TextMesh Pro VRC Fallback Font JPを設定」を実行してください。 詳細は、本販売ページ6枚目の画像、および公式ドキュメントの「インストール」「使い方」を参照してください。 https://github.com/Narazaka/tmp-fallback-fonts-jp/blob/master/README.md 2) 本販売ページからダウンロードした「PonsPortalMarker_v○○.zip」を展開してください。 3) 展開された「PonsPortalMarker_v○○.unitypackage」をダブルクリックして、アセットをインポートしてください。 4) UnityのProjectビューの中から Assets/Pon/PonsPortalMarker/ フォルダを開き、その中にある「PonsPortalMarker.prefab」をシーンビュー内の好きな位置にドラッグ&ドロップして配置してください。 5) ヒエラルキーから配置したPonsPortalMarkerを選択し、インスペクタの「ワールドID or URL」欄に、設定したいワールドのURLを入力してください。 6) 「ワールドIDからワールド名を取得」ボタンを押してください。 シーンビュー内に正しいワールド名が表示されればOKです。
動作環境
以下環境での動作を確認しています。 ・Unity 2022.3.22f1 ・VRChat SDK - Worlds 3.10.1 ・TextMesh Pro VRC Fallback Font JP 1.0.2 これより古いバージョンのソフトウェアを使用されている場合は、正しく動作しない可能性があります。
利用規約
・ 商用利用可 ・ 改変可 ・ データを取り出せる形での再配布禁止 ・ クレジット表記は任意 ・ 本データの利用によって生じた損害等の一切の責任を負いかねます ・ 利用規約は予告なく変更される場合があります
更新履歴
2026/2/25 ver1.00 公開
(EN) Features
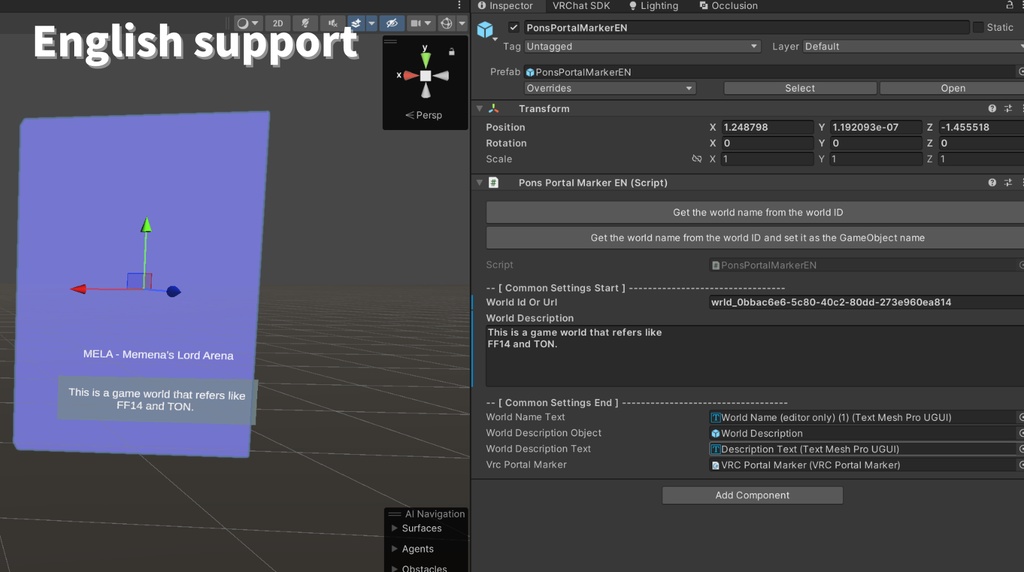
Compared to standard VRChat portals, these have the following features: - Ability to enter and display a description below the portal - Editing assistance in the Unity Editor - Display of a blue rectangle indicating the portal's approximate location and size - Set a world simply by copying and pasting the world URL! No need to extract the ID from the URL. - After setting the ID, retrieve and display the world name with a single button. No more wondering, "Which world is this portal for?" You can see an example of how the description displays in action in the following portal world: https://vrchat.com/home/world/wrld_8d6e690a-7c38-4bc7-88b5-8752dbeb22da/info
(EN) Installation and usage procedures
1) Unzip the "PonsPortalMarker_v○○.zip" file downloaded from this sales page. 2) Double-click the extracted "PonsPortalMarker(English)_v○○.unitypackage" to import the assets. 3) In Unity's Project view, open the Assets/Pon/PonsPortalMarkerEN/ folder and drag and drop the "PonsPortalMarkerEN.prefab" file located inside it into the Scene view. If you're prompted to run "Import TMP Essentials" at this point, please do so. 4) Select the placed PonsPortalMarker from the Hierarchy and enter the URL of the world you want to set in the "World ID or URL" field in the Inspector. 5) Click the "Get world name from world ID" button. If the correct world name is displayed in the Scene view, it's OK.
(EN) Environment
We have confirmed compatibility with the following environments: - Unity 2022.3.22f1 - VRChat SDK - Worlds 3.10.1 If you are using an older version of the software, it may not function correctly.
(EN) Terms of Service
- Commercial use permitted - Modifications permitted - Redistribution of data in a form that allows data extraction is prohibited - Crediting is optional - We are not responsible for any damages or losses resulting from the use of this data - Terms of use are subject to change without notice