방송배경/방송화면/버튜버/配信部屋/includes 8 colors/All Package/3DBackground for VTuber/配信背景/Live Streaming Background/VTuber room/Vtuber background 3
- Digital5,000 JPY
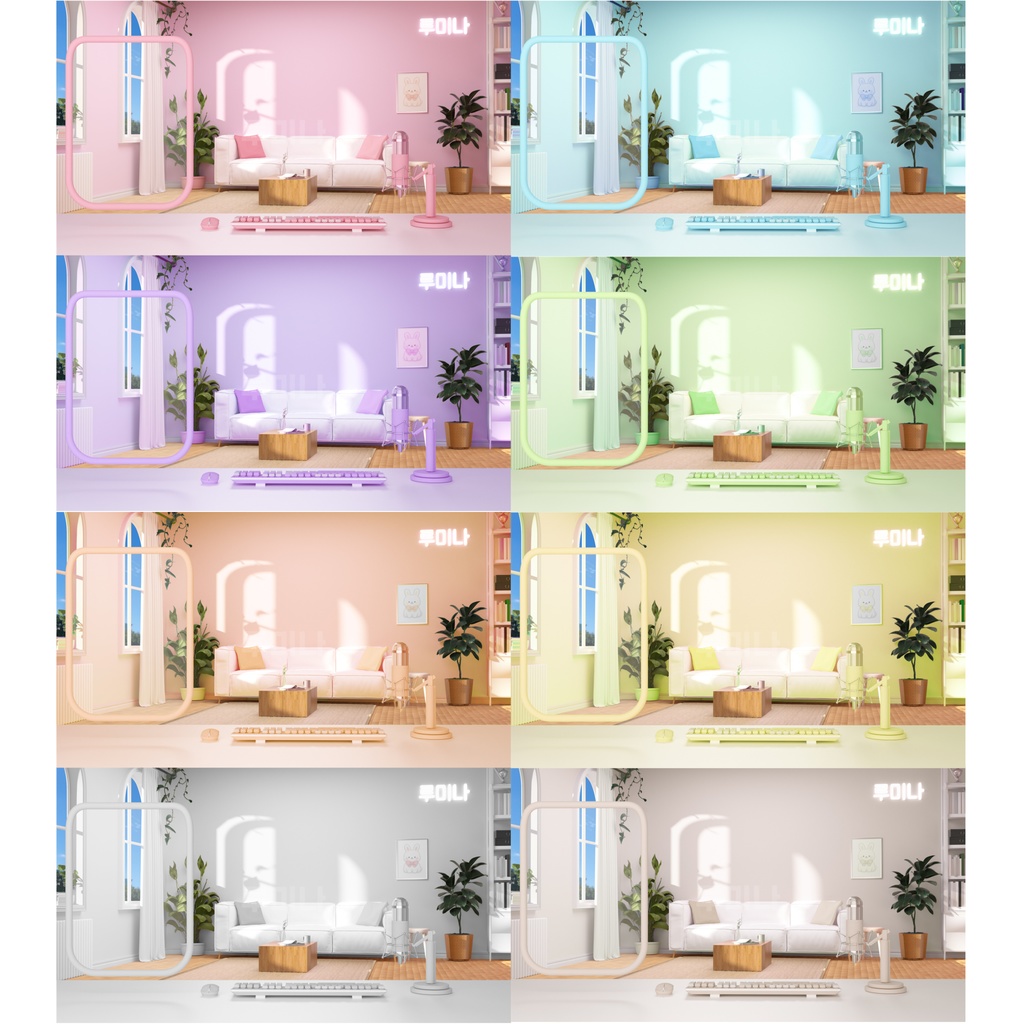
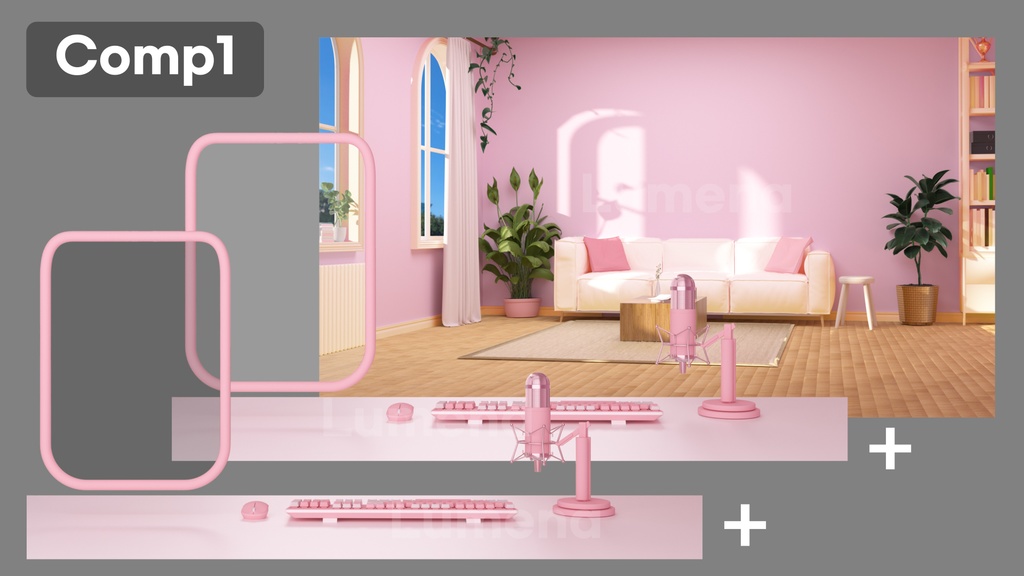
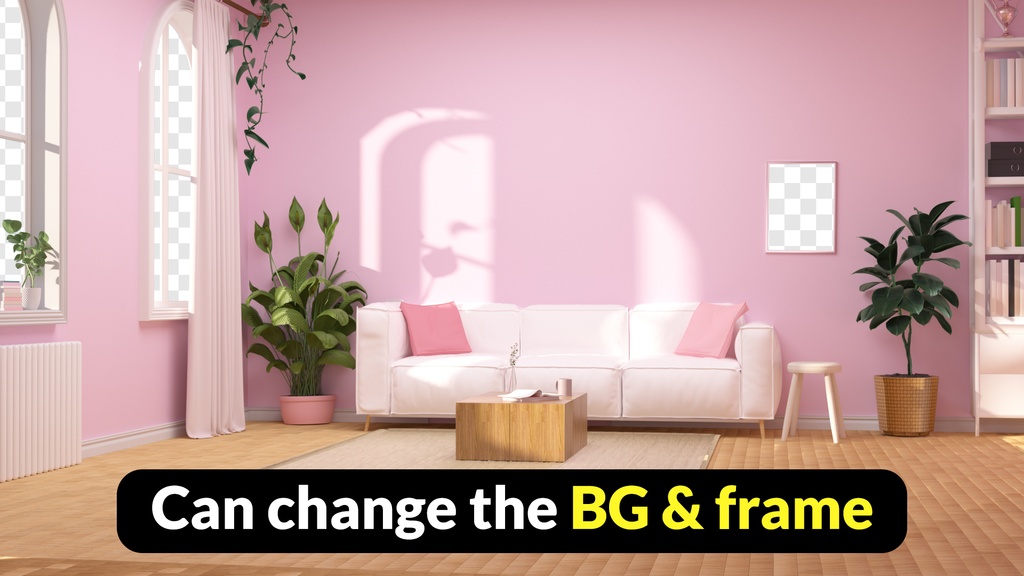
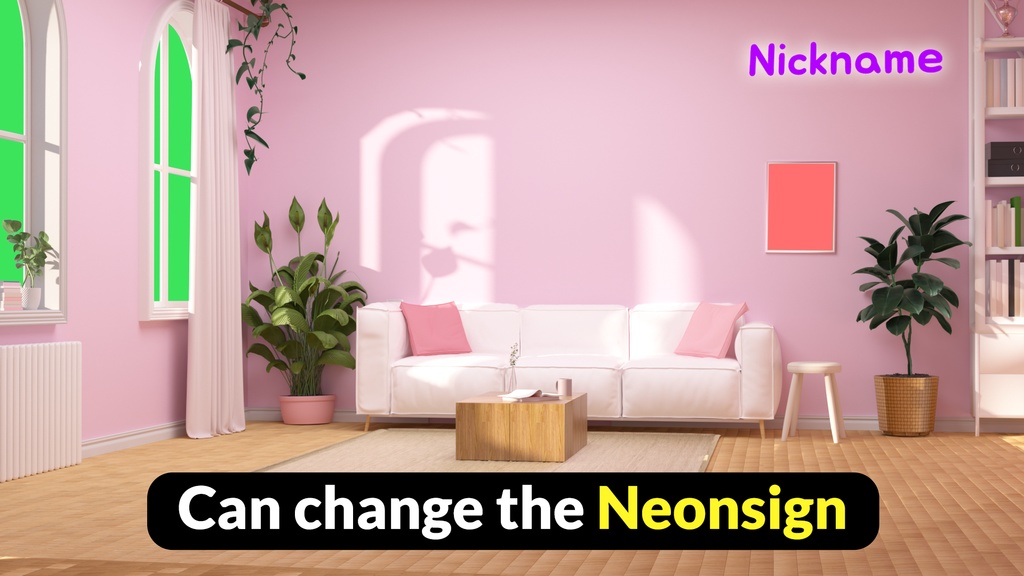
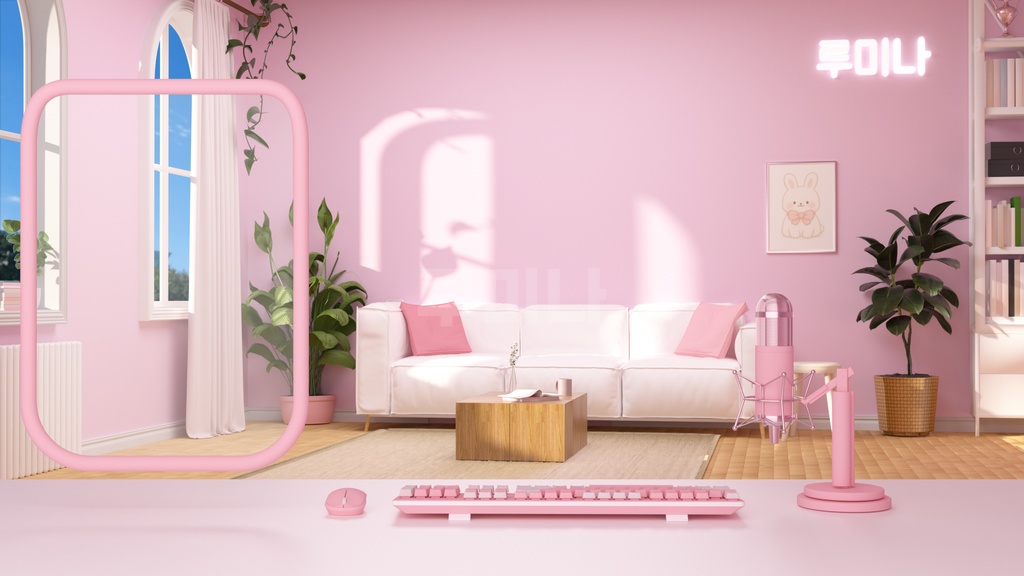
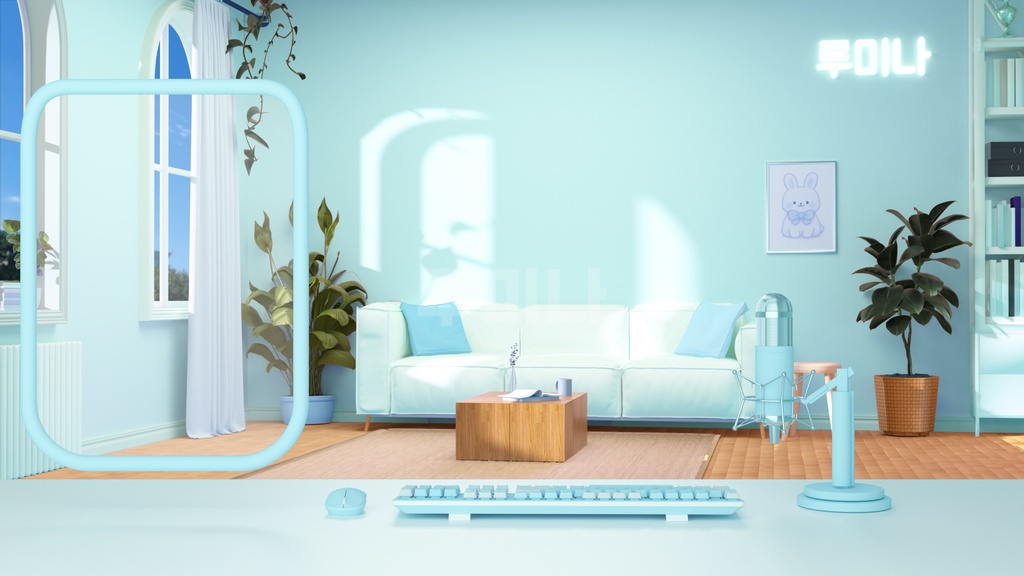
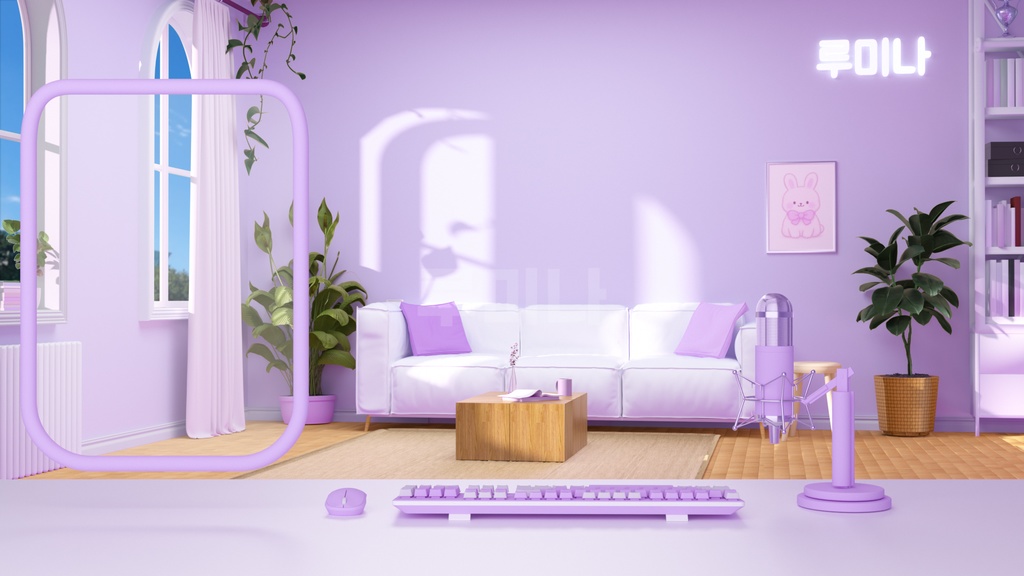
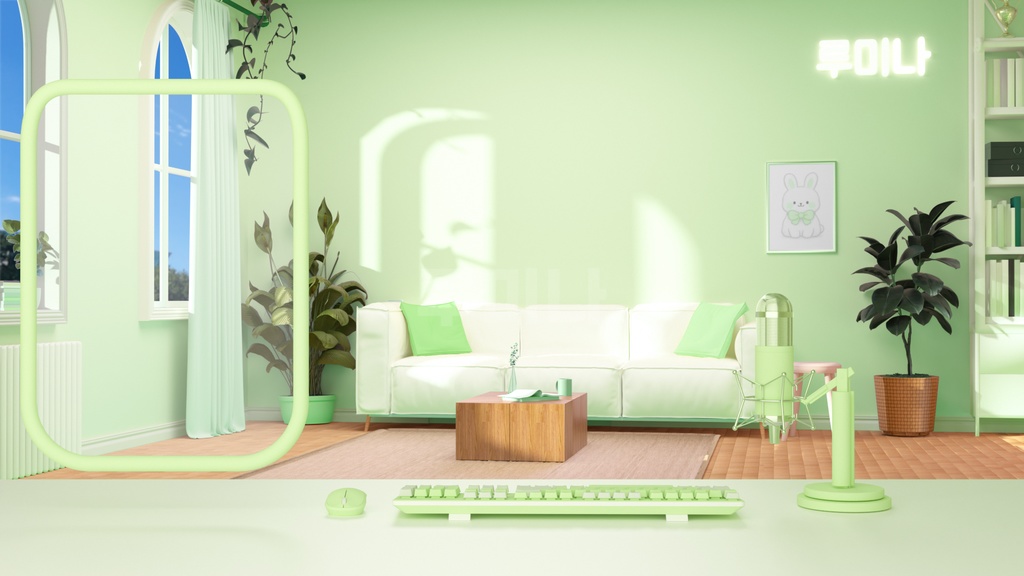
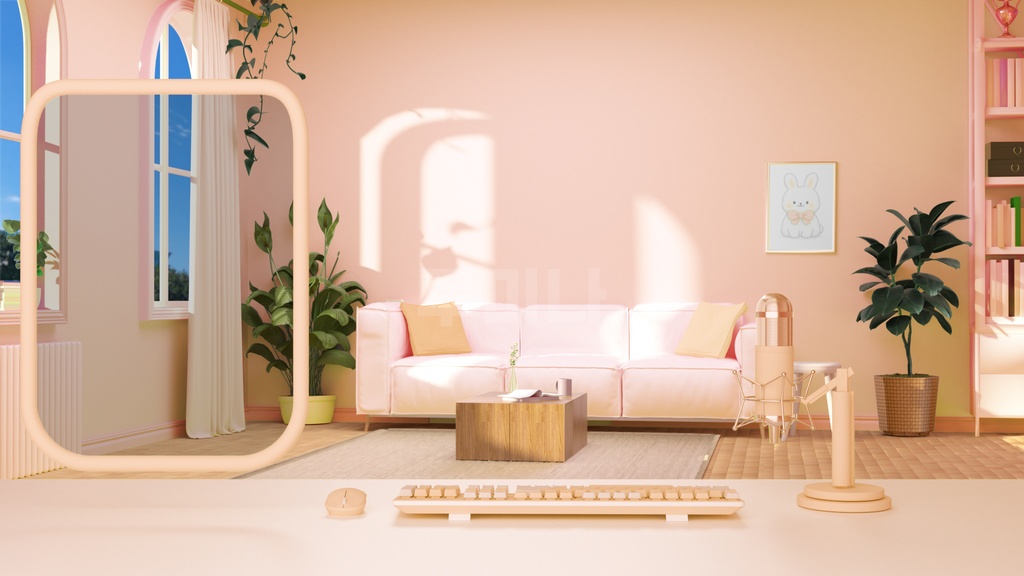

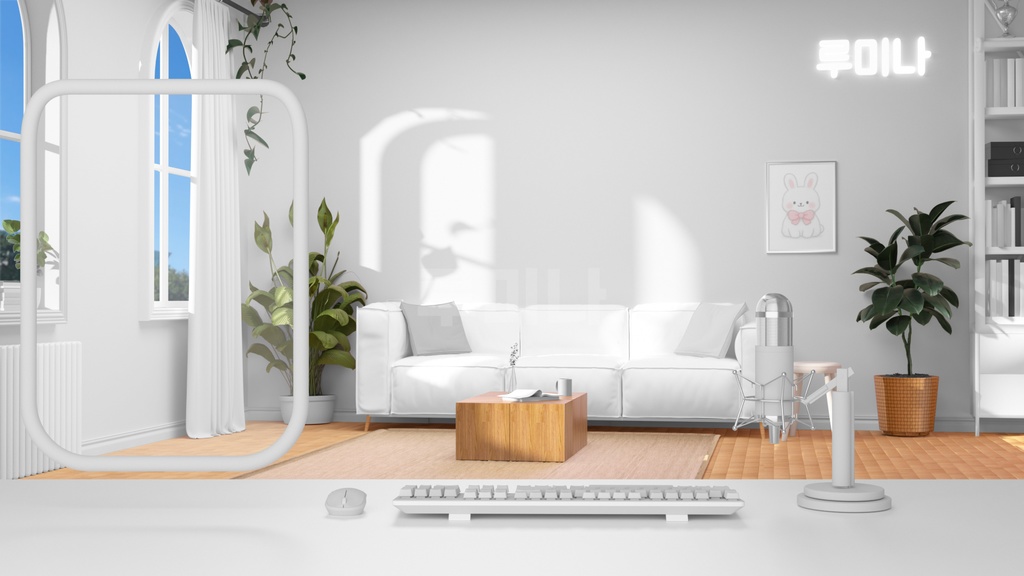
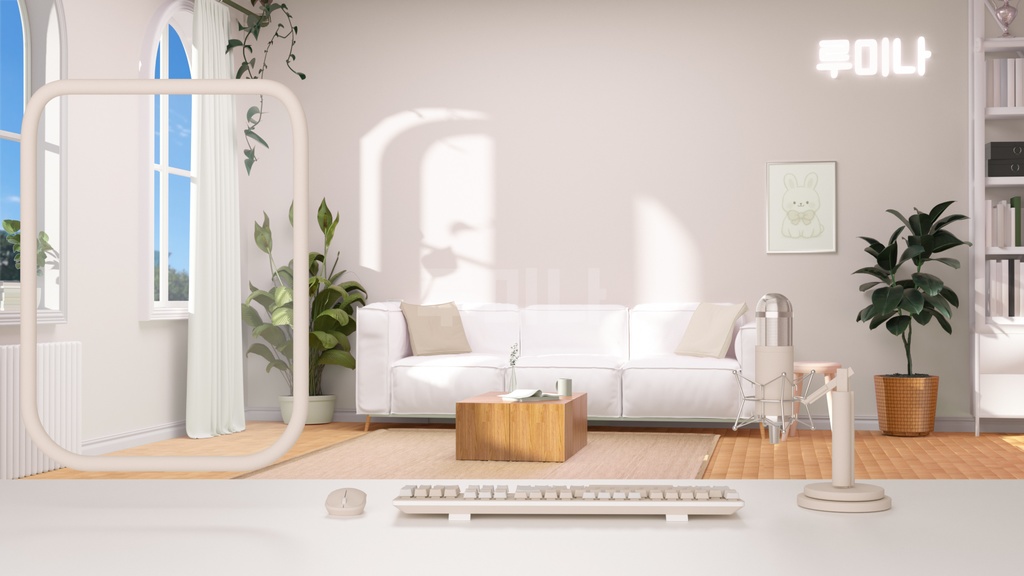
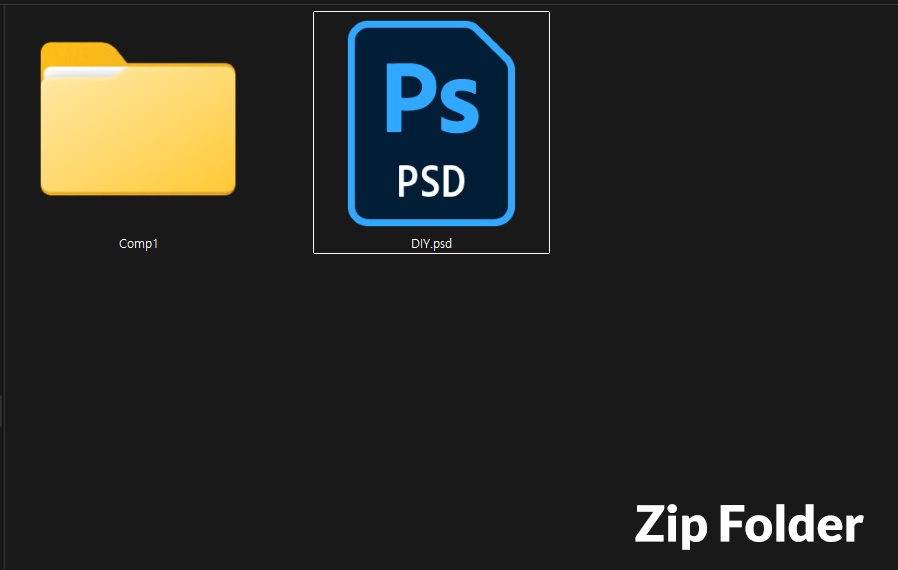

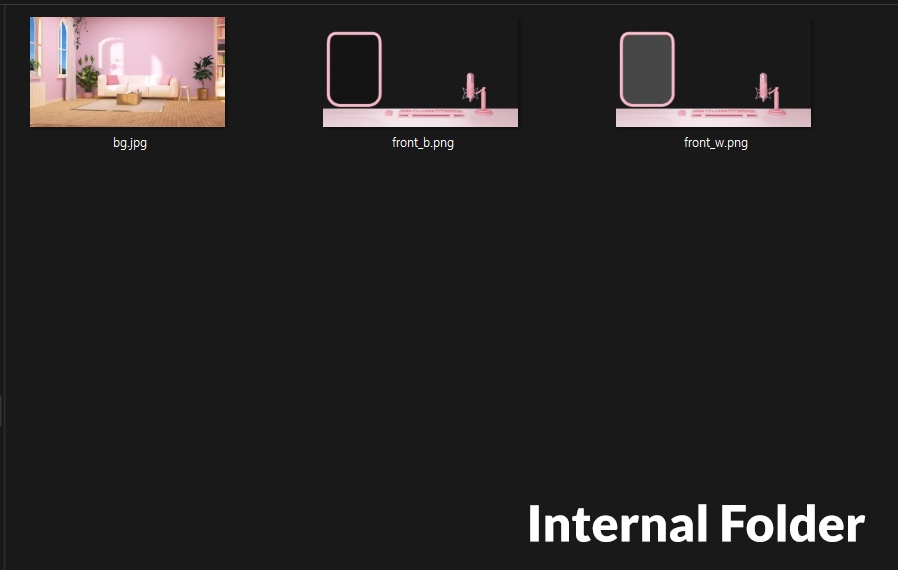


JP 構成要素 (8 colors) jpg / png / psd 構成1 ・基本背景を含む背面背景(jpg) ・前面デスク部分 ダーク&ライト 2種類(png) 構成2 ・背景、額縁画像、ネオンサインを変更できる DIY組み立て式背景フレーム(psd) DIY使用方法 1. 背景の変更方法 「DIY.psd」のPhotoshopファイルを開き、 レイヤーの最下段にお好みの背景を配置してください。 2. 額縁画像の変更方法 「picture」レイヤーをダブルクリックしてレイヤー内部に入り、 お好みの画像を配置後、Ctrl+Sで保存してください。 元のPSDファイルに戻ると、保存した変更内容が反映されます。 3. ネオンサインのテキスト変更方法 「Neonsign」レイヤーをダブルクリックしてレイヤー内部に入り、 お好みのテキストを入力後、Ctrl+Sで保存してください。 元のPSDファイルに戻ると、保存した変更内容が反映されます。 CN 组成要素 (8 colors) jpg / png / psd 组成1 ・包含基础背景的后方背景部分(jpg) ・前方桌面部分 深色&浅色 两种(png) 组成2 ・可更换背景、相框图片、霓虹灯的 DIY组装式背景模板(psd) DIY 使用方法 1. 更换背景方法 打开「DIY.psd」Photoshop 文件, 将想要的背景放置在图层最底部。 2. 更换相框图片方法 双击「picture」图层进入图层内部, 放入想要的图片后按 Ctrl+S 保存。 返回原来的 PSD 文件后,保存的更改内容将自动应用。 3. 更换霓虹灯文字方法 双击「Neonsign」图层进入图层内部, 输入想要的文字后按 Ctrl+S 保存。 返回原来的 PSD 文件后,保存的更改内容将自动应用。 KO 구성 요소 (색상 8종) jpg, png, psd 구성1 기본 배경 포함 뒤쪽 배경부 (jpg) 앞쪽 책상부 다크&라이트 2종 (png) 구성2 배경, 액자 이미지, 네온사인 변경이 가능한 DIY 조립식 배경 틀 (psd) DIY 사용 방법: 1. 배경 변경 방법 'DIY.psd' 포토샵 파일을 열고 레이어 최하단에 원하는 배경을 넣으세요. 2. 액자 이미지 변경 방법 'picture' 레이어를 더블클릭하여 레이어 내부로 들어간 후 원하는 이미지를 넣고 Ctrl+s를 눌러 저장하세요. 3. 네온사인 텍스트 문구 변경 방법 'Neonsign' 레이어를 더블클릭하여 레이어 내부로 들어간 후 원하는 텍스트를 입력하고 Ctrl+s를 눌러 저장하세요. 다시 기존의 psd 파일로 돌아오면 저장된 변경 내용이 적용됩니다. EN Included Files (8 colors) jpg / png / psd Set 1 ・Rear background with base background included (jpg) ・Front desk area: Dark & Light versions (2 types) (png) Set 2 ・DIY modular background frame (psd) Background, picture frame image, and neon sign are customizable DIY Instructions 1. How to change the background Open the “DIY.psd” Photoshop file and place your desired background image at the bottom of the layer stack. 2. How to change the picture frame image Double-click the “picture” layer to enter the layer contents, insert your desired image, then press Ctrl + S to save. When you return to the original PSD file, the saved changes will be applied automatically. 3. How to change the neon sign text Double-click the “Neonsign” layer to enter the layer contents, enter your desired text, then press Ctrl + S to save. When you return to the original PSD file, the saved changes will be applied automatically.