

調整可能なマイク / IK Adjustable Microphone
- Digital1,300 JPY
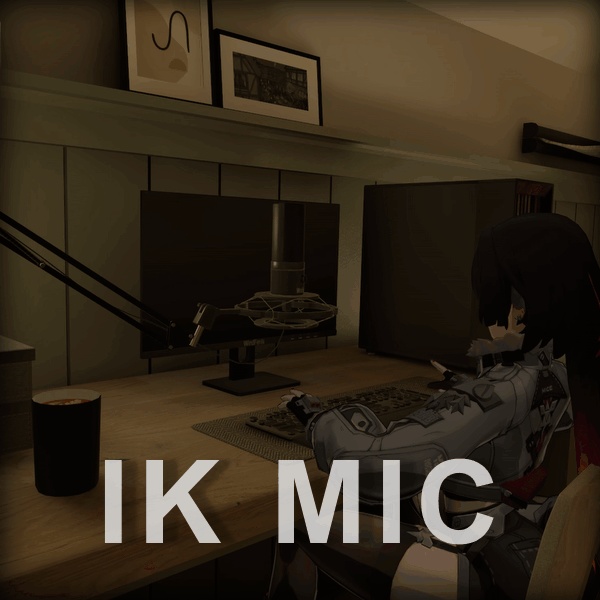

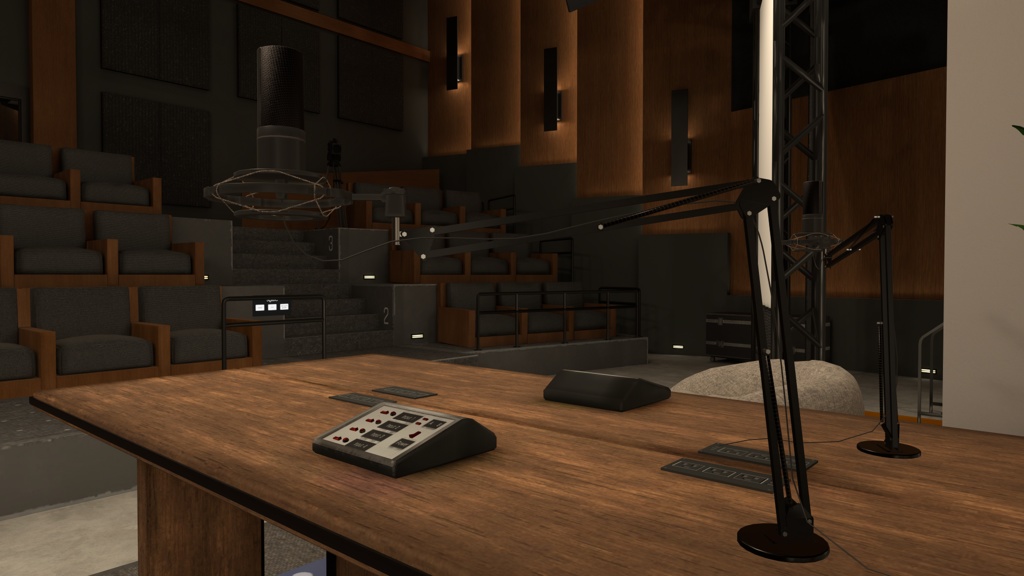


翻訳を使用しました。 IK 調整可能マイク / IK Adjustable Microphone 完全にインタラクティブなマイクです。プレイヤーはマイクを自由に掴んで動かすことができ、マイクアームは現実的で自然な動きで反応します。スタジオ、ステージ、ポッドキャスト、ホームオフィス空間など、VRChat ワールドに最適です。 機能一覧 • 4K PBR テクスチャ • IK に反応するアーム付きの掴めるマイク • 回転制限、初期ポーズ、自動ドロップ範囲のカスタマイズが可能 • ドラッグ&ドロップで簡単にインストール サンプルワールド Bombae 制作の Silent Summit にて、VRChat 内で本製品を実際にお試しいただけます (https://vrchat.com/home/world/wrld_c5de7ca5-4c00-4351-9103-1b6f4be127cf)。 マイクは、寝室の2階にあるコンピューターデスクの上に設置されています。 インストール 1. Unity を起動した状態で、Unity パッケージをダブルクリックしてダウンロードおよびインストールします。 2. Assets\Maxxuss\Microphone\Prefabs\Microphone.prefab にあるマイクのプレハブをヒエラルキーにドラッグします。 3. 必要に応じて、プレハブのルートからマイクの位置、回転、スケールを調整してください。Customize に記載されているものを除き、マイクプレハブのルート配下にあるオブジェクトは変形しないでください。 カスタマイズ 1. ヒエラルキー内のマイクオブジェクトの下にある IKScript ゲームオブジェクトを選択します。 2. Unity の Gizmos が有効かつ表示されていることを確認します。 3. Inspector の Microphone IK (Script) UdonSharp コンポーネントにて、必要に応じてマイクをカスタマイズします。 * Hinge Limits、Hinge Offsets、Base Rotator Limit を調整します。これらの値を変更すると、シーンビュー内の角度制限およびオフセットの可視化が更新されます。 * マイクの待機位置(レストポジション)を調整するには、まず Adjust Rest Position ボタンをクリックし、次にマイク先端に表示される位置ハンドルを使用してマイクを移動させます。このハンドルは Gizmos が有効な場合のみ表示されます。このモードでは角度調整も可能です。調整が完了したら、緑色の Stop Adjusting Rest Position ボタンをクリックしてください。 * 調整内容をデフォルトに戻すには、Reset Rest Position & Customizations をクリックします。 4. ヒエラルキー内のマイクオブジェクトの下にある IKTarget ゲームオブジェクトを選択します。 5. Inspector の Microphone IK Grabber (Script) UdonSharp コンポーネントにて、必要に応じてマイクをカスタマイズします。 * Auto Drop Radius を調整することで、マイク中心からの半径を増減できます。この半径外に出ると、「grabber」は自動的にドロップされます。 6. ヒエラルキー内のマイクオブジェクトの下で Armature を展開し、その中の WirePoseable を展開します。WirePoseable および WireEnd は、必要に応じて移動、回転、スケール変更が可能です。 サポート用Discordサーバー:https://discord.gg/p5xWRUQqbf サポートは英語のみとなります。 クレジット Windfenix - モデリング、テクスチャ、マテリアル maxxuss - プログラミング ライセンス すべてのコードは MIT ライセンスの下で提供されています。 モデルおよびテクスチャの著作権は Windfenix に帰属します。メッシュおよびテクスチャの改変は可能ですが、適切なクレジット表記が必要です。 ----- IK Adjustable Microphone A fully interactive microphone. Players can grab and move it freely while the microphone arm reacts with realistic natural motion. Perfect for your VRChat worlds - such as studios, stages, podcasts, or home office spaces. Feature List • 4K PBR textures • Grabbable microphone with IK reactive arm • Customizable rotation limits, initial pose, and automatic drop range • Easy drag-and-drop installation Example World Try out this product for yourself in VRChat in Silent Summit by Bombae (https://vrchat.com/home/world/wrld_c5de7ca5-4c00-4351-9103-1b6f4be127cf). The microphone is located on the computer desk upstairs in the bedroom. Installation 1. Download and install the Unity package by double clicking on it with Unity open. 2. Drag the microphone prefab located at Assets\Maxxuss\Microphone\Prefabs\Microphone.prefab into the hierarchy. 3. Position, rotate, and scale the microphone from its prefab root as needed. Do not transform any of the objects under the hierarchy of the microphone prefab root except those mentioned under Customize. Customize 1. Under the microphone object in the hierarchy, select the IKScript game object. 2. Ensure Unity Gizmos are enabled and visible. 3. In the Inspector under the Microphone IK (Script) UdonSharp component, customize the microphone as desired: - Adjust Hinge Limits, Hinge Offsets, and Base Rotator Limit. Modifications to these values will update angle limit and offset visualizations in the Scene view. - Adjust the rest position of the microphone by first clicking the Adjust Rest Position button, then, move the microphone using the positional handle that appears at the tip of the microphone. Please note, this only appears if Gizmos are enabled. Angle adjustments can also be made in this mode. Once adjustments are complete, click the green button labeled Stop Adjusting Rest Position. - To reset adjustments back to defaults, click Reset Rest Position & Customizations. 4. Under the microphone object in the hierarchy, select the IKTarget game object. 5. In the Inspector under the Microphone IK Grabber (Script) UdonSharp component, customize the microphone as desired: - Adjust Auto Drop Radius to increase or decrease the radius from the center of the microphone where the 'grabber' will automatically drop if outside of the radius. 6. Under the microphone object in the hierarchy, expand Armature and then WirePoseable. You may transform, rotate, and scale WirePoseable and WireEnd as desired. Support Discord: https://discord.gg/p5xWRUQqbf Support is English only Credits Windfenix - Modeler, Texture, Materials maxxuss - Programming License All code is licensed under MIT. Models & texture copyright Windfenix -- mesh and textures may be modified but must be credited accordingly.