

七色残像ギミック
- Digital300 JPY
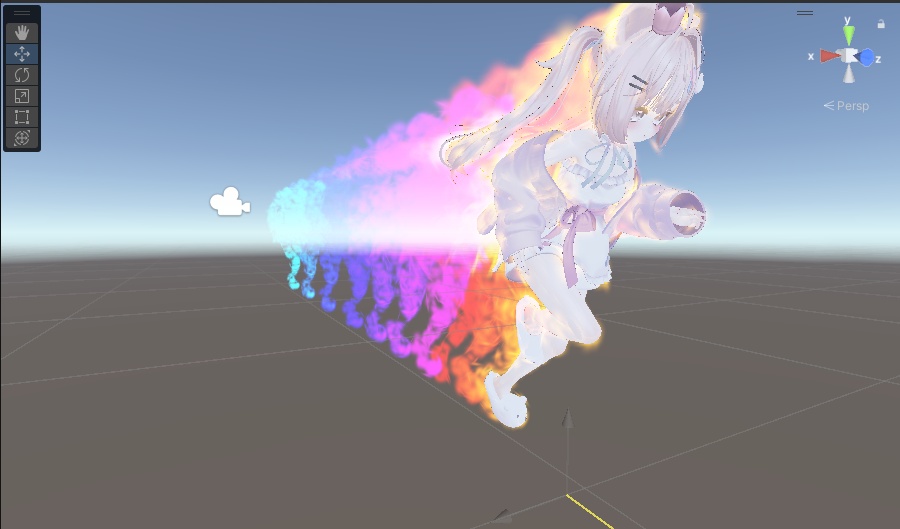


必要ツール liltoon➡ https://lilxyzw.github.io/lilToon/ ModularAvatar➡ https://modular-avatar.nadena.dev/ja AvatarMenuCreator for MA➡ https://narazaka.booth.pm/items/4419509
ギミック導入について
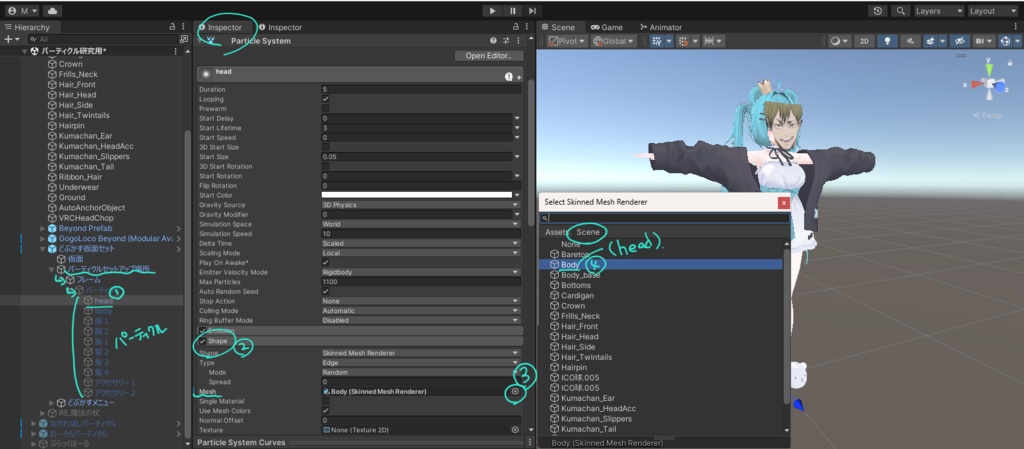
ダウンロードしたプレハブをアバター直下にD&Dしてください。 プレハブを展開するとパーティクルセットアップ➡フレーム➡パーティクルとあってその中に複数のパーティクルが入っています。 各パーティクル名はミルフィ素体に合わせて付けられています。 例えば「からだ」の場合は、該当パーティクルを選択してインスペクターを開きます。 1. 「Emission」の一つ下にある「Shape」を展開 2. 「Skinned Mesh Renderer」を設定 3. 現在「None」になっているので、右側の丸いマークを押してシーン内のHeadを選択 これで、パーティクルがメッシュに沿って表示されるようになります。 あとは、残像を付けたい部位ごとに同じ設定を行えばOKです。 各パーティクルごとに設定が必要になります。 例: * 頭 * 体 * 髪の毛 * 衣装 * アクセサリー 必要な部分だけ、お好みで設定してください。 設定が完了すれば導入完了です。 なお、パーティクル名とアバター側の名前が一致していなくても問題ありません。 対応する部位に設定されていればOKです。 分かりやすいように、パーティクル名を変更しても問題ありません。 ※パーティクルのシミュレーション速度が9倍速設定になってます。画面のカクツキ、pcの負荷が大きい方はシミュレーション速度を落としてください。 Drag and drop the downloaded prefab directly under your avatar. When you expand the prefab, you'll see Particle Setup ➡ Frame ➡ Particle, and inside there are multiple particles. Each particle is named according to the Milfy base model. For example, for the 'Body,' select the relevant particle and open the Inspector. 1. Expand 'Shape,' which is just below 'Emission.' 2. Set the 'Skinned Mesh Renderer.' 3. It's currently 'None,' so click the round icon on the right and select 'Head' in the scene. This will make the particles display along the mesh. Then, just repeat the same settings for each part where you want to add a trail effect. Each particle needs to be set individually. Examples: * Head * Body * Hair * Outfit * Accessories Set only the parts you need, as you like. Once the setup is done, the installation is complete. Also, it doesn't matter if the particle names don't match the avatar's names. As long as they are set to the corresponding body parts, it's fine. You can even rename the particles to make it clearer if you want. *Note:* The particle simulation speed is set to 9x. If your screen stutters or your PC struggles, lower the simulation speed.