Camera Shutter Button UI Animation made with Rive
- Digital500 JPY
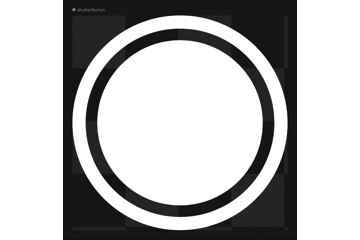
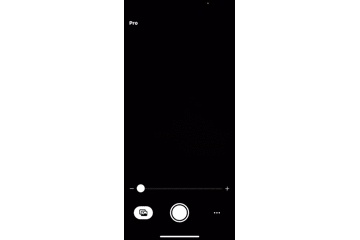


Recreate iPhone's Shutter Button with Rive Animation for effortless clicks. # How to use ## SwiftUI YouTube Video: https://youtu.be/lAgR0KCzN-s 1. Target The minimum iOS target is 14.0 2. Install the dependency To install via Swift Package Manager, in the package finder in Xcode, search for rive-ios 3. Place the file "shutter_button.riv" in your project 4. Sample code ```swift import SwiftUI import RiveRuntime struct ShutterButton: View { @StateObject private var riveViewModel = RiveViewModel( fileName: "shutter_button", stateMachineName: "State Machine 1", autoPlay: false ) @State private var isPressed = false private let action: () -> Void init(action: @escaping () -> Void) { self.action = action } var body: some View { Button { onTap() } label: { riveViewModel .view() .frame(width: 65, height: 65) } .buttonStyle(ShutterButtonStyle(isPressed: $isPressed)) .onChange(of: isPressed) { newValue in riveViewModel.setInput("isPressed", value: newValue) } .onAppear { riveViewModel.setInput("isPressed", value: false) } } private func onTap() { riveViewModel.triggerInput("onTapped") action() } } struct ShutterButtonStyle: ButtonStyle { @Binding var isPressed: Bool func makeBody(configuration: Configuration) -> some View { configuration.label .onChange(of: configuration.isPressed) { isPressed in self.isPressed = isPressed } } } ```