
MaskMaker【簡単にマスク画像を作れるUnity拡張】 #dennokoworks
- Mask MakerDigital750 JPY
- 開発支援(内容は同じ)Digital1,000 JPY
- 技術書をプレゼントする(内容は同じ)Digital2,000 JPY
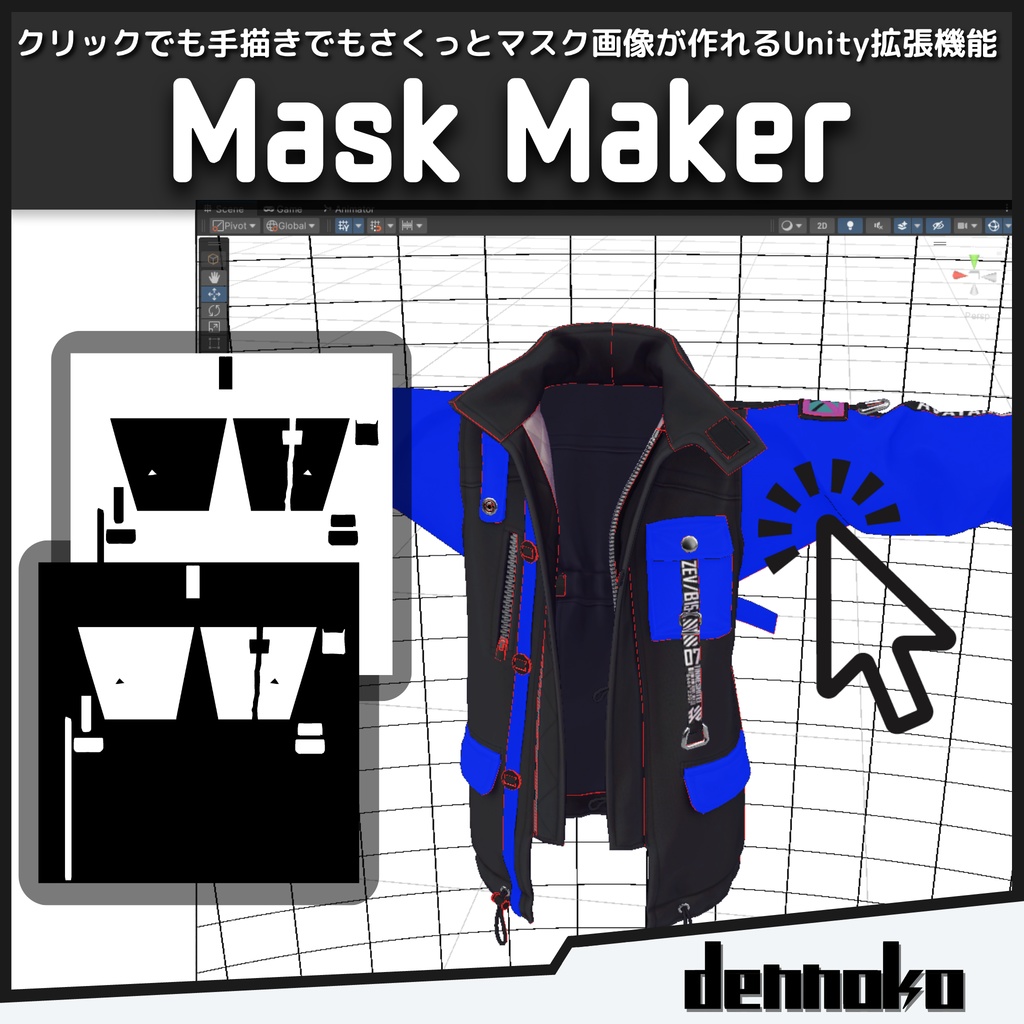
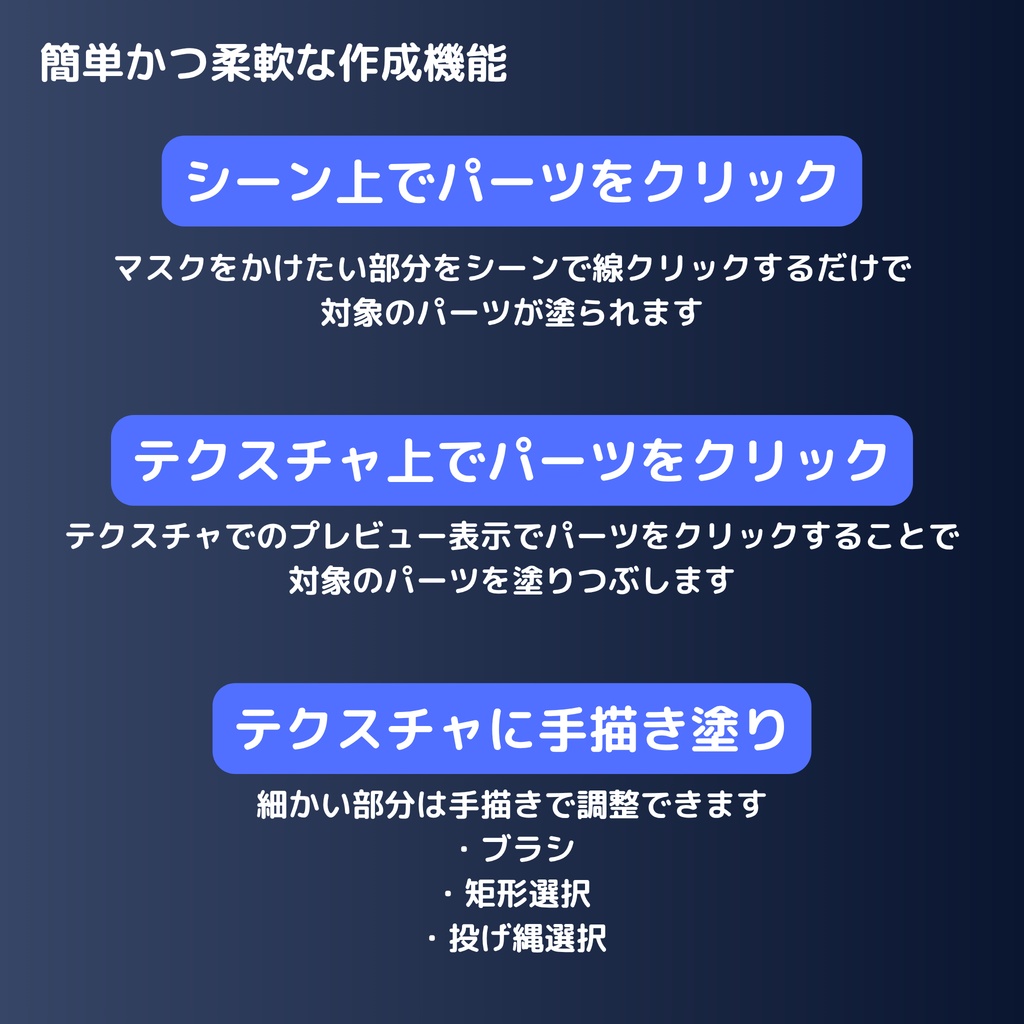
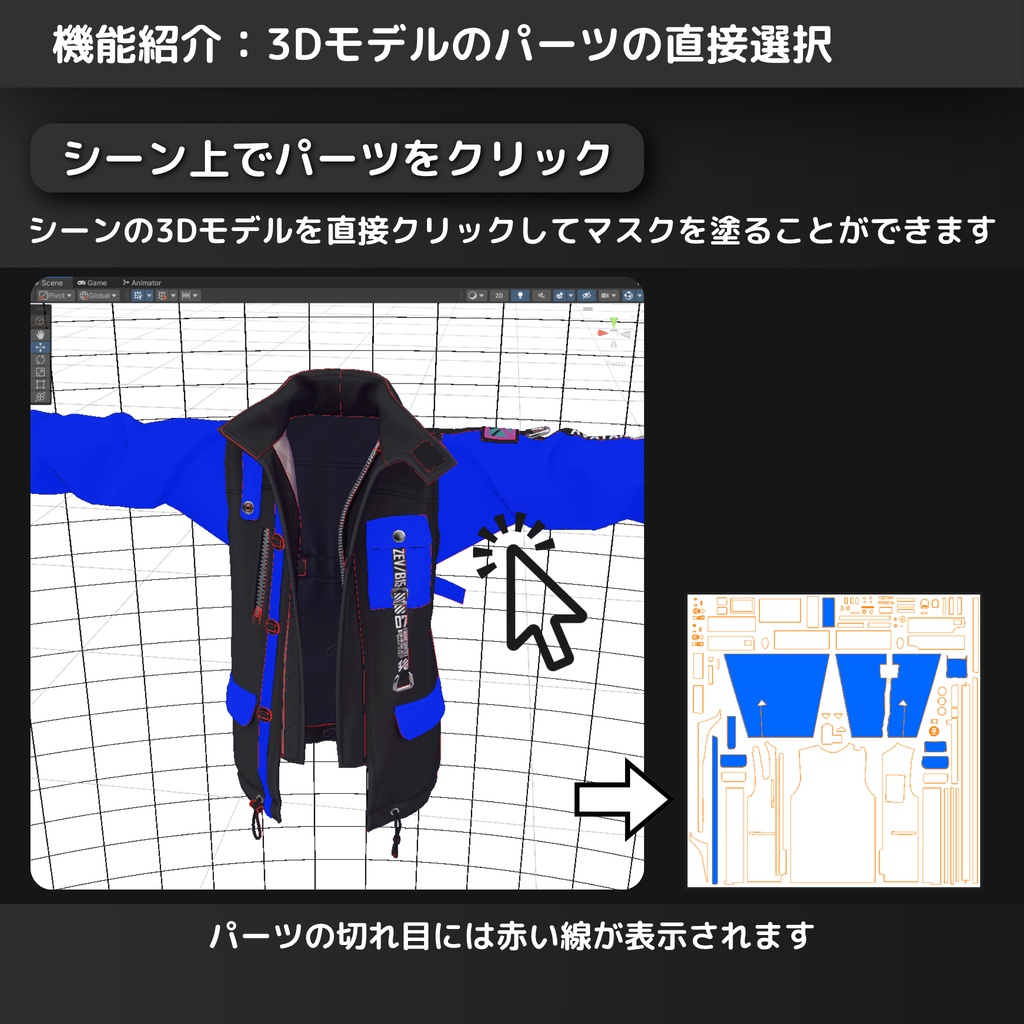
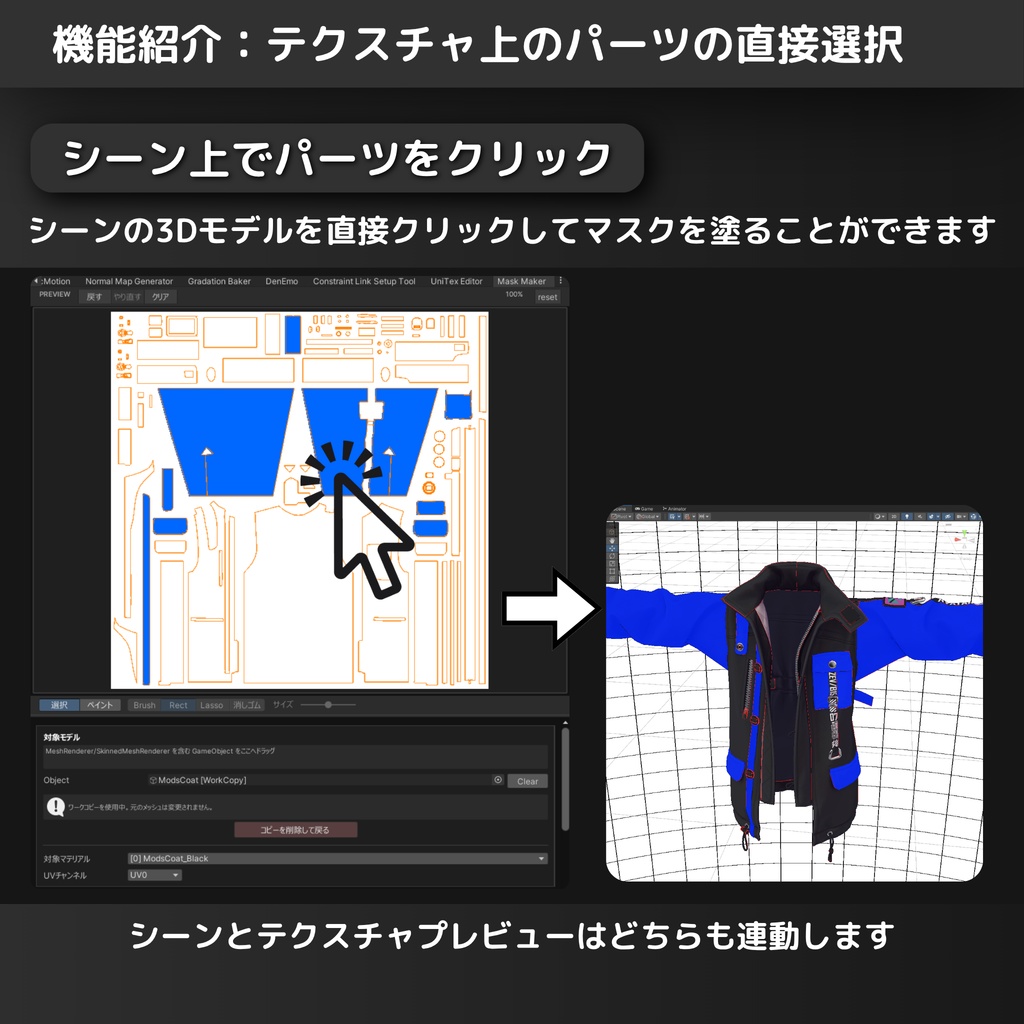
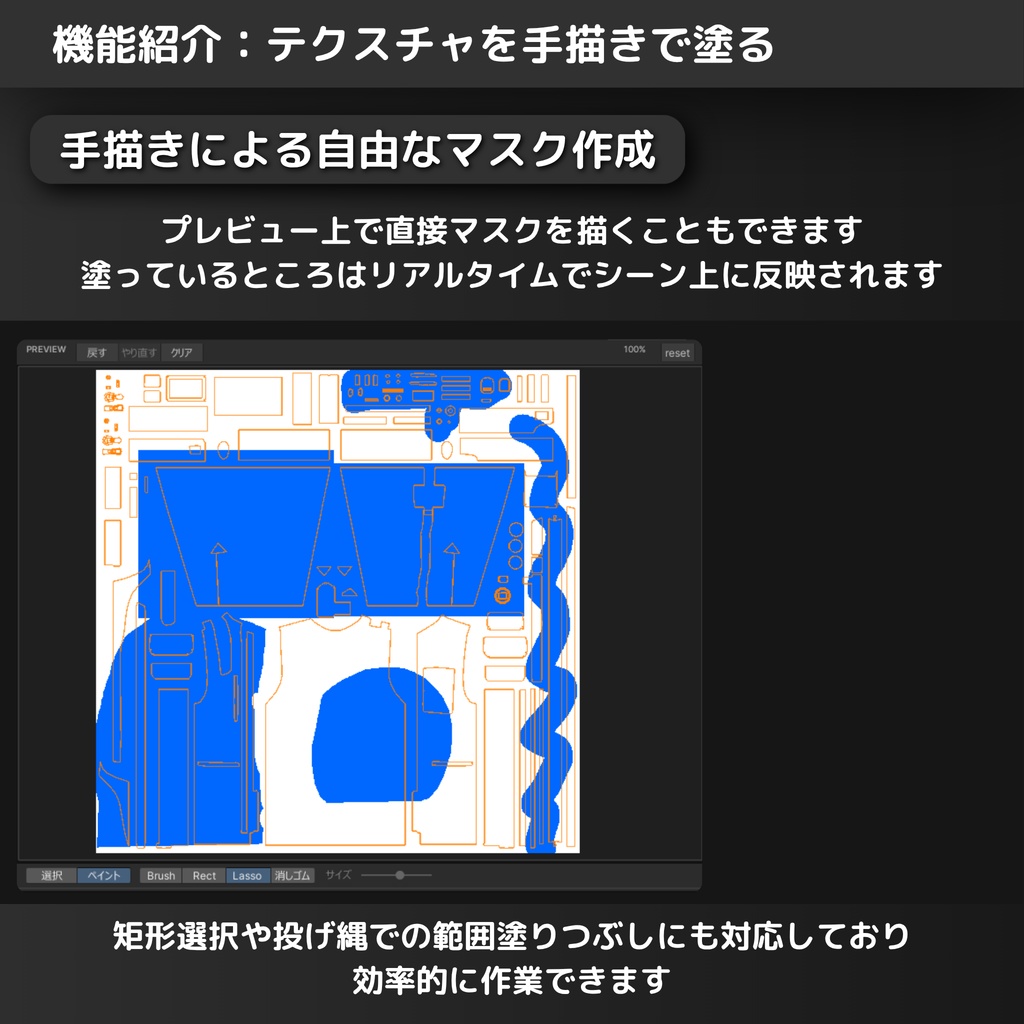


Unity上でメッシュ上のパーツを選択することでマスク画像を作ることができるUnityの拡張機能です。 ・シーン上での対象のメッシュのパーツのクリック ・テクスチャプレビュー上のパーツのクリック ・手塗り(ブラシ、矩形塗りつぶし、投げ縄塗りつぶし) ・既存のマスク画像を塗りつぶしとして読みとり(マスク画像の編集用) の全ての方法でマスク画像の作成ができます。 マスク画像は、衣装の部分的な色変更や、ノーマルマップ、マットキャップなどの範囲制御など、様々な用途に使用できます。 選択した時に塗られるパーツはUVアイランドで管理しています。 機能の詳細については後述の機能欄をご確認ください。 使用方法の詳細は同封された"使い方.pdf"を参照してください。 また、このソフトウェアで作成した画像は商用・非商用問わずご自由にお使いください。 利用例や感想などをXにてハッシュタグ #dennokoworks でツイートして頂けると励みになります。 もし不具合等ありましたらBOOTHメッセージにてご連絡ください。 商品紹介に珍飯亭様のZev(https://booth.pm/ja/items/6717995)を使用させていただいています。©佐藤芋蔵/珍飯亭
使い方と調整項目について
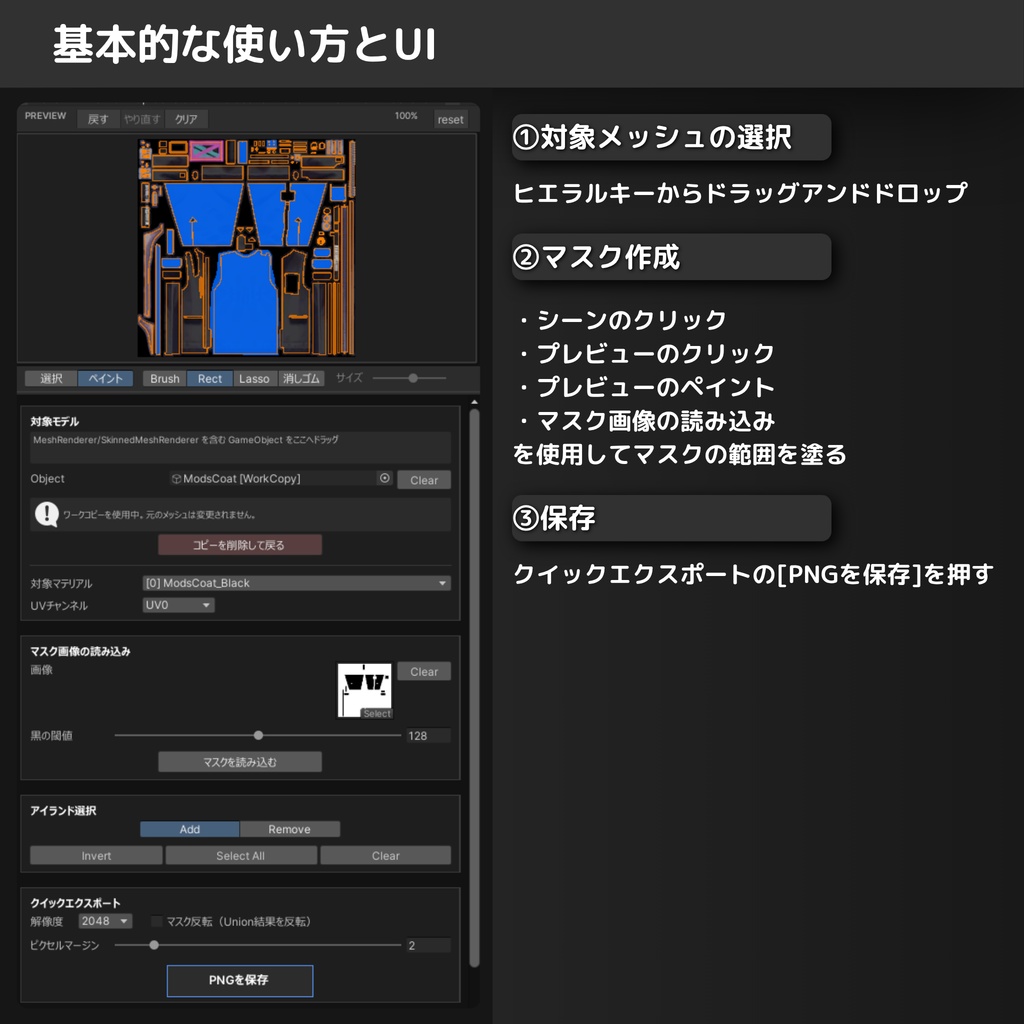
動作条件 - Unity 2022.3.22f1 - UV0 が必要(本ツールは UV0 を使用) 動作はWindows11で確認 基本手順 1. メニューから `dennokoworks > MaskMaker` を開く 2. ウィンドウ上部の枠に対象 GameObject をドラッグ&ドロップ(または Object フィールドで指定) - 自動的に作業用コピー([WorkCopy])が生成され、メッシュ変形の影響を受けずに安全に選択できます - ターゲット設定時に自動でUV解析が実行されます 3. (任意)既存マスクの読み込み - `Import Mask Image` 枠に画像をセットし「マスクを読み込む」をクリックすることで、以前のマスクを起点に編集を再開できます 4. 編集モードの選択 - **選択モード**: `Add`(追加)か `Remove`(削除)を選び、シーンやプレビュー上でUVアイランドを選択 - **ペイントモード**: ブラシ、矩形、投げ縄ツールを使用して、プレビュー上でピクセル単位の自由な描画が可能 5. ツール等の切替 - ホットキー(デフォルト `R`)で選択モードのAdd/Removeを切り替え - ペイント操作は `Undo` / `Redo` に対応。全て消去する場合は `Clear` を使用 6. `Pixel Margin` を必要に応じて調整(UVの境界を数ピクセル塗り広げて隙間を防ぐ) 7. `File Name` 等の設定を確認し、`Save PNG` でマスクを書き出し 8. (任意)詳細オプションを使用する場合: - チャンネル別出力: RGBAの特定チャンネルのみに書き込み、既存テクスチャへの合成も可能 - 頂点カラー焼き込み: 選択範囲を頂点カラーとしてメッシュに保存 【注意】 拡張機能のパーツ選択は対象となるモデルのUVに依存します。UVが繋がっているものや、適切にUV展開されていないモデルでは上手く動作しない恐れがあります。 メッシュ変形を行っている場合でも、Work Copy機能(デフォルト有効)により正確な位置で選択作業が可能です。 Work Copy機能を使用しない場合は、変形により実際のメッシュと表示位置がずれる場合がありますのでご注意ください。 --------------------------------------------------------------- Requirements - Unity 2022.3.22f1 - UV0 is required (this tool uses UV0) Tested on Windows 11 Basic Steps 1. Open `dennokoworks > MaskMaker` from the menu 2. Drag & drop the target GameObject into the field at the top of the window (or specify it via the Object field) - A working copy ([WorkCopy]) is automatically created, allowing safe selection unaffected by mesh deformation - UV analysis runs automatically when the target is set 3. (Optional) Import existing mask - Set an image in the `Import Mask Image` section and click "Load Mask" to resume editing from a previous mask 4. Choose Edit Mode - **Select Mode**: Choose `Add` or `Remove` and click on UV islands in the Scene view or Preview - **Paint Mode**: Use Brush, Rect, or Lasso tools for free-hand pixel drawing on the preview 5. Switching Tools/Modes - Use the hotkey (default `R`) to toggle between Add/Remove in Select mode - Painting supports `Undo` / `Redo`. Use `Clear` to erase all hand-painted data 6. Adjust `Pixel Margin` if needed (expands the fill boundary to prevent gaps) 7. Check `File Name` and output settings, then click `Save PNG` to export the mask 8. (Optional) Advanced Options: - Channel Write: Write to specific RGBA channels, allowing composition into existing textures - Vertex Color Bake: Save the selected area as vertex colors on a new mesh asset Notes Part selection depends on the UVs of the target model. Models with connected UVs or improper UV unwrapping may not work correctly. Even with mesh deformation, the Work Copy feature (enabled by default) allows for accurate selection. If you choose not to use the Work Copy feature, the mask selection may become misaligned with the displayed position due to deformations.
機能詳細とオプション
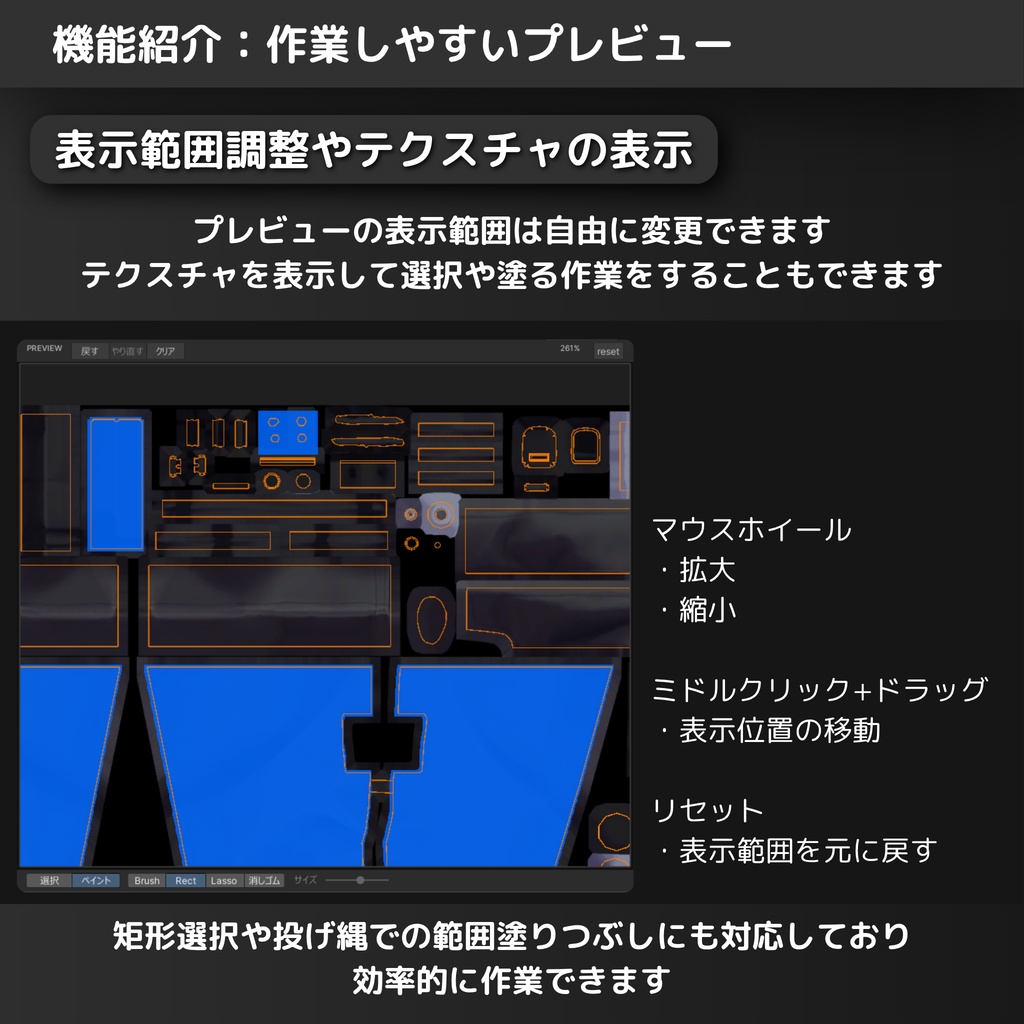
詳細機能とオプション 対象モデル (Target Model) - Object: 対象となる GameObject (MeshRenderer / SkinnedMeshRenderer) を指定 - Work Copy: アバターのポーズ変形等の影響を受けない、作業用の静的コピーを作成/削除します マスク画像の読み込み (Import Mask Image) - Image: 既存のマスク画像を読み込み、黒い領域を手描きペイントエリアとして取り込みます - Black Threshold: 取り込み時の黒判定しきい値を調整(0〜255)。アンチエイリアス等の調整に有用 編集モード (Edit Mode) - Select (選択): UVアイランド単位の操作 - Add / Remove: クリック時の選択/解除動作の切り替え - ホットキー: モード切替に使用するキー(デフォルト: R / 環境設定で変更可能) - Paint (ペイント): プレビュー上でのピクセル単位の描画操作 - Brush: 自由な線で描画 - Rect: 矩形範囲を塗りつぶし - Lasso: 投げ縄(囲い込み)で塗りつぶし - Eraser: 描画した部分の消去 - Size: ブラシ/消しゴムの太さを調整(1〜100px) - Undo / Redo / Clear: 描画履歴の戻す/進める、または全消去 選択操作 (Selection Actions) - Analyze UVs: 現在のメッシュと設定でUV解析を実行(初回や設定変更時に実行) - Invert: 現在の選択状態(アイランド単位)を反転 - Select All: すべてのアイランドを選択 - Clear: 全アイランドの選択を解除 UVプレビュー (UV Preview) - UV表示: 展開図を表示し、クリックでの選択も可能 - ベーステクスチャ表示: 元のテクスチャを背景に表示し、位置関係を確認可能(詳細オプションで切り替え) クイックエクスポート (Quick Export) - Resolution: 出力画像の解像度(256 ~ 4096) - Invert Mask: 白(選択)と黒(非選択)を反転して出力 - Pixel Margin: 黒領域(選択範囲)を外側に数ピクセル拡張し、UV境界の色の継ぎ目を防ぎます - Save PNG: 設定に基づいてマスク画像を保存 出力設定 (Output Settings) - File Name: 出力ファイル名(.png は自動付与) - Output Folder: 保存先フォルダを指定 - Main Texture Folder: チェックすると、対象モデルのテクスチャと同じフォルダに保存 - Save Inverted Too: 通常のマスクと同時に、反転したマスク(_inv.png)も書き出し 詳細オプション (Advanced Options) - Scene Overlay (シーン表示) - Draw on Top: 常に最前面にワイヤーフレームを描画 - Line Settings: 線の太さやデプスオフセット(埋まり防止)の調整 - Color Settings: 選択色、シーム色、プレビューの塗りつぶし色や透明度をカスタマイズ - Channel Write (チャンネル書き込み) - RGBA Select: 書き込み対象とするチャンネルを選択 - Base PNG: 既存の画像を指定することで、その画像の特定チャンネルだけを上書き更新可能 - Vertex Color Bake (頂点カラー焼き込み) - Bake to Mesh: 選択範囲を頂点カラーとしてメッシュに焼き込み、新規アセットとして保存 - Base Mesh: 既存の頂点カラー情報を持つメッシュを指定して合成可能 - Overwrite: 同名のメッシュアセットが存在する場合に上書きするかどうか - Preferences (環境設定) - Use Baked Mesh: ポーズ変形済みのメッシュ形状を使用して判定(SkinnedMeshRenderer使用時) - Auto Work Copy: ターゲット設定時に自動でWork Copyを作成するかどうか - Hotkey / Language: ショートカットキーと言語(日/英)の設定 --------------------------------------------------------------- Detailed Features and Options Target Model - Object: Specify the target GameObject (MeshRenderer / SkinnedMeshRenderer) - Work Copy: Create/Remove a static working copy unaffected by pose deformations Import Mask Image - Image: Load an existing mask image and import its black regions as hand-painted areas - Black Threshold: Adjust the threshold for black detection (0-255). Useful for handling AA or gray edges Edit Mode - Select: UV island-based operations - Add / Remove: Toggle between selecting and deselecting on click - Hotkey: Key used to switch modes (Default: R / Customizable in Preferences) - Paint: Pixel-based drawing on the preview - Brush: Draw freehand lines - Rect: Fill rectangular areas - Lasso: Fill freehand selection areas - Eraser: Erase painted pixels - Size: Adjust thickness for Brush/Eraser (1-100px) - Undo / Redo / Clear: Step through history or erase all hand-paint data Selection Actions - Analyze UVs: Analyze UVs with current settings (Run initially or after changing settings) - Invert: Invert current island selection - Select All: Select all islands - Clear: Deselect all islands UV Preview - UV Display: Shows the UV layout; clickable for selection - Base Texture Overlay: Display original texture in background for reference (Toggle in Advanced Options) Quick Export - Resolution: Output image resolution (256 - 4096) - Invert Mask: Inverts white (selected) and black (unselected) in the output - Pixel Margin: Expands the black area (selection) by a few pixels to prevent bleeding at UV seams - Save PNG: Save the mask image based on settings Output Settings - File Name: Output file name (.png is automatically added) - Output Folder: Specify destination folder - Main Texture Folder: Save in the same folder as the model's texture - Save Inverted Too: Export an inverted version (_inv.png) simultaneously Advanced Options - Scene Overlay - Draw on Top: Always draw wireframes on top of other objects - Line Settings: Adjust line thickness and depth offset (to prevent z-fighting) - Color Settings: Customize selection color, seam color, preview fill color, and opacity - Channel Write - RGBA Select: Choose which channels to write to - Base PNG: Specify an existing image to overwrite only selected channels - Vertex Color Bake - Bake to Mesh: Bake selection as vertex colors into the mesh and save as a new asset - Base Mesh: Specify a mesh with existing vertex colors to composite with - Overwrite: Toggle overwriting if a mesh asset with the same name exists - Preferences - Use Baked Mesh: Use deformed mesh shape for detection (for SkinnedMeshRenderer) - Auto Work Copy: Automatically create a Work Copy when setting a target - Hotkey / Language: Settings for shortcut key and language (JP/EN)
内容物
- Unitypackage - 使い方.pdf(日本語の使い方) - Usage.pdf (英語版の使い方)
更新履歴
[2025-08-18] v0.3.1 ベータ版リリース [2025-08-18] v0.3.2 UVが重なっているメッシュの選択範囲のバグ修正、UV0以外のUVへの対応、その他細かい修正 [2025-08-08] v0.3.3 ホットキーが稀に動作しない問題を修正 [2026-01-22] v1.0.0リリース: UIの大幅な調整と、作業用複製メッシュ生成機能, プレビューテクスチャのクリックによる選択機能の追加 [2026-04-13] v2.0.0リリース: プレビューに手塗りでマスクをかける機能を追加. UIのリメイク. [2026-07-14] v3.0.0 リリース: UIのリメイク. シーンクリックによる選択の一時停止機能追加. バージョン情報取得機能の追加. [2026-07-23] v3.0.1 リリース UV境界が多い時にエラーが出る不具合を修正 [2026-07-25] v3.0.2 リリース UI表示が崩れる問題を修正 GitHub https://github.com/dennoko/UVMaskMaker
利用規約
- 二次配布は禁止です。 - 拡張機能をを使用して作成した画像は商用、非商用問わずご自由にお使いください。 - 本商品を利用したことによって生じるいかなる損害に対して当方は一切責任を負いません。 - OSやUnity等のアップデートなどで生じる仕様変更により、本商品の機能を使用できなくなった場合、当方は責任を負いません。 (可能な限り対応を続ける予定です) - 著作権はdennokoに帰属します。※生成した画像は含まれません。 ----------------------------------------------------------------- ・Redistribution is prohibited. ・Images created using this extension may be used freely for both commercial and non-commercial purposes. ・I take no responsibility for any damages arising from the use of this product. ・I am not responsible if updates to the OS, Unity, or other factors cause changes in specifications that make this product unusable. (I will continue to provide support as much as possible.) ・Copyright belongs to dennoko. This does not apply to the generated images.