

【Free】Icon Generator v2
- Freeダウンロード商品¥ 0
- Donationダウンロード商品¥ 200
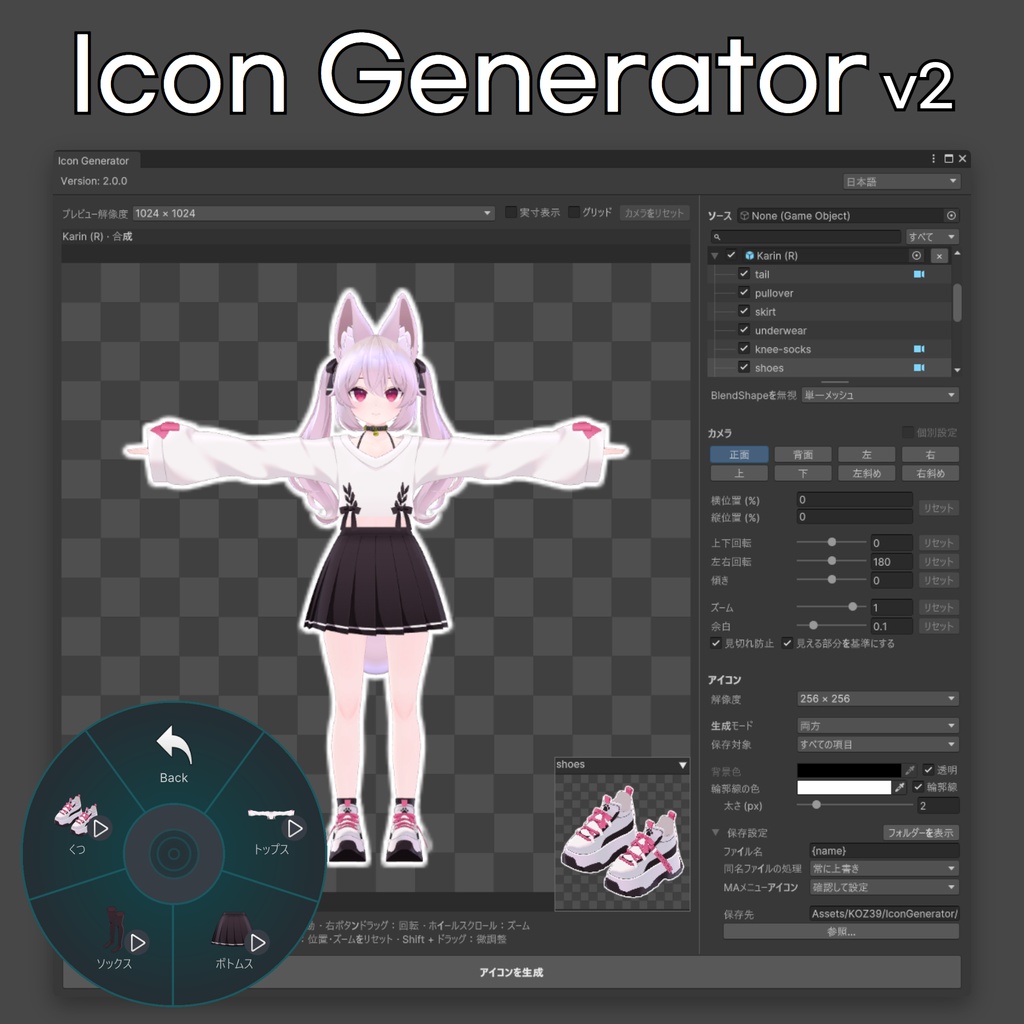

VRChatのアバターやアクセサリーのアイコンを作成するUnityエディターツールです。 VRChat 아바타와 액세서리의 아이콘을 만드는 유니티 에디터 도구입니다. A Unity editor tool for creating icons of VRChat avatars and accessories.
Requirements
- Unity 2022.3.22f1 - Modular Avatar (optional)
Features
- 合成アイコンと個別アイコンを一度に生成 - ソースツリーで撮影する項目をチェック・選択して範囲を指定 - プレビュー上でマウスによるカメラの移動・回転・ズーム - 項目ごとに異なるカメラ設定 - 見える部分を基準にした構図、見切れ防止、背景色、輪郭線 - ファイル名テンプレートと重複ファイルの処理 - Modular AvatarのShape Changer、Material Setter、Material Swapを反映 - 保存したアイコンをMAメニューのアイコンに自動で設定 - 합성 아이콘과 개별 아이콘을 한 번에 생성 - 소스 트리에서 촬영할 항목을 체크하거나 선택해 범위 지정 - 미리보기에서 마우스로 카메라 이동·회전·확대/축소 - 항목마다 다른 카메라 설정 - 보이는 부분 기준 구도, 잘림 방지, 배경색, 윤곽선 - 파일명 템플릿과 중복 파일 처리 - Modular Avatar의 Shape Changer, Material Setter, Material Swap 반영 - 저장한 아이콘을 MA 메뉴 아이콘에 자동 연결 - Generate combined and individual icons at once - Choose what to capture by checking or selecting items in the source tree - Move, rotate and zoom the camera with the mouse in the preview - Per-item camera settings - Framing based on visible parts, crop prevention, background color and outline - File name templates and duplicate file handling - Reflects Modular Avatar Shape Changer, Material Setter and Material Swap - Automatically assigns saved icons to MA menu icons
Installation
- VCC/ALCOM:https://koz39.github.io/vpm-listing/ で「Add to VCC」を押してリポジトリを追加した後、プロジェクトの管理画面でIcon Generatorパッケージを追加します。 - unitypackage:zip内のunitypackageをプロジェクトにインポートします。 - VCC/ALCOM: https://koz39.github.io/vpm-listing/ 에서 "Add to VCC"로 저장소를 추가한 뒤, 프로젝트 관리에서 Icon Generator 패키지를 추가합니다. - unitypackage: zip 안의 unitypackage를 프로젝트에 임포트합니다. - VCC/ALCOM: Click "Add to VCC" on https://koz39.github.io/vpm-listing/ to add the repository, then open your project's Manage page and add the Icon Generator package. - unitypackage: Import the unitypackage from the zip into your project.
How to Use
1. 上部メニューの Tools > Icon Generator を開きます。 2. ソースにアバターやアクセサリーをドラッグ&ドロップします。 3. プレビューを見ながらカメラとアイコンの設定を調整します。 4. 「アイコンを生成」をクリックします。 1. 상단 메뉴에서 Tools > Icon Generator를 엽니다. 2. 소스에 아바타나 액세서리를 끌어다 놓습니다. 3. 미리보기를 보면서 카메라와 아이콘 설정을 조절합니다. 4. "아이콘 생성"을 누릅니다. 1. Open Tools > Icon Generator from the top menu. 2. Drag and drop an avatar or accessory into Sources. 3. Adjust the camera and icon settings while checking the preview. 4. Click "Generate Icon".
Updating from v1
- メニューの場所が Tools > 3D Obj to Icon から Tools > Icon Generator に変わりました。 - 保存フォルダ、アイコンサイズ、ズーム、カメラ角度、言語の設定は初回起動時に自動で引き継がれます。 - デフォルトのファイル名が {name}.png に変わり、v1で作成したアイコンを上書きしません。 - 메뉴 위치가 Tools > 3D Obj to Icon에서 Tools > Icon Generator로 바뀌었습니다. - 저장 폴더, 아이콘 크기, 확대/축소, 카메라 각도, 언어 설정은 처음 실행할 때 자동으로 옮겨집니다. - 기본 파일명이 {name}.png로 바뀌어 v1로 만든 아이콘을 덮어쓰지 않습니다. - The menu has moved from Tools > 3D Obj to Icon to Tools > Icon Generator. - Output folder, icon size, zoom, camera angle and language settings are carried over automatically on first launch. - The default file name is now {name}.png, so icons made with v1 are not overwritten.
Update History (Korean Only)
https://github.com/KOZ39/Icon-Generator/blob/main/CHANGELOG.md