
【3Dモデル】うさみみ-bunny ears-【PB対応】
- Digital500 JPY
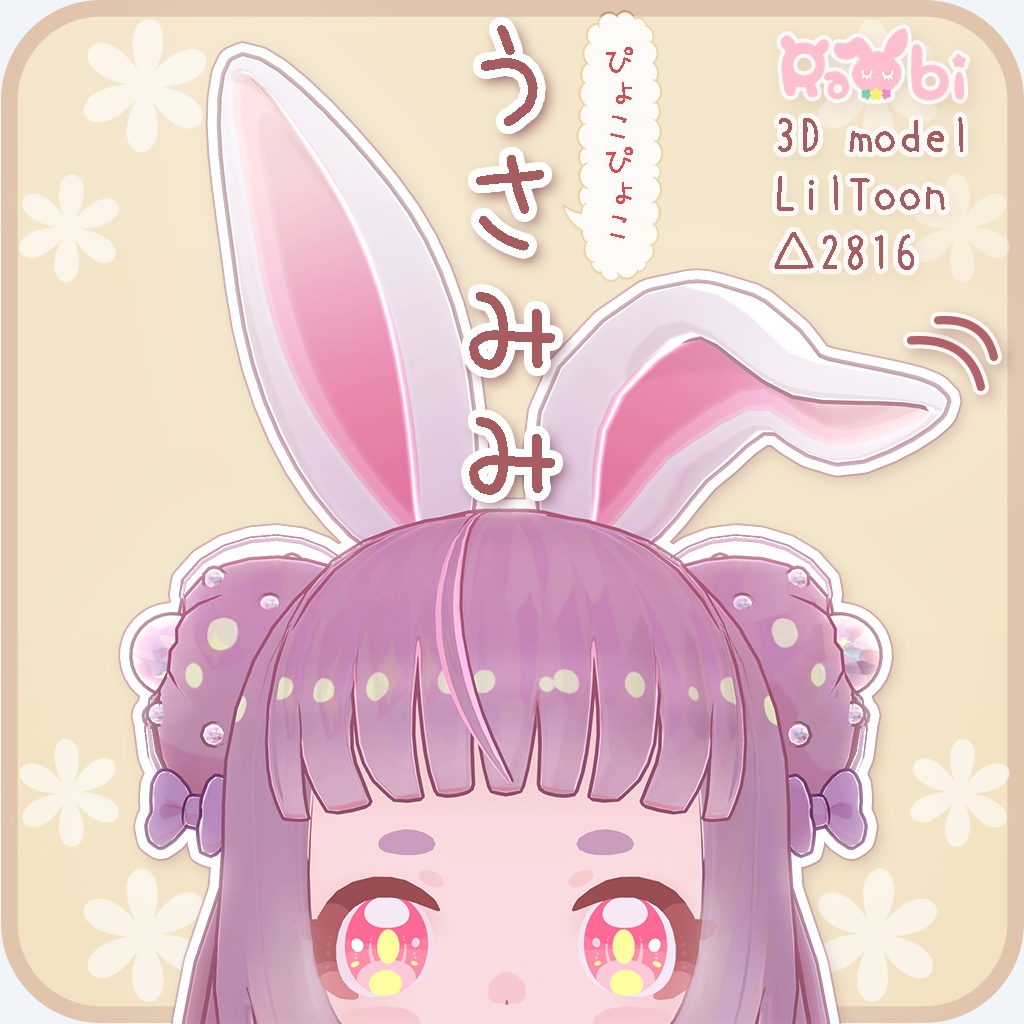
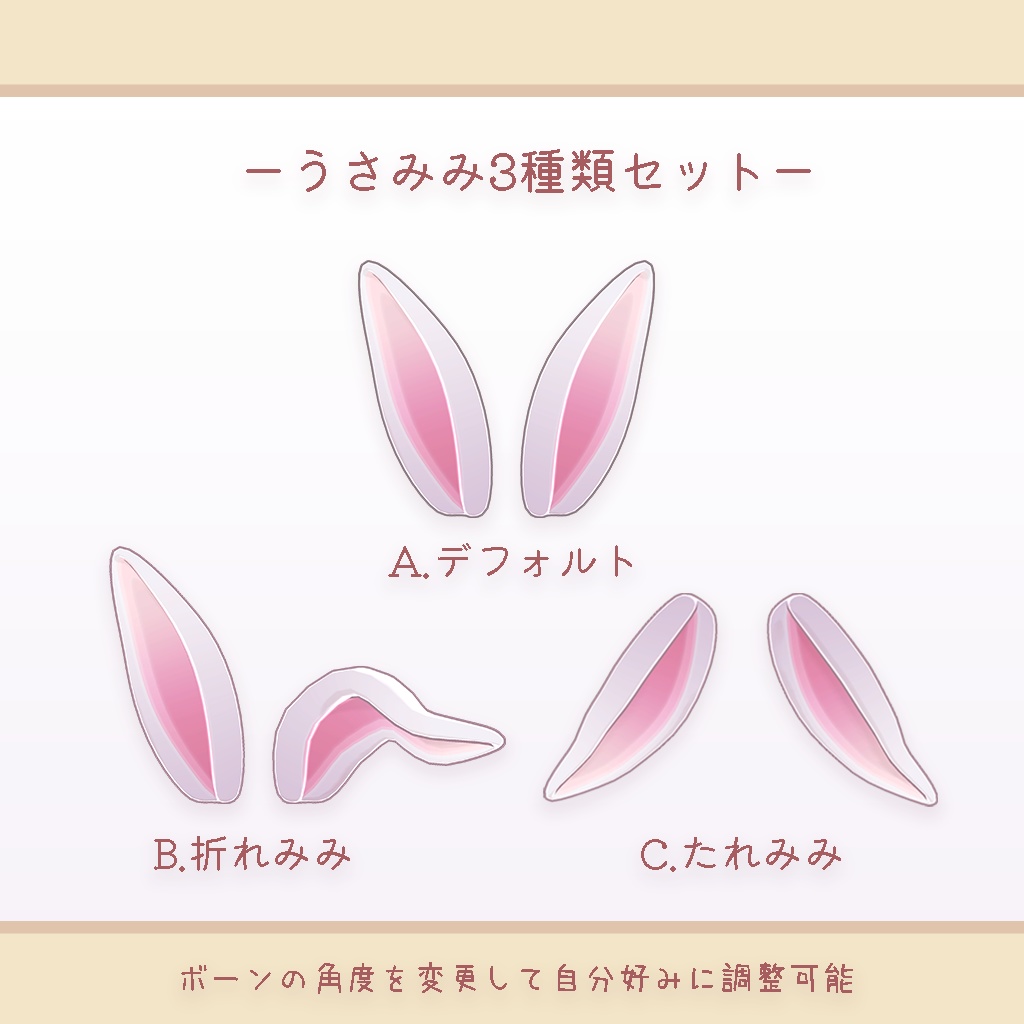
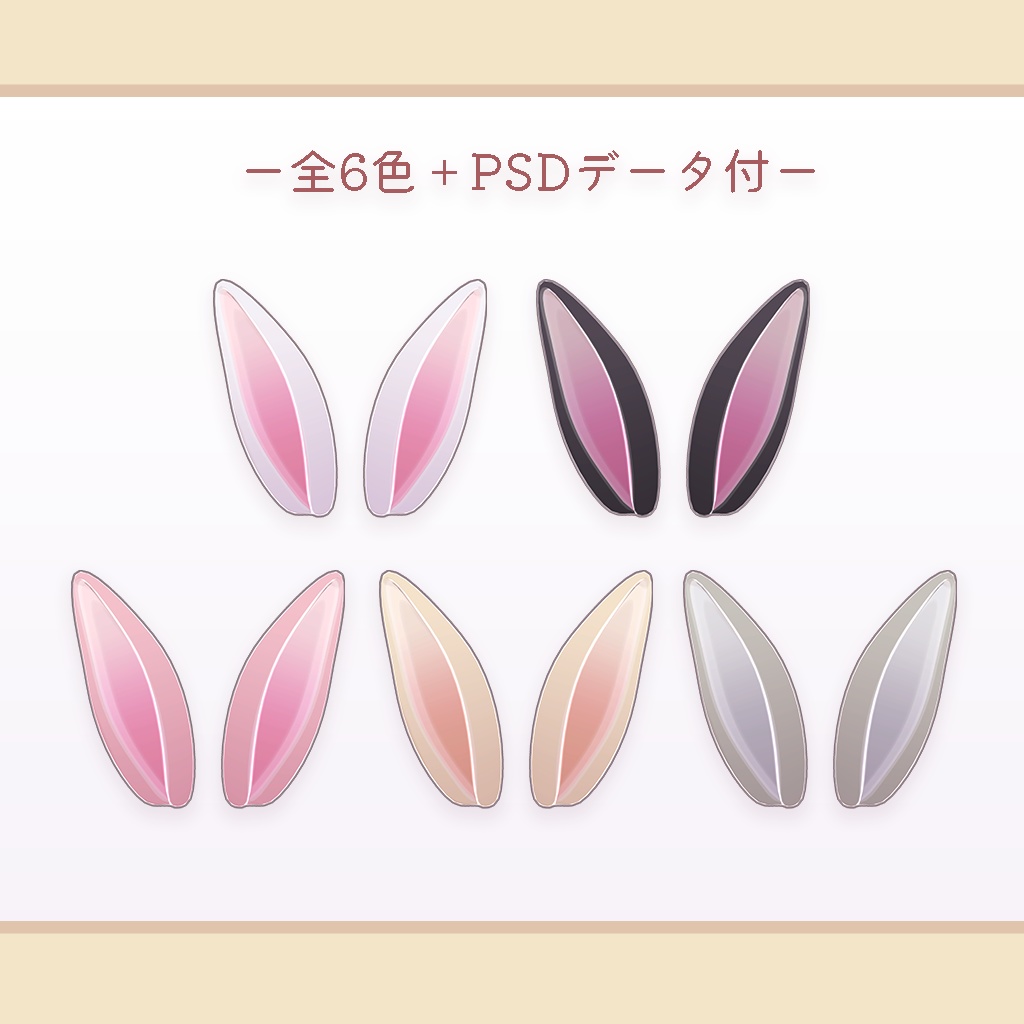
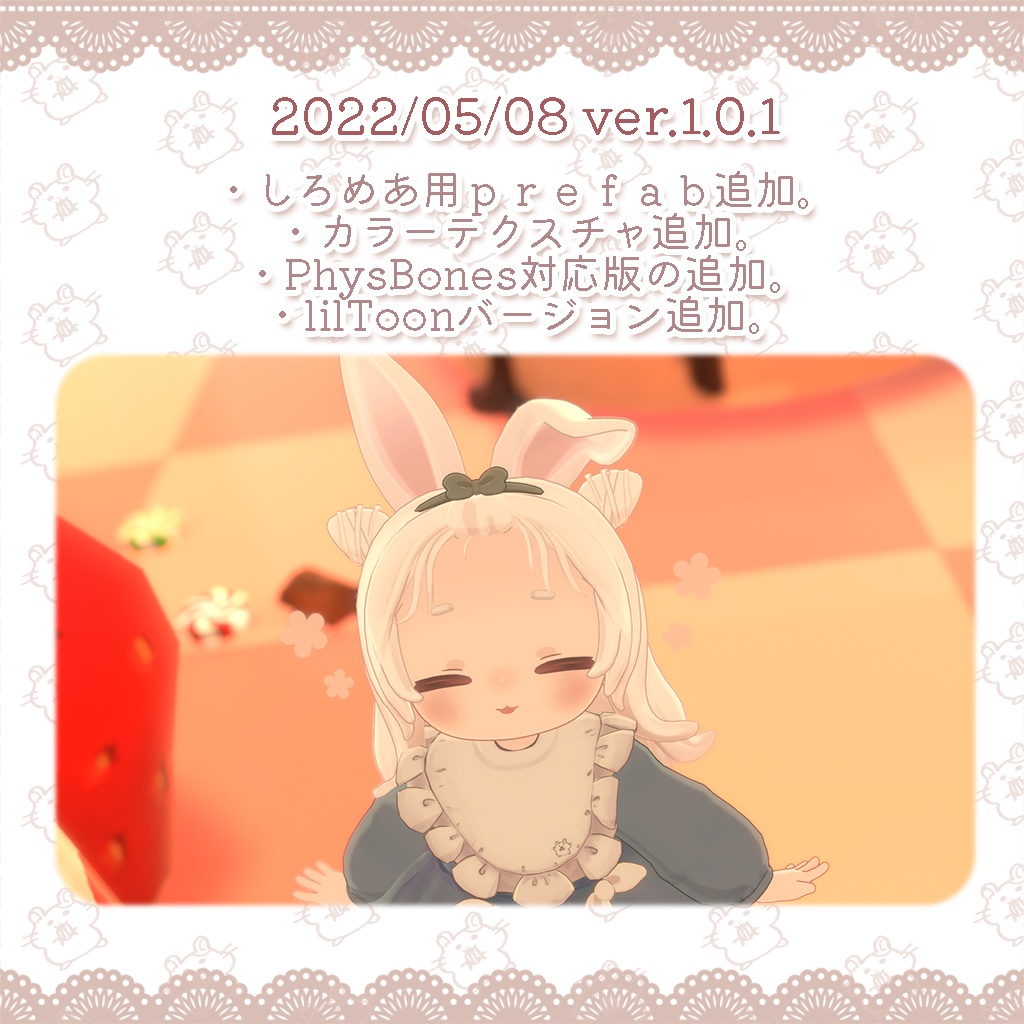


【オリジナル3Dモデル】うさみみ-bunny ears- 制作者_Creator ひの(hino) ※アバターは商品に含まれていません。 Avatar is not included in the product. ぴょこぴょこ動くうさみみです! ボーンを調整して自分の好きな形にしたりPSDで色の改変が可能です! ✦商品内容✦-Product Contents- ・bunnyEars_ver.1.0.2.unitypackage うさみみ通常、折れ耳、たれみみのプレハブが3つ入っています。 ・PSD ・textures.png ・rabi 3Dモデル利用規約 -rabi 3Dmodel_Terms of Service- ・しろめあ用prefab有 ✦商品仕様✦-Product Specifications- ・ポリゴン数 △2916polygons ・シェーダー-Shader- lilToon ・PB対応 ✦導入方法✦ -How to Upload- ①Unity 2019.4.31f1 で新規プロジェクトを作成 ②モデルをインポートする前に、lilToonを、Asetts → Import Package → Custom Packageからインポート。 ③使用しているアバターと、bunnyEars_ver.1.0.2.unitypackageを Asetts → Import Package → Custom Packageからインポートします。 ④projectタブのbunnyEars>prefabフォルダ内にプレハブが3つあるので好みのものをHierarchyに移動します。 ⑤HierarchyタブのアバターのArmature>Hips>Spine>Neck>Headの中にうさみみを移動します。 ⑥原点にうさみみがあるのでお好きな位置に移動して終了です。 ①Create a new project with Unity 2019.4.31f1 ② Import lilToon from Asets → Import Package → Custom Package before importing the model. ③ Import the avatar you are using and bunnyEars_ver.1.0.2.unitypackage from Import from Asetts → Import Package → Custom Package. ④ In the project tab, there are 3 prefabs in the bunnyEars>prefab folder, so move the one you like to the Hierarchy. ⑤ Move the rabbit ears to the avatar's Armature>Hips>Spine>Neck>Head in the Hierarchy tab. 6) Move the rabbit ears to the origin. ⑥Move the rabbit ears at the origin to the position of your choice and you are done. ✦rabi 3Dモデル利用規約 https://drive.google.com/file/d/1tRuJ1FRg4ltLlWLySlTiqVOOhY_N-Pfq/view?usp=drive_link ✦rabi 3Dmodel_Terms of Service https://drive.google.com/file/d/1kWDEZy55xPUfvnmK_-hpDIerworPTURa/view?usp=drive_link ✦rabi 3D 모델 이용 약관 https://drive.google.com/file/d/1QmCPqhzMuXjZrbfT1IKlA9EfgLhABshB/view?usp=drive_link ✦rabi 3D model 中文版 https://drive.google.com/file/d/1QpG1t_U15Z2CjtHEWKlkudBxsocrEkqX/view?usp=drive_link ✦更新履歴 2021/05/21 販売開始 2022/05/08 ver.1.0.1 ・lilToon追加 ・PhysBones対応 ・しろめあ用prefabとカラーテクスチャの追加 2023/8/19 ver.1.0.2 ・DB、UTSを削除 ・lilToon packageが入っていたので削除 ・PB設定を変更