[Unity] MaskMaker 2.1.0
- Digital1,990 JPY
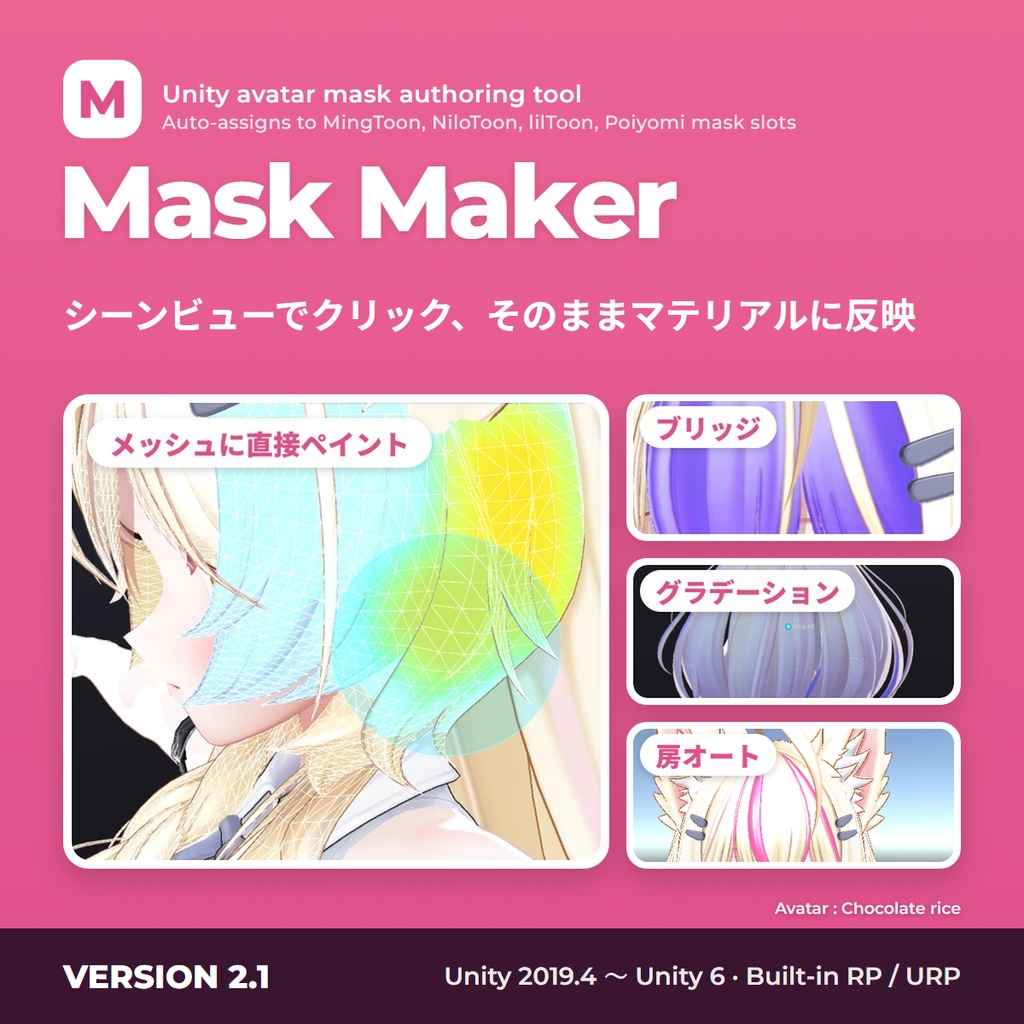


【Mask Maker 2.1.0】Unity 아바타 마스크 제작 툴 Unity 에디터 전용 툴이에요. 게임이나 방송 중에 실행되는 런타임 기능이 아니에요. 다운로드 후 환불 불가(구매 착오 포함). 구매 전에 꼭 확인해 주세요. ■ v2.1.0 업데이트 · 2026.11.13 2.0 위에 그대로 덮어 임포트하면 돼요. 창이 다시 한 화면이에요. ・다운로드에는 MaskMaker_v2.1.0.zip(새 화면)과 MaskMaker_v2.0.0.zip(이전 2.0)이 함께 있어요. 보통은 2.1.0을 받으세요. 2.0은 2.0 화면이나 2.0 레이어 문서 편집이 꼭 필요한 프로젝트를 위해 남겨 두었어요. 둘은 같은 폴더에 설치되니 한 프로젝트에는 하나만 넣으세요. ・순서: 바꿀 부분을 고르고 → 넣을 곳(셰이더의 마스크 칸)을 고르고 → 편집 모드를 켜고 → 적용하기를 눌러요. ・처음에는 부분 전체가 칠해져 있어요. UV나 모델을 눌러서 빼고 넣어요. 전체 선택・전체 해제도 있어요. ・넣을 곳마다 마스크와 대표 값(세기나 색)을 따로 가져요. 칸마다 작업이 남고 적용하기 한 번에 모두 들어가요. 되돌리기도 한 번에 돼요. ・AO맵은 머티리얼의 노멀맵 요철도 반영할 수 있어요. ・MingToon 마스크 UV 변환이 설정된 슬롯은 이유를 알려 줘요. ・계정 로그인이나 라이선스 확인 없이 바로 열려요. ・없어진 것: 레이어 목록, 출력 페이지, 그룹, 데칼, 결과 카드, 쉽게 시작 / 전문가 작업 화면. 이미 만든 마스크 텍스처와 머티리얼은 그대로 써요. 2.0에서 저장한 레이어 문서는 텍스처로는 계속 쓰이고, 새 창에서 레이어 스택으로 다시 열리지는 않아요. 고친 것 ・차폐(가린 면 칠하지 않기)를 켜면 뒤에 가린 면은 안 칠해지고, 비스듬한 면・접힌 곳 옆・화면 가장자리의 보이는 면은 제대로 칠해져요. ・Linear 프로젝트에서 어두운 색이 내보내기와 스포이드에서 뭉개지지 않아요. AO가 Metal/모바일에서도 선명해요. ・UV 타일(Repeat)로 놓인 섬도 외곽선이 덮어요. ・마스크 파일만 저장하거나 다른 이름으로 저장할 때, 그 PNG가 밖에서 바뀌었으면 덮어쓰기 전에 묻고 백업을 남겨요. ・패키지나 기본 머티리얼에 쓰는 마스크도 Assets 아래에 저장돼요. ・알파 베이크와 채널 분리가 원본 텍스처의 크기와 Max Size(플랫폼별 포함)를 따라가요. ・슬롯 분리: 프리팹 인스턴스에서 분리한 결과가 오버라이드로 남아서 씬을 다시 열어도 그대로예요. Play 중에는 적용・합치기・새로고침이 꺼지고 이유를 보여 줘요. UV0가 없는 메시도 돼요. ・슬롯 분리: 같은 원본 메시를 쓰는 두 번째 렌더러가 첫 번째 결과 파일을 덮어쓰지 않아요. 불러온 뒤 메시가 바뀌었으면 거부하고, 빠지는 머티리얼을 알려 줘요. 다른 도구의 임시 미리보기 머티리얼이 남아 있으면 무엇인지 말하고 멈춰요. ・씬 미니 세션(MingToon 슬롯 버튼): X 대칭이 UV 이음매를 넘어 1:1로 맞고, 저장해도 UV 밖 픽셀은 그대로예요. 긴 슬라이더 이름은 "…"로 줄고, 아이콘 버튼에 이름 툴팁이 떠요. ・도움말 "?" 팝업이 바로 닫히지 않아요. 가닥 자동(브릿지)이 미러된 메시의 뒷면과 마지막 서브메시의 추가 슬롯을 제대로 다뤄요. ・알아 두기: 2.0 위에 덮으면 2.0에만 있던 옛 파일 14개가 남아요(쓰이지 않아요, 지워도 돼요). 에디터를 다시 켠 뒤 복구된 작업은 "적용된 것"으로 세요. ・확인한 범위: 에디터 실행 확인은 Unity 2022.3(Built-in)에서 했어요. 그 밖의 Unity 버전은 컴파일 확인까지이고, URP에서는 실행해 보지 않았어요. ■ Mask Maker란 Unity 씬뷰에서 아바타 마스크를 칠하고 더하기 효과(광택・AO맵・그라데이션・가닥 자동)를 합쳐서, 넣을 곳마다 PNG로 만들어 셰이더 슬롯에 연결하는 에디터 툴이에요. ■ 주요 기능 ・씬뷰에서 모델 위에 바로 칠하고(선택/브러쉬 모드), 편집 모드에서 마스크를 모델 위에 겹쳐 확인 ・칠하기에 더하기 탭 4가지를 합쳐요: 광택(맷캡), AO맵, 그라데이션, 가닥 자동(머리카락 가닥 선택) ・AO맵은 머티리얼의 노멀맵 요철도 반영할 수 있어요 ・넣을 곳(셰이더의 마스크 칸)마다 마스크와 대표 값을 따로 보관. 여러 마스크를 한 장에 담는 텍스처는 고른 채널에만 써요 ・UV 보기의 선택・칠하기와 붓 크기・불투명・경도, 펜 필압(크기와 불투명도에 따로) ・적용하기 한 번에 칸마다 PNG를 만들어 머티리얼에 연결(Ctrl+Z 한 번에 모두 되돌려요). 텍스처 크기와 외곽선(px)을 정할 수 있어요 ・MingToon 인스펙터의 마스크 슬롯에서 바로 열기(MingToon 최신 버전 필요) ・되돌리기(Ctrl+Z, Ctrl+Y), 한국어・English・日本語 UI ■ 지원 환경 ・Unity 2019.4 ~ Unity 6 (6000.0, 6000.3 LTS) / Built-in Render Pipeline, URP ・자동 연결 셰이더: MingToon, NiloToon, lilToon, Poiyomi. 그 밖의 셰이더는 저장한 PNG를 슬롯에 직접 꽂아요. ■ 설치와 업데이트 ・받은 MaskMaker_v2.1.0.zip을 풀고 안의 .unitypackage를 임포트하면 Assets/StudioRaming/MaskMaker 폴더가 생겨요. 메뉴는 StudioRaming > Mask Maker. ・1.x(1.0, 1.1)와 2.0 구매자는 무료예요. 기존 폴더 위에 그대로 덮어 임포트하세요. 이미 만든 마스크 PNG는 그대로 동작해요. 2.0에서 저장한 레이어 문서는 텍스처로는 계속 쓰이고, 새 창에서 레이어 스택으로 다시 열리지는 않아요. ・2.0 위에 덮어 임포트하면 2.0에만 있던 옛 파일 14개가 남아요. 2.1은 읽지 않으니 지워도 돼요. ・소스(.cs) 판을 설치한 적이 있다면 먼저 지우세요. DLL 판과 함께 두면 클래스 중복 오류가 나요. ・Easy Mesh Editor와 함께 설치해서 써도 돼요. Mask Maker가 미리보기를 보여 주는 렌더러는 Easy Mesh Editor가 불러오지 않고 이유를 알려 줘요. ■ 설명서 https://studioraming.github.io/maskmaker-docs/ ※ 온라인 설명서는 2.0 기준이에요. 2.1.0의 화면은 패키지 안의 MaskMaker_Manual.md를 보세요. Avatar : Chocolate rice · 사용 아바타: Mayo (【オリジナル3Dモデル】Mayo / まよのデータ) 이 제품은 코드 생성 AI의 도움을 받아 제작되었습니다. ■ 사용 약관 ・Unity 에디터 확장(.unitypackage)으로 제공됩니다. 파일・코드의 재배포・재판매・유출을 엄격히 금지합니다. ・✓ 비상업/상업 방송・디지털 굿즈・개인 유튜브 허용 ・✓ 이 툴로 만든 결과물은 굿즈・입체 인쇄물에 사용 가능・개인/상업 모두 허용・판매 가능 ・커미션 등 파일 공유 시 받는 모든 당사자가 본 에셋 구매자여야 합니다. 기업 사용・수익성 콘텐츠는 문의. ■ 환불 ・다운로드 0회는 문의로 환불 가능, 1회 이상은 디지털 상품 특성상 환불 불가. ■ 문의 studioraming@gmail.com (설치와 사용 문의는 상품 Q&A로도 받아요)
【Mask Maker 2.1.0】Unity avatar mask authoring tool
Unity Editor only. It is not a runtime feature for games or live streams. No refunds after download (incl. purchase mistakes). Please confirm before buying. ■ v2.1.0 Update · 2026.11.13 Import it right over 2.0. The window is back to one screen. ・The download has both MaskMaker_v2.1.0.zip (new window) and MaskMaker_v2.0.0.zip (the previous 2.0). Take 2.1.0 in most cases. 2.0 stays available for projects that need the 2.0 window or need to edit 2.0 layer documents. Both install into the same folder, so put only one of them in a project. ・Flow: pick the Part to change -> pick Goes into (a shader mask slot) -> turn on edit mode -> Apply. ・The whole part starts painted. Click the UV or the model to take areas out or put them back. Select all and Clear all are there too. ・Each slot keeps its own mask and main value (strength or color). Work stays per slot and one Apply puts all of it in. Undo is one step too. ・The AO map can also use the material's normal-map bumps. ・A slot with a MingToon mask UV transform now tells you why. ・It opens right away, with no account login or license check. ・Gone: the layer list, the output page, groups, decals, the result card, and the Easy start / Expert screens. Mask textures and materials you already made keep working. Layer documents saved in 2.0 still work as textures, but they do not reopen as a layer stack in the new window. Fixed ・With Occlude on, faces hidden behind are not painted, and visible faces at an angle, next to folds or at the screen edge are painted properly. ・In Linear projects, dark colors are no longer crushed in export and in the eyedropper. AO is sharp on Metal/mobile too. ・The outline now also covers UV islands placed as tiles (Repeat). ・When you save only the mask file or use Save as, and that PNG was changed outside, it asks before overwriting and keeps a backup. ・Masks for materials inside packages or for default materials are saved under Assets. ・Alpha bake and channel split follow the source texture's size and Max Size (per-platform settings included). ・Slot Split: a split made on a prefab instance stays as an override and survives reopening the scene. Apply, Merge and refresh are off during Play, with the reason shown. Meshes without UV0 work. ・Slot Split: a second renderer that uses the same source mesh no longer overwrites the first one's result file. If the mesh changed after loading, it refuses and names the materials that would drop. If another tool's temporary preview material is left over, it says which one and stops. ・Scene mini session (MingToon slot button): X mirror matches 1:1 across UV seams, and saving keeps the pixels outside the UVs. Long slider labels end in "…", and icon buttons show their name as a tooltip. ・The help "?" popup no longer closes at once. Auto strands (Bridge) handles the back faces of mirrored meshes and extra slots on the last submesh correctly. ・Good to know: importing over 2.0 leaves 14 old files that only 2.0 had (unused; you can delete them). After an editor restart, recovered work counts as "applied". ・What was checked: the editor run was done on Unity 2022.3 (Built-in). Other Unity versions were checked up to compiling, and it was not run on URP. ■ What it is An editor tool that lets you paint avatar masks in the Unity Scene view, add effects (Gloss, AO map, Gradient, Auto strands), make a PNG for each slot, and connect it to the shader slot. ■ Main features ・Paint directly on the model in the Scene view (Select/Brush mode) and see the mask over the model in edit mode ・Add four Add tabs to the painted area: Gloss (MatCap), AO map, Gradient, Auto strands (hair strand selection) ・The AO map can also use the material's normal-map bumps ・Each slot (shader mask field) keeps its own mask and main value; a texture that packs several masks is written only on the chosen channel ・Select and Paint in the UV view, with brush size, opacity and hardness, and pen pressure (for size and opacity separately) ・One Apply makes a PNG per slot and connects them to the material (one Ctrl+Z reverts all). Texture size and outline (px) are adjustable ・Open from a MingToon Inspector mask slot (needs the latest MingToon) ・Undo (Ctrl+Z, Ctrl+Y), UI in 한국어, English, and 日本語 ■ Supported environment ・Unity 2019.4 to Unity 6 (6000.0, 6000.3 LTS) / Built-in Render Pipeline and URP ・Auto-connected shaders: MingToon, NiloToon, lilToon, Poiyomi. For other shaders, plug the saved PNG into the slot yourself. ■ Installation and update ・Unzip the downloaded MaskMaker_v2.1.0.zip and import the .unitypackage inside. It creates Assets/StudioRaming/MaskMaker. Menu: StudioRaming > Mask Maker. ・Buyers of 1.x (1.0 and 1.1) and 2.0 get it free. Import over the existing folder as it is. Mask PNGs you already made keep working. Layer documents saved in 2.0 still work as textures, but they do not reopen as a layer stack in the new window. ・Importing over 2.0 leaves 14 old files that only 2.0 had. 2.1 does not read them; you can delete them. ・If you installed the source (.cs) edition before, delete it first. Keeping it next to the DLL edition causes duplicate class errors. ・You can install it together with Easy Mesh Editor. A renderer that Mask Maker is previewing is not loaded by Easy Mesh Editor, and it tells you why. ■ Documentation https://studioraming.github.io/maskmaker-docs/ Note: the online docs describe 2.0. For the 2.1.0 window, see MaskMaker_Manual.md inside the package. Avatar : Chocolate rice · Avatar shown: Mayo (【オリジナル3Dモデル】Mayo / まよのデータ) This product was developed with the help of code-generation AI. ■ Terms ・Provided as a Unity Editor extension (.unitypackage). Redistribution, resale, or leaking of files/code is strictly prohibited. ・✓ Non-commercial/commercial streaming・digital goods・personal YouTube allowed ・✓ Results made with this tool may be used for goods and 3D printed items・personal and commercial・selling allowed ・When sharing files (e.g. commissions), every recipient must own this asset. Corporate/monetized use: inquire. ■ Refund ・Download count 0: refund possible via inquiry. 1+: no refund (digital goods). ■ Contact studioraming@gmail.com (installation and usage questions can also go through the product Q&A)
【Mask Maker 2.1.0】Unity アバター用マスク制作ツール
Unity エディター専用のツールです。ゲームや配信中に動く実行時機能ではありません。 ダウンロード後は返金不可(購入間違い含む)。ご購入前に必ずご確認ください。 ■ v2.1.0 アップデート · 2026.11.13 2.0 の上にそのまま上書きインポートできます。ウィンドウが 1 画面に戻りました。 ・ダウンロードには MaskMaker_v2.1.0.zip(新しい画面)と MaskMaker_v2.0.0.zip(以前の 2.0)の両方があります。通常は 2.1.0 をお使いください。2.0 は、2.0 の画面や 2.0 のレイヤー文書の編集が必要なプロジェクトのために残しています。どちらも同じフォルダーに入るので、1 つのプロジェクトにはどちらか 1 つだけ入れてください。 ・使い方: 変える部分を選ぶ → 入れる場所(シェーダーのマスクスロット)を選ぶ → 編集モードをオン → 適用する。 ・最初は部分全体が塗られた状態です。UV やモデルをクリックして外したり戻したりできます。すべて選択・すべて解除もあります。 ・入れる場所ごとにマスクと代表値(強さや色)を別々に持ちます。スロットごとに作業が残り、適用 1 回でまとめて入ります。元に戻すも 1 回です。 ・AO マップはマテリアルの法線マップの凹凸も反映できます。 ・MingToon のマスク UV 変換が設定されたスロットは、理由を表示します。 ・アカウントのログインやライセンス確認なしで、そのまま開きます。 ・なくなったもの: レイヤー一覧、出力ページ、グループ、デカール、結果カード、かんたんスタート / エキスパートの画面。作成済みのマスクテクスチャとマテリアルはそのまま使えます。2.0 で保存したレイヤー文書はテクスチャとしては使えますが、新しいウィンドウでレイヤースタックとして開き直すことはできません。 修正 ・オクルードをオンにすると奥に隠れた面は塗らず、斜めの面・折り目の横・画面の端の見えている面はきちんと塗れます。 ・Linear プロジェクトで、暗い色が書き出しとスポイトでつぶれなくなりました。AO が Metal/モバイルでもくっきりします。 ・UV タイル(Repeat)で置かれたアイランドにもアウトラインがかかります。 ・マスクファイルだけの保存や名前を付けて保存のとき、その PNG が外で変更されていれば、上書きの前に確認してバックアップを残します。 ・パッケージ内のマテリアルやデフォルトのマテリアルに使うマスクも Assets の下に保存されます。 ・アルファのベイクとチャンネル分割が、元テクスチャのサイズと Max Size(プラットフォーム別の設定を含む)に従います。 ・スロット分割: プレハブのインスタンスで分割した結果がオーバーライドとして残り、シーンを開き直してもそのままです。Play 中は適用・結合・更新がオフになり、理由を表示します。UV0 のないメッシュも使えます。 ・スロット分割: 同じ元メッシュを使う 2 つ目のレンダラーが、1 つ目の結果ファイルを上書きしなくなりました。読み込み後にメッシュが変わっていれば拒否し、外れるマテリアルを知らせます。ほかのツールの一時プレビューマテリアルが残っていれば、それが何かを伝えて止まります。 ・シーンのミニセッション(MingToon のスロットボタン): X ミラーが UV の継ぎ目をまたいで 1:1 で合い、保存しても UV の外のピクセルはそのままです。長いスライダー名は「…」で省略され、アイコンボタンに名前のツールチップが出ます。 ・ヘルプの「?」ポップアップがすぐに閉じなくなりました。房オート(ブリッジ)が、ミラーしたメッシュの裏面と最後のサブメッシュの追加スロットを正しく扱います。 ・知っておくこと: 2.0 の上に上書きすると 2.0 にだけあった古いファイル 14 個が残ります(使われません。削除して構いません)。エディターを再起動したあと復旧した作業は「適用済み」として数えます。 ・確認した範囲: 実際のエディター動作は Unity 2022.3(Built-in)で確認しました。ほかの Unity バージョンはコンパイル確認まで、URP では動かしていません。 ■ Mask Maker とは Unity のシーンビューでアバターのマスクを描き、追加の効果(光沢・AOマップ・グラデーション・房オート)を合わせて、入れる場所ごとに PNG を作ってシェーダーのスロットに接続するエディターツールです。 ■ 主な機能 ・シーンビューでモデルに直接描き(選択/ブラシモード)、編集モードでマスクをモデル上に重ねて確認 ・描画に加えて、追加タブ 4 つを組み合わせ: 光沢(マットキャップ)、AO マップ、グラデーション、房オート(髪の房の選択) ・AO マップはマテリアルの法線マップの凹凸も反映できます ・入れる場所(シェーダーのマスクスロット)ごとにマスクと代表値を別々に保持。複数のマスクを 1 枚にまとめるテクスチャは、選んだチャンネルにだけ書き込みます ・UV ビューの選択・描画と、ブラシのサイズ・不透明度・硬さ、ペン筆圧(サイズと不透明度に別々に) ・適用 1 回でスロットごとに PNG を作ってマテリアルに接続(Ctrl+Z 1 回でまとめて元に戻せます)。テクスチャサイズとアウトライン(px)も調整できます ・MingToon のインスペクターのマスクスロットから直接開ける(最新の MingToon が必要) ・元に戻す(Ctrl+Z、Ctrl+Y)、한국어・English・日本語 の UI ■ 対応環境 ・Unity 2019.4 ~ Unity 6(6000.0、6000.3 LTS) / Built-in Render Pipeline、URP ・自動接続するシェーダー: MingToon、NiloToon、lilToon、Poiyomi。それ以外は、保存した PNG をスロットに手動で差し込みます。 ■ インストールとアップデート ・ダウンロードした MaskMaker_v2.1.0.zip を展開し、中の .unitypackage をインポートすると Assets/StudioRaming/MaskMaker フォルダーができます。メニューは StudioRaming > Mask Maker。 ・1.x(1.0 と 1.1)と 2.0 の購入者は無料です。既存のフォルダーの上にそのまま上書きインポートしてください。作成済みのマスク PNG は引き続き動作します。2.0 で保存したレイヤー文書はテクスチャとしては使えますが、新しいウィンドウでレイヤースタックとして開き直すことはできません。 ・2.0 の上に上書きインポートすると、2.0 にだけあった古いファイルが 14 個残ります。2.1 は読み込まないので削除して構いません。 ・ソース(.cs)版を以前に入れていた場合は、先に削除してください。DLL 版と一緒に置くとクラスの重複エラーになります。 ・Easy Mesh Editor と一緒に入れて使えます。Mask Maker がプレビュー中のレンダラーは Easy Mesh Editor が読み込まず、理由を表示します。 ■ ドキュメント https://studioraming.github.io/maskmaker-docs/ ※ オンラインドキュメントは 2.0 の内容です。2.1.0 の画面はパッケージ内の MaskMaker_Manual.md をご覧ください。 Avatar : Chocolate rice ・ 使用アバター:【オリジナル3Dモデル】Mayo / まよのデータ 本製品は、コード生成AIの支援を受けて制作されています。 ■ 利用規約 ・Unityエディタ拡張(.unitypackage)として提供されます。ファイル・コードの再配布・再販売・流出を固く禁止します。 ・✓ 非営利/営利の配信・デジタルグッズ・個人YouTube 可 ・✓ このツールで作った成果物をグッズ・立体印刷物に利用可・個人/商用とも可・販売も可 ・セッティング共有時は受け取る全員が購入済みであること。法人利用・収益化は要問い合わせ。 ■ 返金 ・DL0回はお問い合わせで返金可。1回以上はデジタル商品につき返金不可。 ■ お問い合わせ studioraming@gmail.com(インストールや使い方の質問は商品の Q&A でも受け付けます)
FAQ / よくある質問 / 자주 묻는 질문
【한국어】 Q. 1.x나 2.0을 샀는데 2.1.0을 따로 사야 하나요? A. 아니요. 무료 업데이트예요. 기존 폴더 위에 덮어 임포트하면 돼요. Q. 스크립트 리로드나 Play에서 작업이 사라지나요? A. 저장하지 않은 작업은 보존되고 돌아오면 복원돼요. 비정상 종료 뒤에는 복구 배너에서 복원하거나 버릴 수 있어요. Q. 마스크를 꽂았는데 효과가 안 보여요. A. 텍스처의 sRGB(Color Texture)가 꺼져 있는지, 슬롯의 채널(R/G/B/A)이 맞는지, 그 기능의 상위 토글이 켜져 있는지 확인하세요. 【English】 Q. I bought 1.x or 2.0. Do I need to buy 2.1.0 separately? A. No. It is a free update. Import it over your existing folder. Q. Do I lose my work when scripts reload or I press Play? A. Unsaved work is kept and restored when you come back. After an unexpected quit, use Restore or Discard in the recovery banner. Q. The mask does not show any effect. A. Check that sRGB (Color Texture) is off on the texture, that the slot's channel (R/G/B/A) matches, and that the feature's parent toggle is on. 【日本語】 Q. 1.x か 2.0 を購入しました。2.1.0 は別に買う必要がありますか? A. いいえ。無料アップデートです。既存のフォルダーの上にそのままインポートしてください。 Q. スクリプトのリロードや Play で作業が消えますか? A. 保存していない作業は保持され、戻ると復元されます。異常終了の後は復旧バナーで復元か破棄を選べます。 Q. マスクを差し込んでも効果が出ません。 A. テクスチャの sRGB(Color Texture)がオフか、スロットのチャンネル(R/G/B/A)が合っているか、その機能の上位トグルがオンかを確認してください。