
つかんでめくれるメーカー - スカート・袖・手袋・ニーソを掴んでずらせるようにするUnityツール【VRChat】【JA,EN,KO】
- 日本語Digital700 JPY
- EnglishDigital700 JPY
- 한국어Digital700 JPY
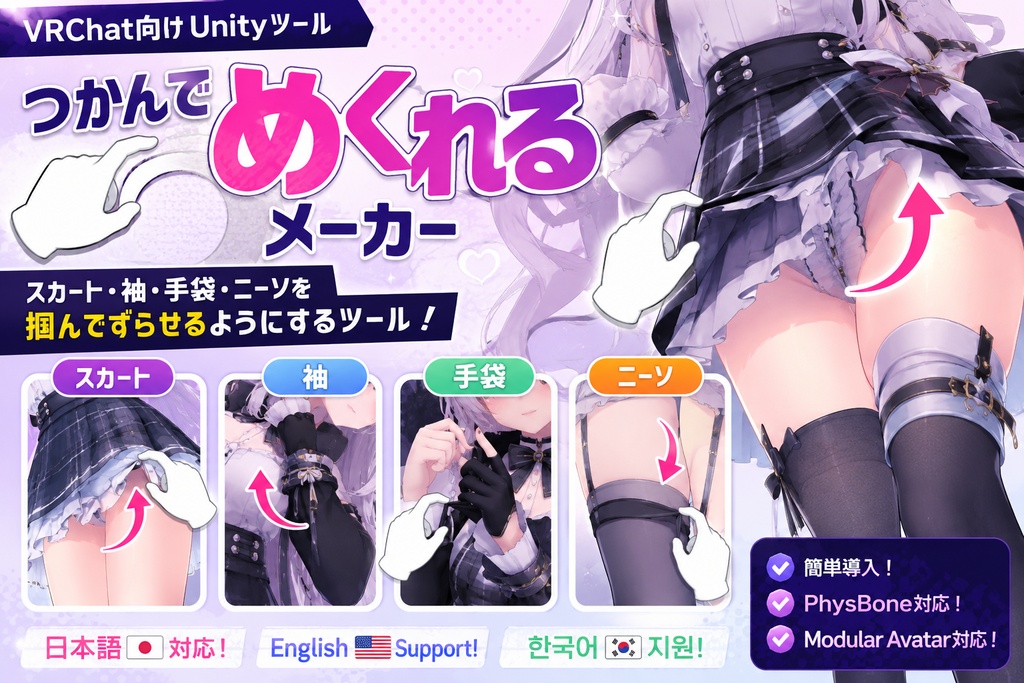
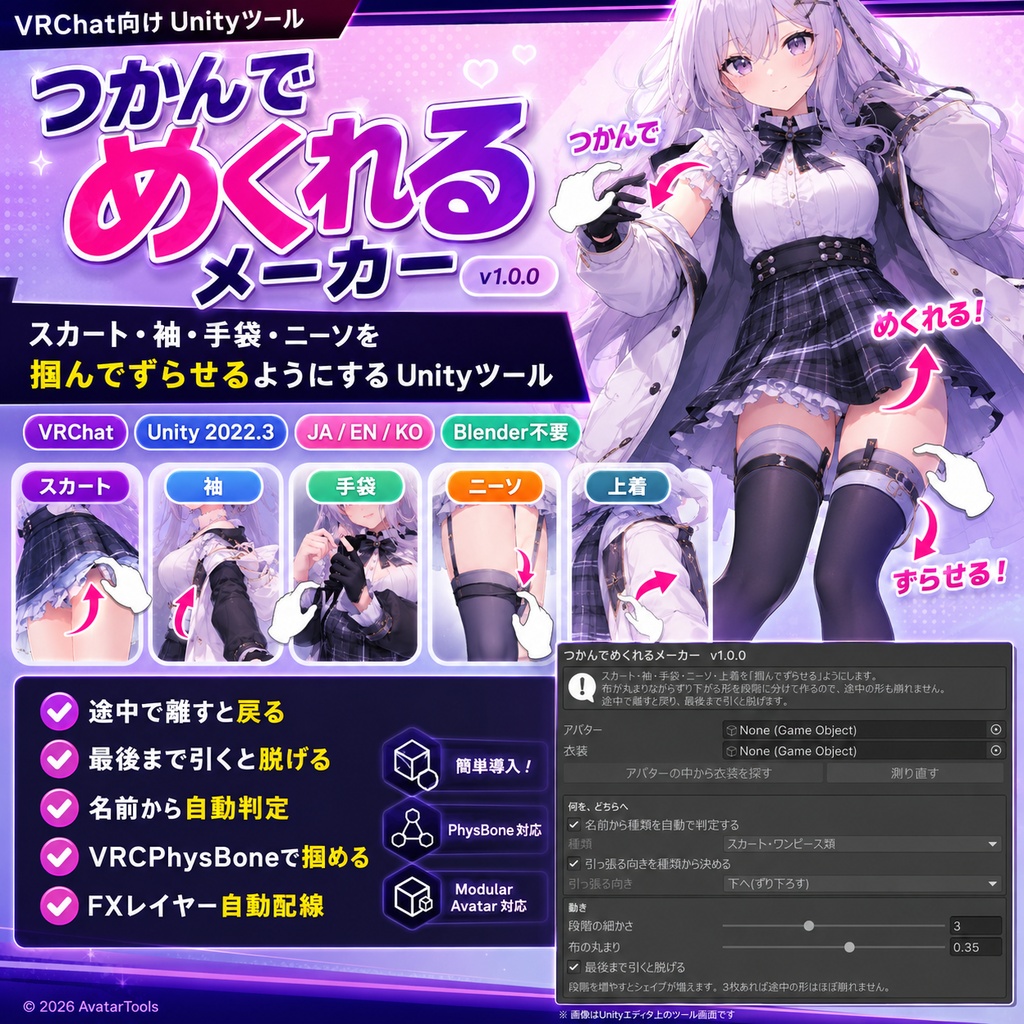
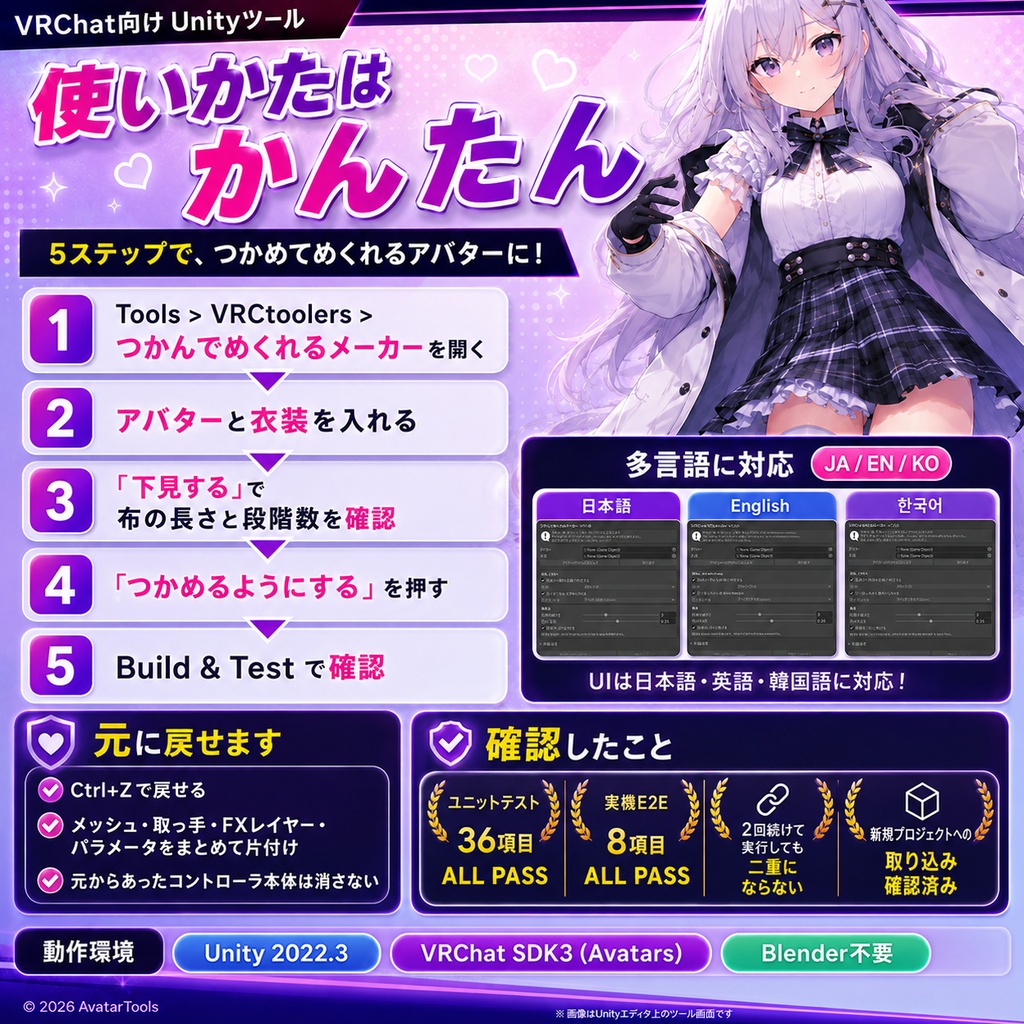
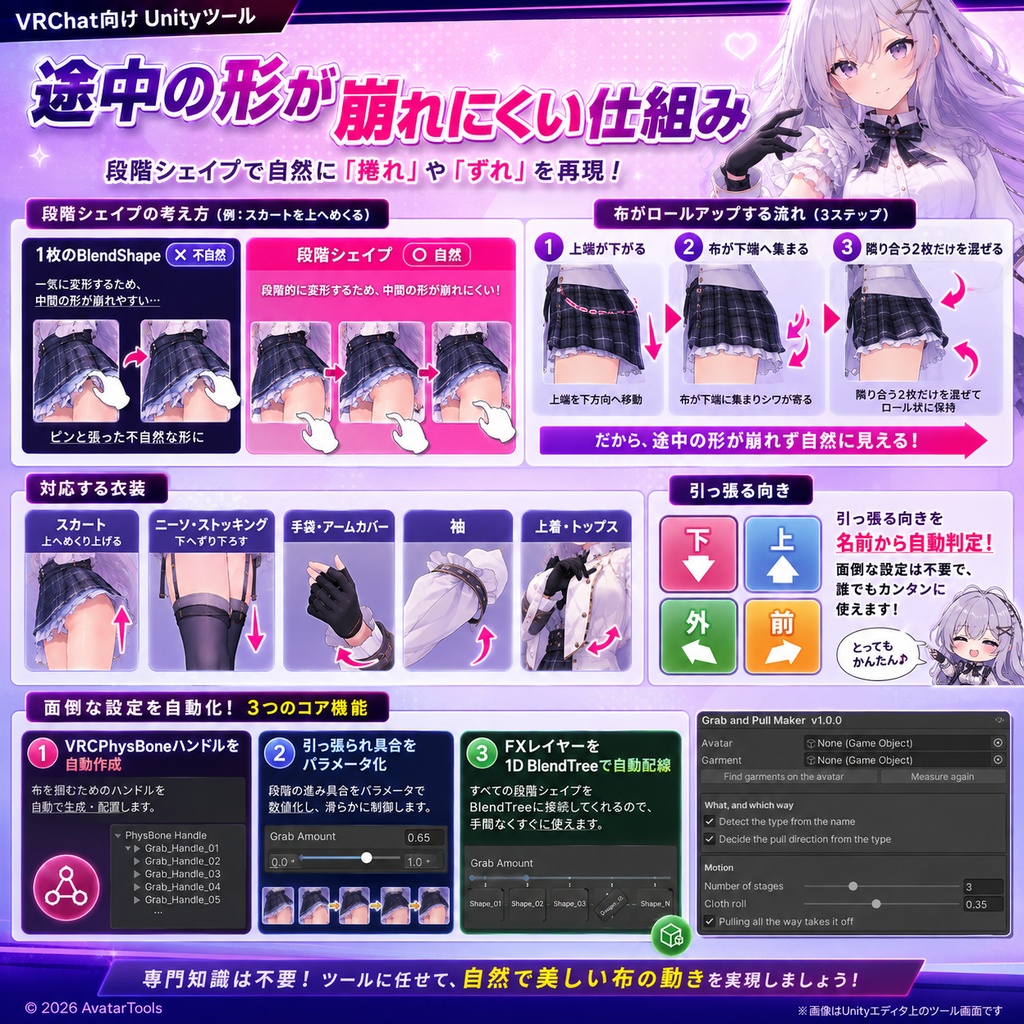


持っている衣装に、掴んで引っ張れる動きを足します。 途中で離すと戻り、最後まで引くと脱げます。 ◆ 布が丸まりながらずり下がります BlendShapeは1枚だと「元の形から目標の形へまっすぐ動く」ことしかできません。 ずり下ろしは、布の上端が下がって、下がった分が下端へ集まっていく動きなので、 1枚では途中の形がぜんぶ嘘になります。 このツールは丸まり具合を刻んで段階シェイプを作り、隣り合う2枚だけを混ぜます。 だから引いている途中の形も崩れません。 ◆ 対応する衣装 スカート(上へめくり上げる) ニーソ・ストッキング(下へずり下ろす) 手袋・アームカバー 袖 上着・トップス 名前から種類と引っ張る向きを自動で決めます。 向きは 下 / 上 / 外 / 前 から手で選ぶこともできます。 ◆ 掴む部分 掴み用のVRCPhysBoneを作って、引っ張られ具合をパラメータとして出します。 離すと物理で戻るので、戻る動きを作り込む必要がありません。 FXレイヤーは1D BlendTreeで自動配線します。 Write Defaults は、そのコントローラの多数派に合わせます。 混在すると表情や衣装が戻らなくなるためです。 どの段階のクリップも全ての段階シェイプに値を書くので、 Write Defaults を切っている環境でも前の段の形が残りません。 ◆ 使いかた 1. Tools > VRCtoolers > つかんでめくれるメーカー を開く 2. アバターと衣装を入れる 3. 「下見する」で布の長さと段階の枚数を確認する(何も変わりません) 4. 「つかめるようにする」を押す 5. Build & Test で実際に掴んで確かめる ◆ 元に戻せます Ctrl+Z で戻せます。 ボタン1つで、メッシュ・取っ手・FXレイヤー・パラメータがまとめて片付きます。 元からあったコントローラ本体は消しません。 ◆ 確認したこと ユニットテスト 36項目 ALL PASS 実機E2E(実VRChat SDK3 + Felis)8項目 ALL PASS 2回続けて実行しても、シェイプもレイヤーも取っ手も二重にならないことを確認 何も入っていない新規プロジェクトへの取り込み確認 済み ◆ 動作環境 Unity 2022.3 系。掴む部分に VRChat SDK3 (Avatars) が必要です。Blender は不要です。 ◆ 注意 他の人からも動きが見えるようにする同期の設定は入っていません。 自分の画面と、掴んだ相手の画面で動きます。 腰まで一体のタイツなど布が体を一周している形状は、丸まりの見えかたがメッシュによって変わります。 丸まりを弱めに調整してください。 靴やブーツと重なっている部分は、ずらすと貫通して見えることがあります。 --- English --- Adds a pull interaction to clothing you already own. Let go partway and it springs back; pull all the way and it comes off. A single BlendShape can only move straight from the base shape to the target shape. Rolling down is different: the top edge descends and the fabric gathers toward the bottom, so a single shape makes every in-between frame wrong. This tool cuts the roll into stage shapes and blends only two neighbours at a time, so the in-between shapes hold up. Supported: skirts (flip up), knee socks and stockings (slide down), gloves and arm covers, sleeves, outerwear and tops. The type and pull direction come from the name, and you can also pick down / up / outward / forward by hand. For the grab part it creates a VRCPhysBone handle that exposes how far it is being pulled as a parameter. Physics springs it back, so you do not have to author the return motion. The FX layer is wired automatically with a 1D BlendTree. Write Defaults follows the majority in that controller, because mixing the two breaks expressions and outfits. Every stage clip writes a value for every stage shape, so nothing from the previous stage is left behind when Write Defaults is off. Open Tools > VRCtoolers > Grab and Pull Maker, set the avatar and the garment, press Preview to check the cloth length and the number of stages, press Make it grabbable, then check it with Build & Test. Ctrl+Z works, and one button cleans up the mesh, the handle, the FX layer and the parameter. A controller that already existed is not deleted. Verified: 36 unit tests all pass, 8 real-avatar E2E tests with the real VRChat SDK3 and Felis all pass, running it twice does not double the shapes, the layer or the handle, and a clean import into an empty project was checked. Unity 2022.3. VRChat SDK3 (Avatars) is needed for the grab part. Blender is not required. There is no sync setup, so the motion is seen on your screen and on the screen of whoever grabbed it. Full tights that wrap all the way around the body vary in how the roll looks; lower the cloth roll for those. Areas overlapping shoes or boots may clip when shifted. Note: the detection keywords include Japanese words on purpose, so garments with Japanese object names still work in this English build. --- 한국어 --- 가지고 있는 의상에 잡아당길 수 있는 움직임을 더합니다. 도중에 놓으면 돌아오고, 끝까지 당기면 벗겨집니다. BlendShape 는 한 장이면 「원래 형태에서 목표 형태로 직선으로 움직이는 것」밖에 못 합니다. 끌어내리기는 천의 윗단이 내려가고 그만큼이 아랫단에 모이는 움직임이라, 한 장으로는 중간 형태가 전부 거짓이 됩니다. 이 툴은 말림 정도를 단계로 나눠 단계 셰이프를 만들고 이웃한 두 장만 섞기 때문에, 당기는 도중의 형태도 무너지지 않습니다. 대응 의상: 치마(위로 걷어 올리기), 니삭스·스타킹(아래로 끌어내리기), 장갑·팔토시, 소매, 겉옷·상의. 종류와 당기는 방향은 이름으로 자동 결정되며, 아래/위/바깥/앞 에서 직접 고를 수도 있습니다. 잡는 부분은 VRCPhysBone 손잡이를 만들어 당겨진 정도를 파라미터로 내보냅니다. 놓으면 물리로 돌아오므로 돌아오는 움직임을 따로 만들 필요가 없습니다. FX 레이어는 1D BlendTree 로 자동 배선합니다. Write Defaults 는 해당 컨트롤러의 다수파에 맞춥니다. 혼재하면 표정이나 의상이 돌아오지 않게 되기 때문입니다. 어느 단계의 클립이든 모든 단계 셰이프에 값을 쓰므로, Write Defaults 를 끈 환경에서도 이전 단계의 형태가 남지 않습니다. Tools > VRCtoolers > 잡아서 벗기기 메이커 를 열고 아바타와 의상을 넣은 뒤, 「미리보기」로 천 길이와 단계 수를 확인하고 「잡을 수 있게 하기」를 누른 다음 Build & Test 로 확인합니다. Ctrl+Z 로 되돌릴 수 있고, 버튼 하나로 메쉬·손잡이·FX 레이어·파라미터가 정리됩니다. 원래 있던 컨트롤러 본체는 지우지 않습니다. 확인 사항: 유닛 테스트 36항목 ALL PASS, 실기 E2E(실제 VRChat SDK3 + Felis) 8항목 ALL PASS, 두 번 연속 실행해도 셰이프·레이어·손잡이가 중복되지 않음, 아무것도 없는 신규 프로젝트로의 임포트 확인 완료. Unity 2022.3 계열. 잡는 부분에 VRChat SDK3 (Avatars) 가 필요합니다. Blender 는 필요 없습니다. 동기화 설정은 들어 있지 않아 자기 화면과 잡은 상대의 화면에서 움직입니다. 허리까지 일체형인 타이츠처럼 천이 몸을 한 바퀴 감는 형태는 말림이 보이는 방식이 메쉬에 따라 다르므로 말림을 약하게 조정해 주세요. 신발이나 부츠와 겹치는 부분은 움직이면 뚫려 보일 수 있습니다. 참고: 판정용 키워드에는 일본어 단어가 의도적으로 포함되어 있습니다. 일본어 오브젝트 이름의 의상도 이 한국어판에서 그대로 판정하기 위해서입니다.