
ボディメイクアトリエ - バスト・ヒップ・太もも・くびれをまとめて【JA,EN,KO】
- ダウンロード商品¥ 700
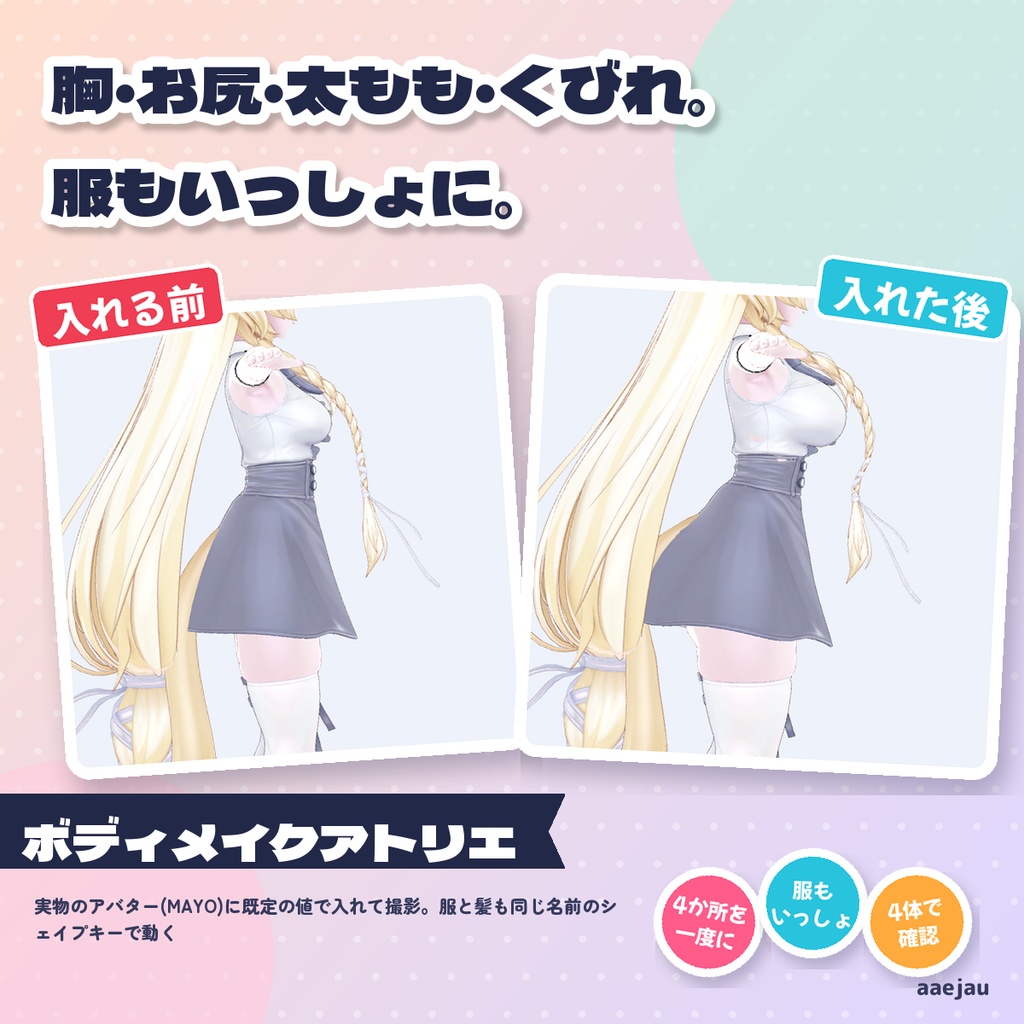
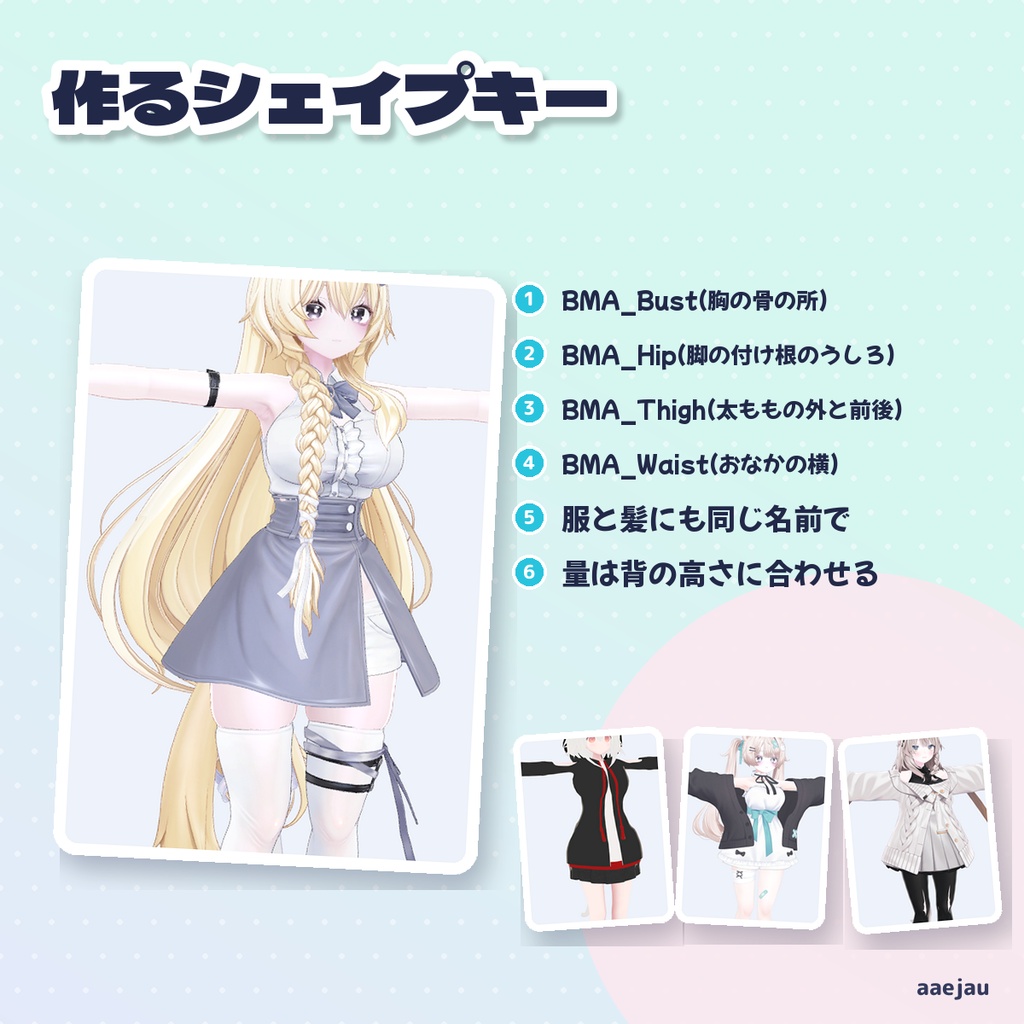
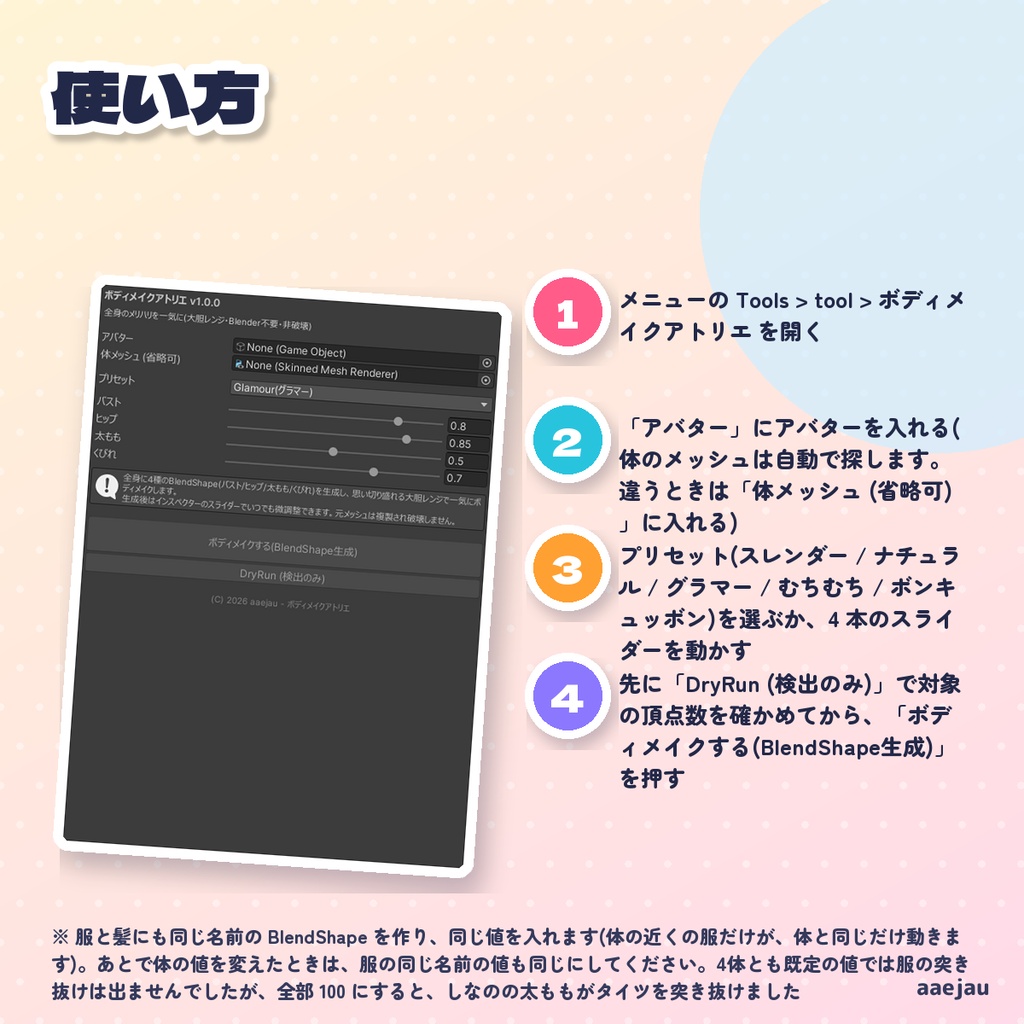
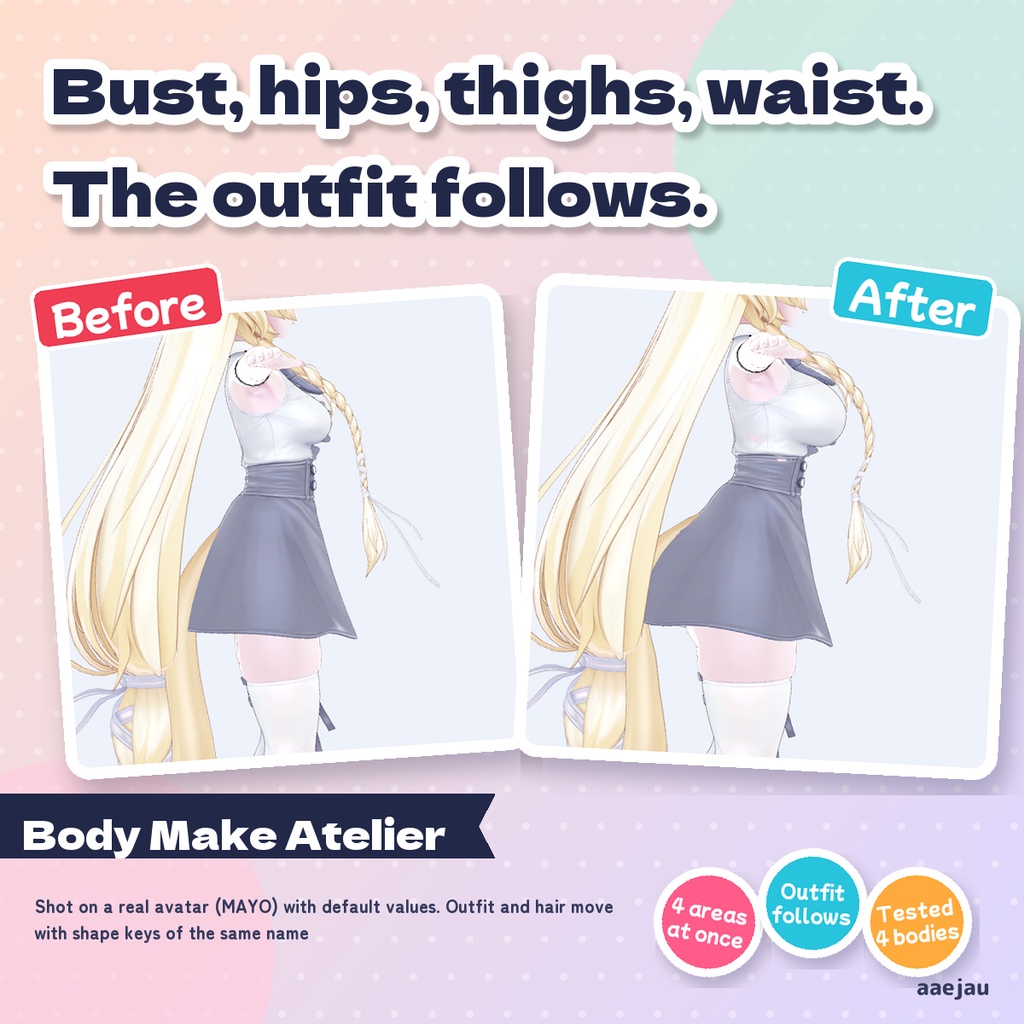
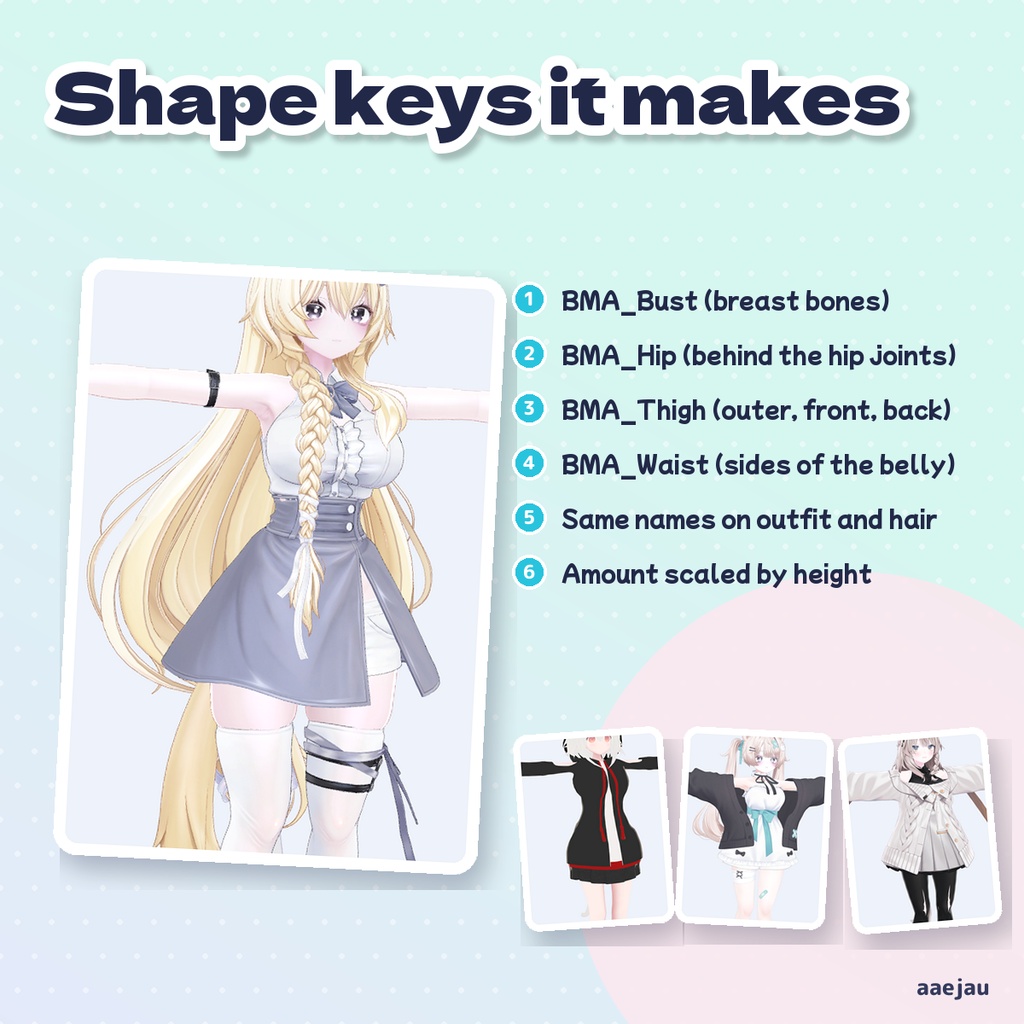
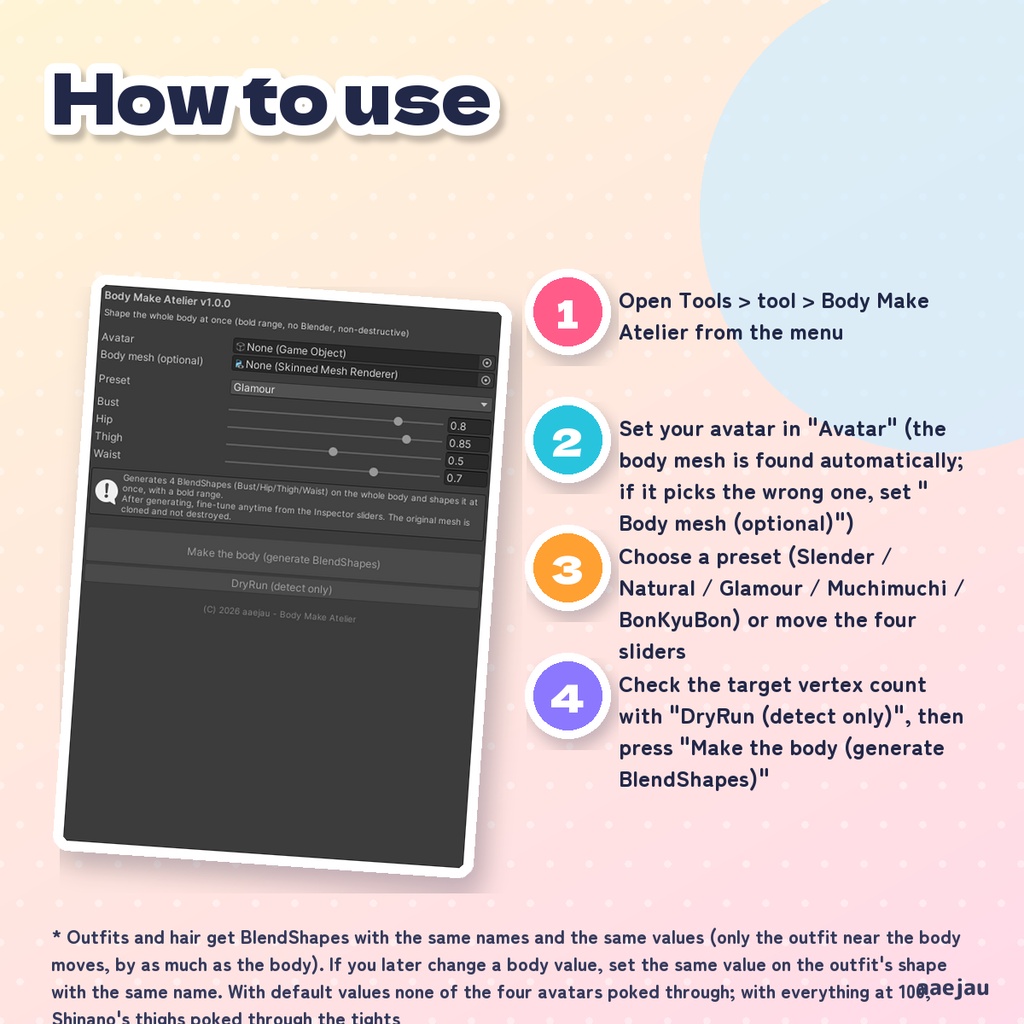
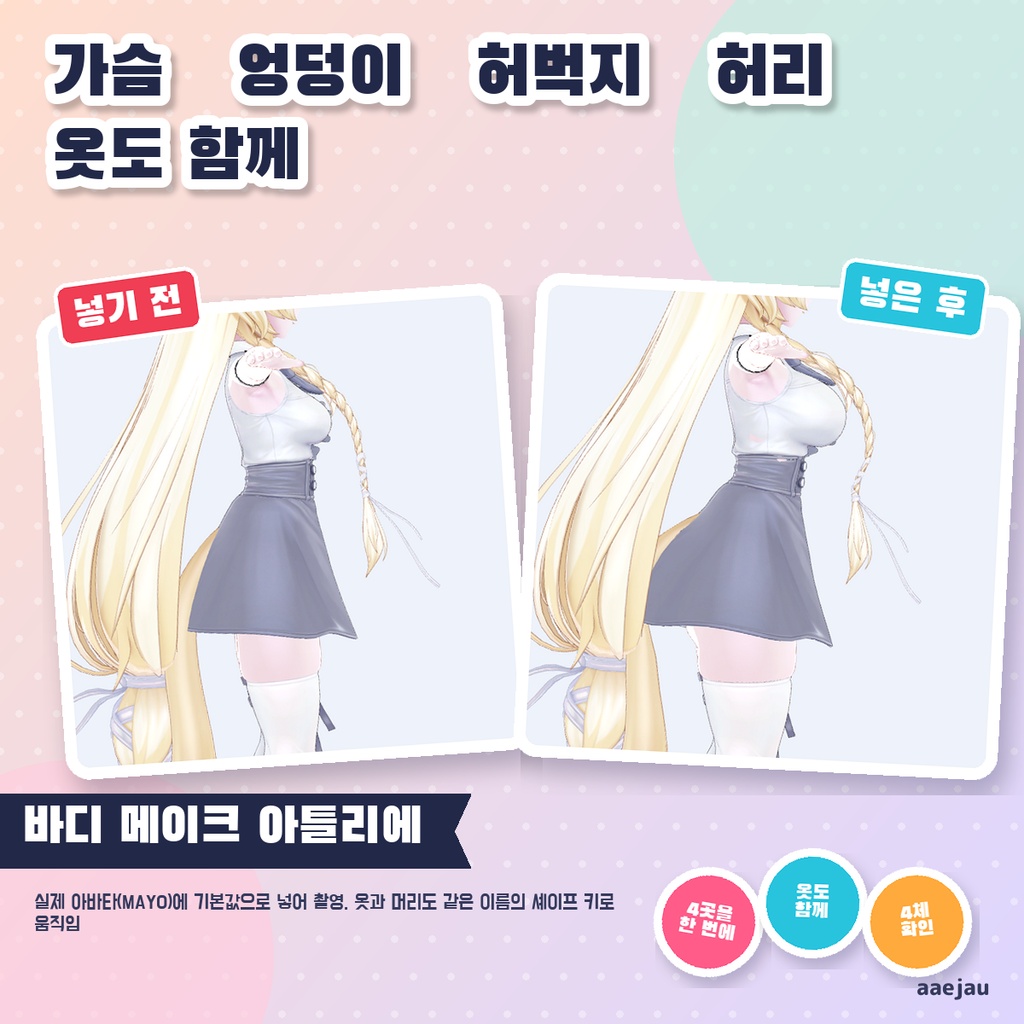
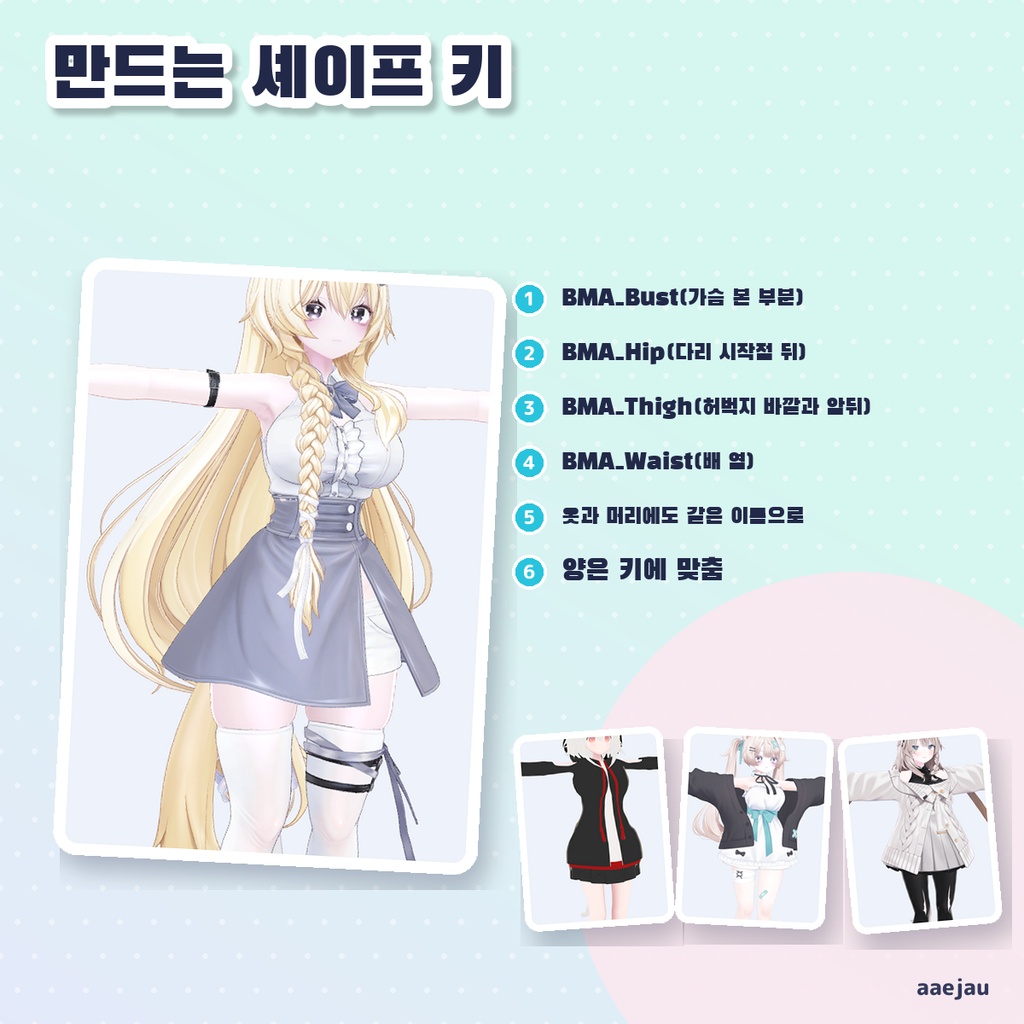
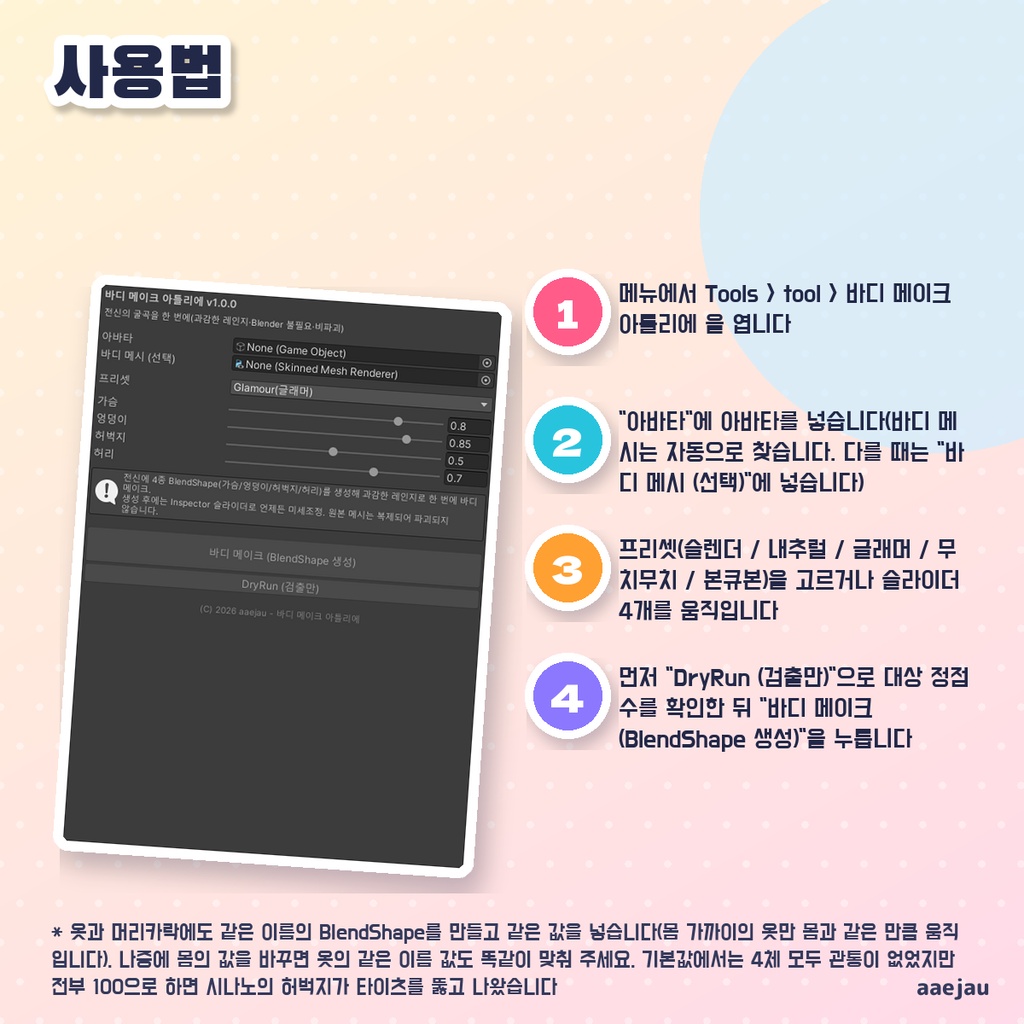


「胸もお尻も太もももくびれも、まとめていじりたい。」 Blenderは使いません。Unityの中だけで終わります。 体のメッシュに、バスト・ヒップ・太もも・くびれの 4 つの BlendShape(BMA_Bust / BMA_Hip / BMA_Thigh / BMA_Waist)を作ります。体のメッシュは、手・足・首までウェイトが届いているものを自動で選びます。バストは胸の骨(Breast_L / R など)のウェイトがある所を、ヒップは脚の付け根のうしろを、太ももは外側と前後を、くびれはおなかの横を動かします。動く量はアバターの背の高さに合わせます。5 つのプリセットか 4 本のスライダーで初めの強さを決め、作った後は Inspector のスライダーでいつでも調整できます。元のメッシュは複製してから書き込みます。 ◆ 使い方 1. メニューの Tools > tool > ボディメイクアトリエ を開く 2. 「アバター」にアバターを入れる(体のメッシュは自動で探します。違うときは「体メッシュ (省略可)」に入れる) 3. プリセット(スレンダー / ナチュラル / グラマー / むちむち / ボンキュッボン)を選ぶか、4 本のスライダーを動かす 4. 先に「DryRun (検出のみ)」で対象の頂点数を確かめてから、「ボディメイクする(BlendShape生成)」を押す 5. 細かい調整は、体メッシュの Inspector にできた BMA_ の 4 つのスライダーで行う ◆ 必要環境 ・Unity 2022.3 ・Humanoid 設定のアバター ・VRChat SDK は不要です ※ 服と髪にも同じ名前の BlendShape を作り、同じ値を入れます(体の近くの服だけが、体と同じだけ動きます)。あとで体の値を変えたときは、服の同じ名前の値も同じにしてください。4体とも既定の値では服の突き抜けは出ませんでしたが、全部 100 にすると、しなのの太ももがタイツを突き抜けました ※ 揺れ(PhysBone)は足しません。形を変えるだけです ※ 胸の骨が無いアバターでは、肩の位置と体の表面から胸の場所を推定します。胸の骨があるアバターより範囲がずれることがあります ※ 太ももは内側(もう片方の脚に向いた面)と股をほとんど動かしません。脚どうしのめり込みを避けるためで、内ももは太くなりません ※ 変えられるのはバスト・ヒップ・太もも・くびれの 4 か所だけで、動く量の上限も決まっています(値 100 で、頭の骨から足の骨まで 1.2m(身長およそ 1.4m)のときバスト 3.5cm・ヒップ 4cm・太もも 2.5cm・くびれ 2.5cm) ※ 処理するのは体のメッシュ 1 枚だけです。体が複数のメッシュに分かれているアバターでは、一部にしか効かないことがあります ※ アバターを置いたままの姿勢(T ポーズ / A ポーズ)で実行してください。ポーズを変えた状態では場所がずれます ※ Hips・Chest などの主要ボーンが見つからないアバター(Humanoid でないもの)では使えません 内容物: unitypackage / README / CHANGELOG / TEST_REPORT / LICENSE / 画面のスクリーンショット ━━━━━━━━━━━━━━━━━━━━ English ━━━━━━━━━━━━━━━━━━━━ Adds four BlendShapes to the body mesh: bust, hips, thighs and waist (BMA_Bust / BMA_Hip / BMA_Thigh / BMA_Waist). The body mesh is picked automatically as the one whose weights reach the hands, feet and neck. The bust moves where the breast bones (Breast_L / R etc.) are weighted, the hips move behind the leg joints, the thighs grow outward and to the front and back, and the waist narrows at the sides. Amounts scale with the avatar height. Pick one of five presets or use four sliders to set the starting strength, then adjust any time with the sliders in the Inspector. The original mesh is duplicated before anything is written. ◆ How to use 1. Open Tools > tool > Body Make Atelier from the menu 2. Set your avatar in "Avatar" (the body mesh is found automatically; if it picks the wrong one, set "Body mesh (optional)") 3. Choose a preset (Slender / Natural / Glamour / Muchimuchi / BonKyuBon) or move the four sliders 4. Check the target vertex count with "DryRun (detect only)", then press "Make the body (generate BlendShapes)" 5. Fine-tune with the four BMA_ sliders that now appear in the body mesh Inspector ◆ Requirements ・Unity 2022.3 ・An avatar set up as Humanoid ・VRChat SDK is not required * Outfits and hair get BlendShapes with the same names and the same values (only the outfit near the body moves, by as much as the body). If you later change a body value, set the same value on the outfit's shape with the same name. With default values none of the four avatars poked through; with everything at 100, Shinano's thighs poked through the tights * No jiggle (PhysBone) is added. It only changes the shape * On avatars without breast bones, the bust area is estimated from the shoulders and the body surface and may be less accurate than on avatars with breast bones * The inner thighs (the side facing the other leg) and the crotch barely move, so the legs do not push into each other. The inner thighs do not get fuller * Only four areas (bust, hips, thighs, waist) can be changed, and each has a fixed maximum (at 100, for an avatar 1.2m from head bone to foot bone, about 1.4m tall: bust 3.5cm, hips 4cm, thighs 2.5cm, waist 2.5cm) * Only one body mesh is processed. On avatars whose body is split into several meshes, it may affect only part of the body * Run it with the avatar in its default pose (T-pose / A-pose). In a changed pose the areas shift * Avatars without main bones such as Hips and Chest (non-Humanoid) are not supported Contents: unitypackage / README / CHANGELOG / TEST_REPORT / LICENSE / screenshot ━━━━━━━━━━━━━━━━━━━━ 한국어 ━━━━━━━━━━━━━━━━━━━━ 바디 메시에 가슴·엉덩이·허벅지·허리의 BlendShape 4개(BMA_Bust / BMA_Hip / BMA_Thigh / BMA_Waist)를 만듭니다. 바디 메시는 손·발·목까지 웨이트가 닿는 메시를 자동으로 고릅니다. 가슴은 가슴 본(Breast_L / R 등)의 웨이트가 있는 곳을, 엉덩이는 다리 뿌리 뒤쪽을, 허벅지는 바깥쪽과 앞뒤를, 허리는 배 옆을 움직입니다. 움직이는 양은 아바타의 키에 맞춥니다. 프리셋 5개나 슬라이더 4개로 처음 세기를 정하고, 만든 뒤에는 Inspector의 슬라이더로 언제든 조정할 수 있습니다. 원본 메시는 복제한 뒤에 기록합니다. ◆ 사용법 1. 메뉴에서 Tools > tool > 바디 메이크 아틀리에 을 엽니다 2. "아바타"에 아바타를 넣습니다(바디 메시는 자동으로 찾습니다. 다를 때는 "바디 메시 (선택)"에 넣습니다) 3. 프리셋(슬렌더 / 내추럴 / 글래머 / 무치무치 / 본큐본)을 고르거나 슬라이더 4개를 움직입니다 4. 먼저 "DryRun (검출만)"으로 대상 정점 수를 확인한 뒤 "바디 메이크 (BlendShape 생성)"을 누릅니다 5. 세밀한 조정은 바디 메시 Inspector에 생긴 BMA_ 슬라이더 4개로 합니다 ◆ 요구 환경 ・Unity 2022.3 ・Humanoid로 설정된 아바타 ・VRChat SDK는 필요 없습니다 ※ 옷과 머리카락에도 같은 이름의 BlendShape를 만들고 같은 값을 넣습니다(몸 가까이의 옷만 몸과 같은 만큼 움직입니다). 나중에 몸의 값을 바꾸면 옷의 같은 이름 값도 똑같이 맞춰 주세요. 기본값에서는 4체 모두 관통이 없었지만 전부 100으로 하면 시나노의 허벅지가 타이츠를 뚫고 나왔습니다 ※ 흔들림(PhysBone)은 추가하지 않습니다. 모양만 바꿉니다 ※ 가슴 본이 없는 아바타에서는 어깨 위치와 몸 표면으로 가슴 위치를 추정합니다. 가슴 본이 있는 아바타보다 범위가 어긋날 수 있습니다 ※ 허벅지 안쪽(반대쪽 다리를 향한 면)과 사타구니는 거의 움직이지 않습니다. 다리끼리 파고들지 않게 하기 위해서이며, 허벅지 안쪽은 굵어지지 않습니다 ※ 바꿀 수 있는 곳은 가슴·엉덩이·허벅지·허리 4곳뿐이며, 움직이는 양의 상한도 정해져 있습니다(값 100, 머리 본에서 발 본까지 1.2m(키 약 1.4m) 기준으로 가슴 3.5cm·엉덩이 4cm·허벅지 2.5cm·허리 2.5cm) ※ 처리하는 것은 바디 메시 1개뿐입니다. 몸이 여러 메시로 나뉜 아바타에서는 일부에만 적용될 수 있습니다 ※ 아바타를 놓은 그대로의 자세(T 포즈 / A 포즈)에서 실행하세요. 자세를 바꾼 상태에서는 위치가 어긋납니다 ※ Hips·Chest 등 주요 본을 찾을 수 없는 아바타(Humanoid가 아닌 것)에서는 쓸 수 없습니다 내용물: unitypackage / README / CHANGELOG / TEST_REPORT / LICENSE / 스크린샷