

よせあげライン - 胸を中心へ寄せて上げる BlendShape を足す【JA,EN,KO】
- 日本語ダウンロード商品¥ 700
- Englishダウンロード商品¥ 700
- 한국어ダウンロード商品¥ 700
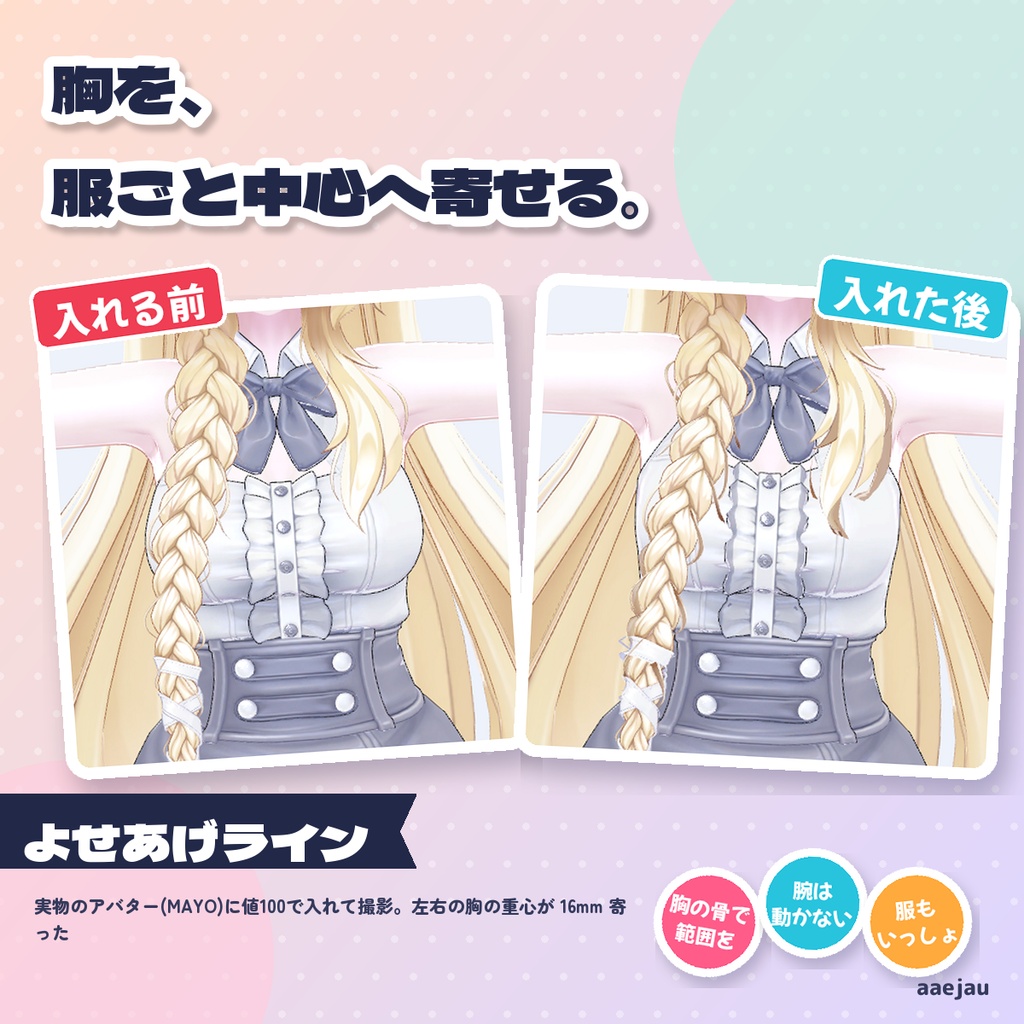
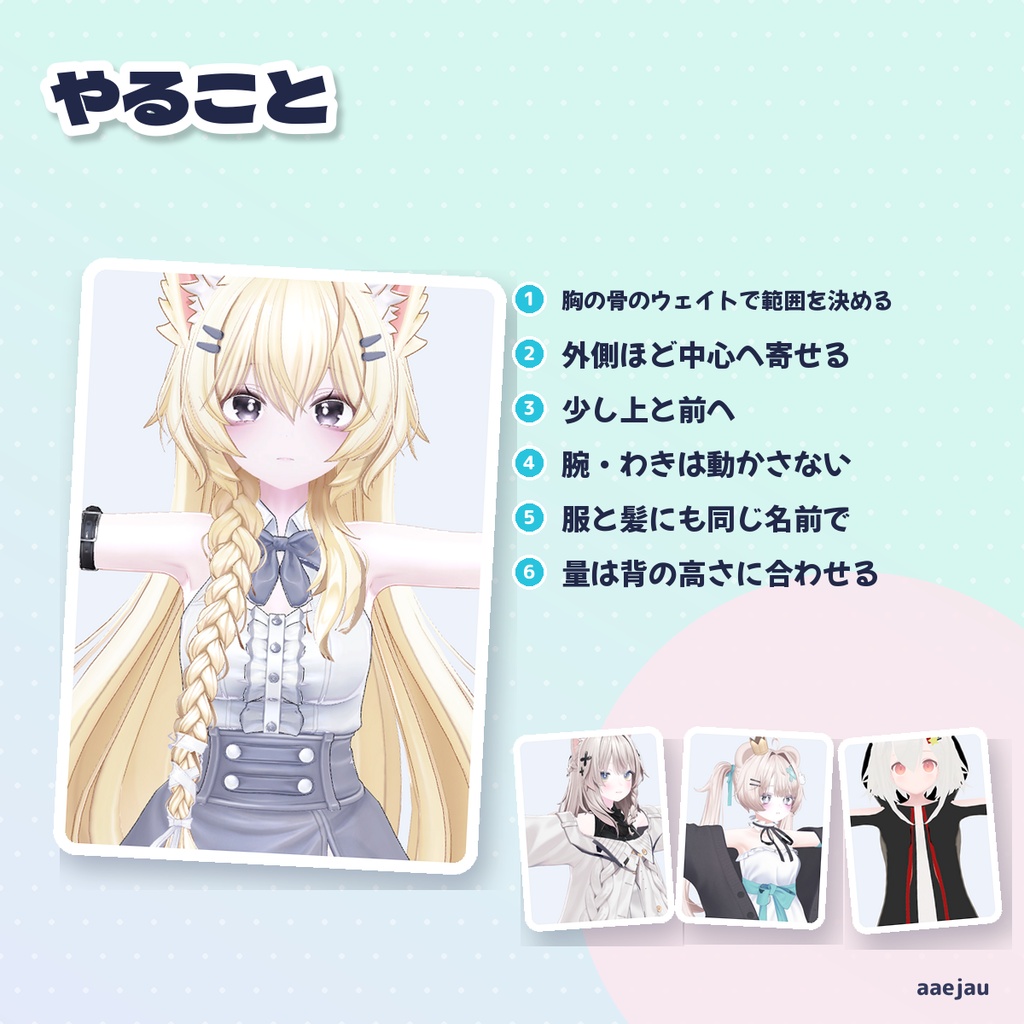
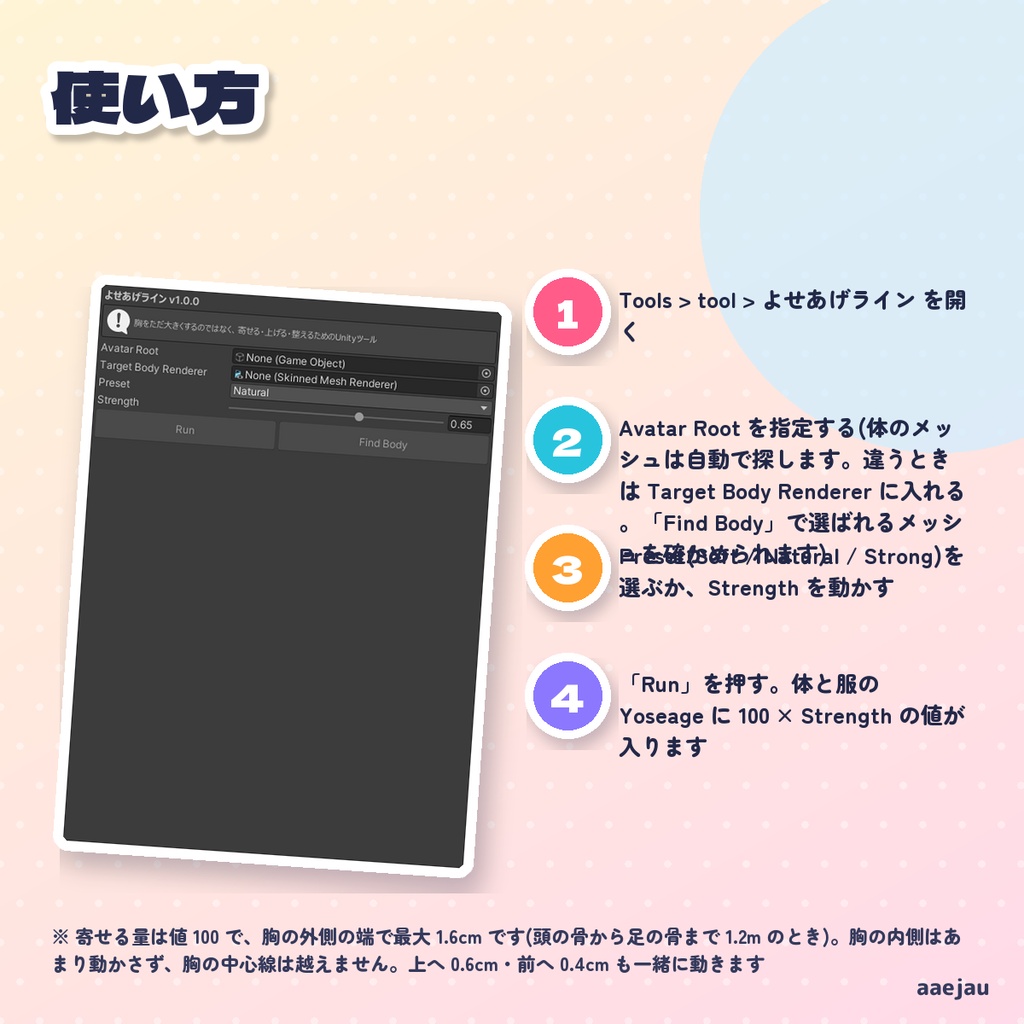
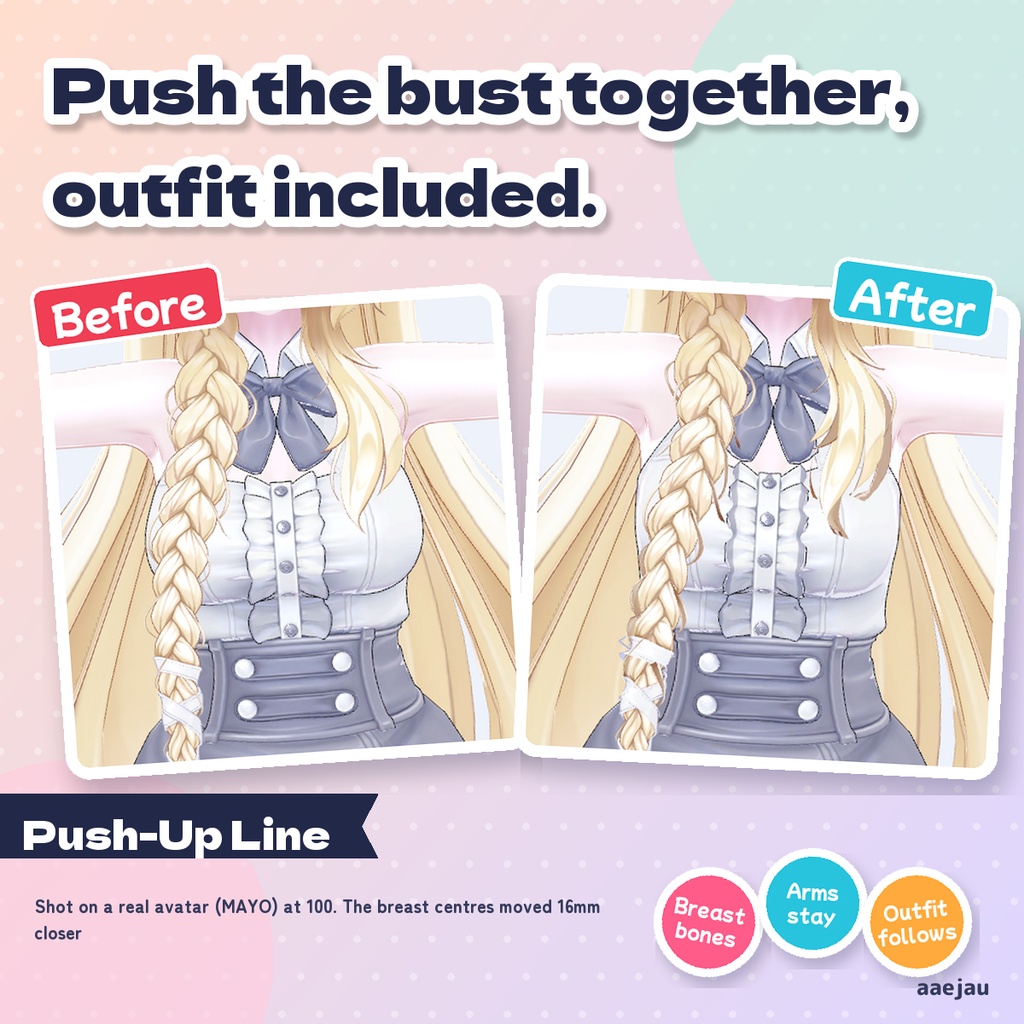
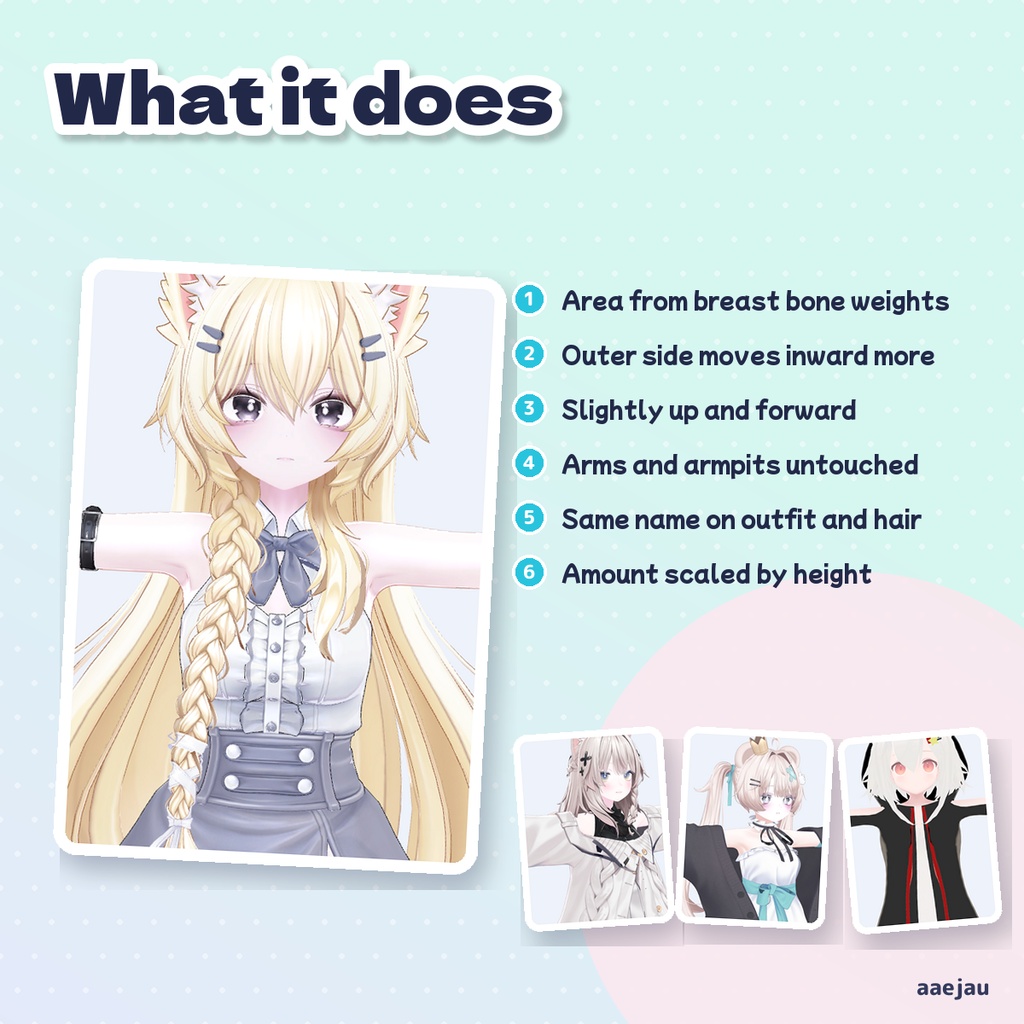
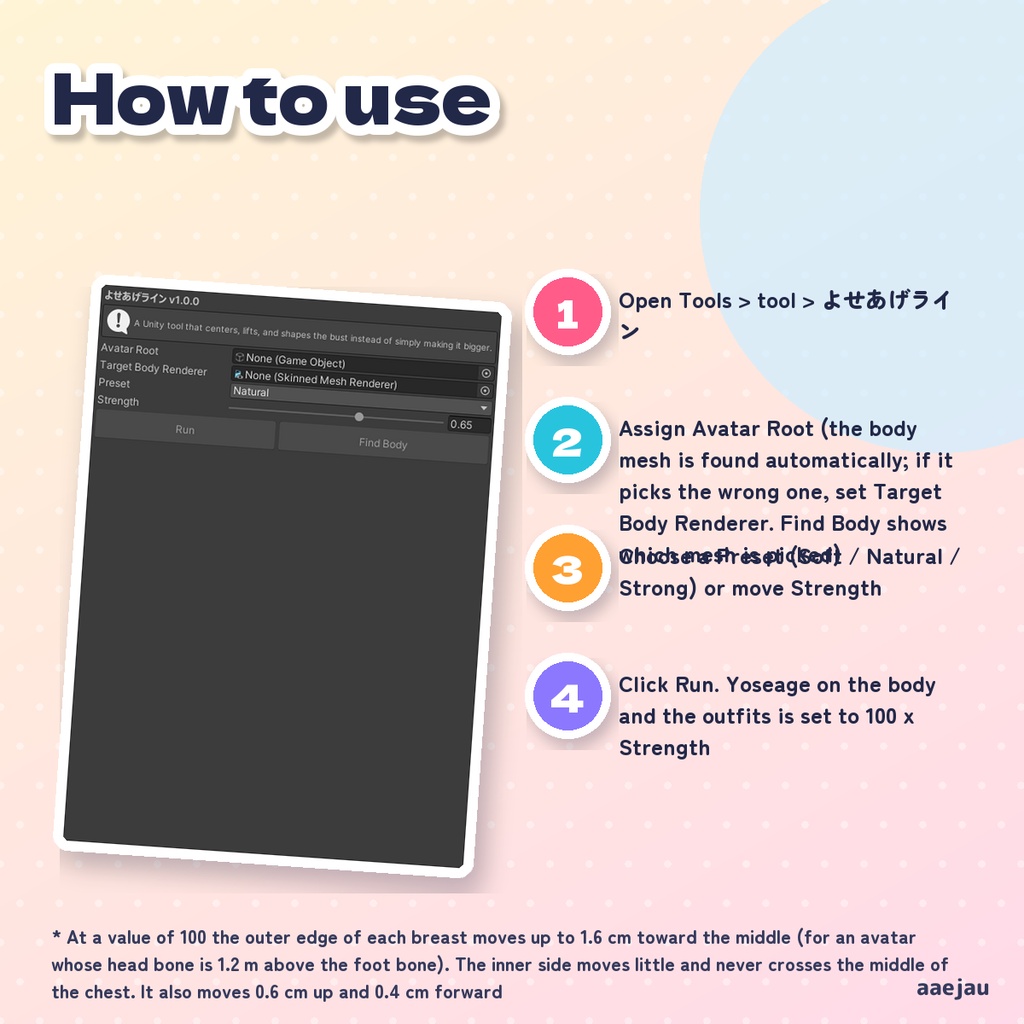
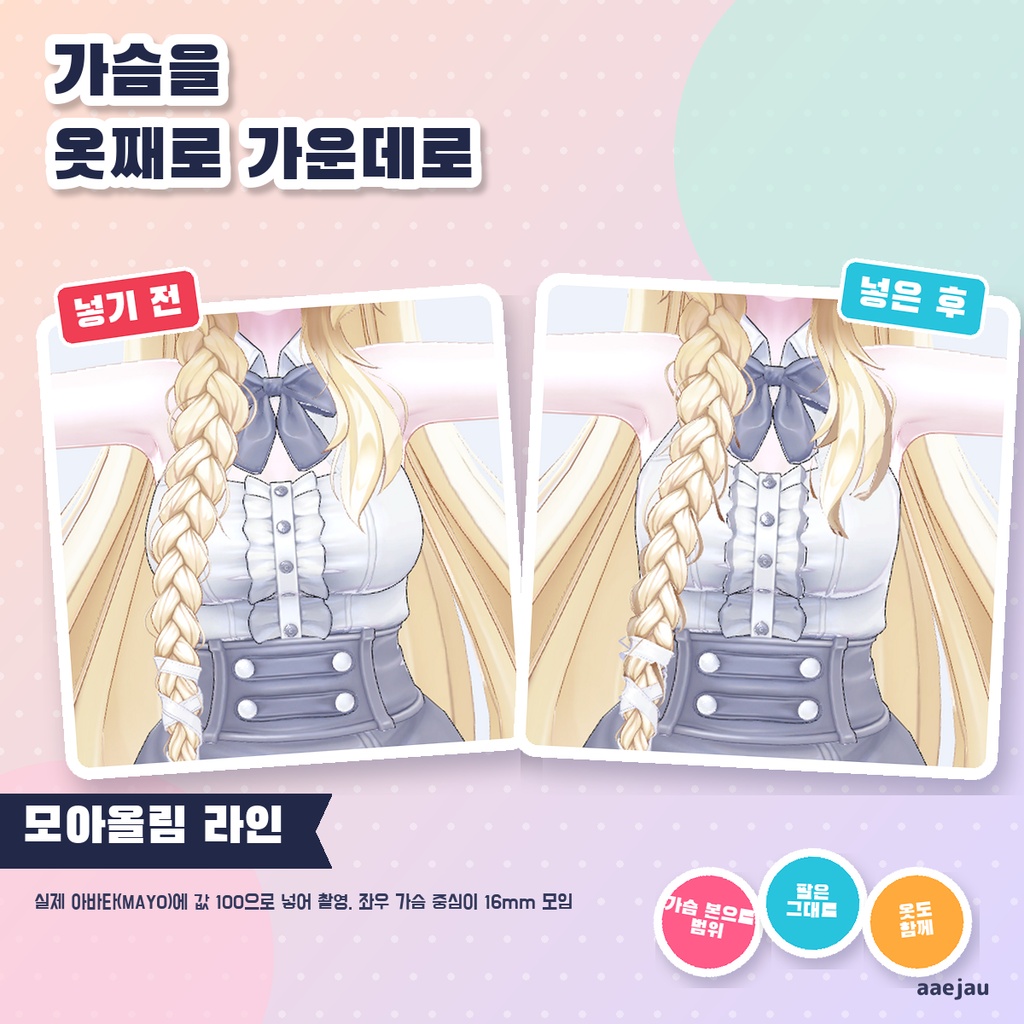
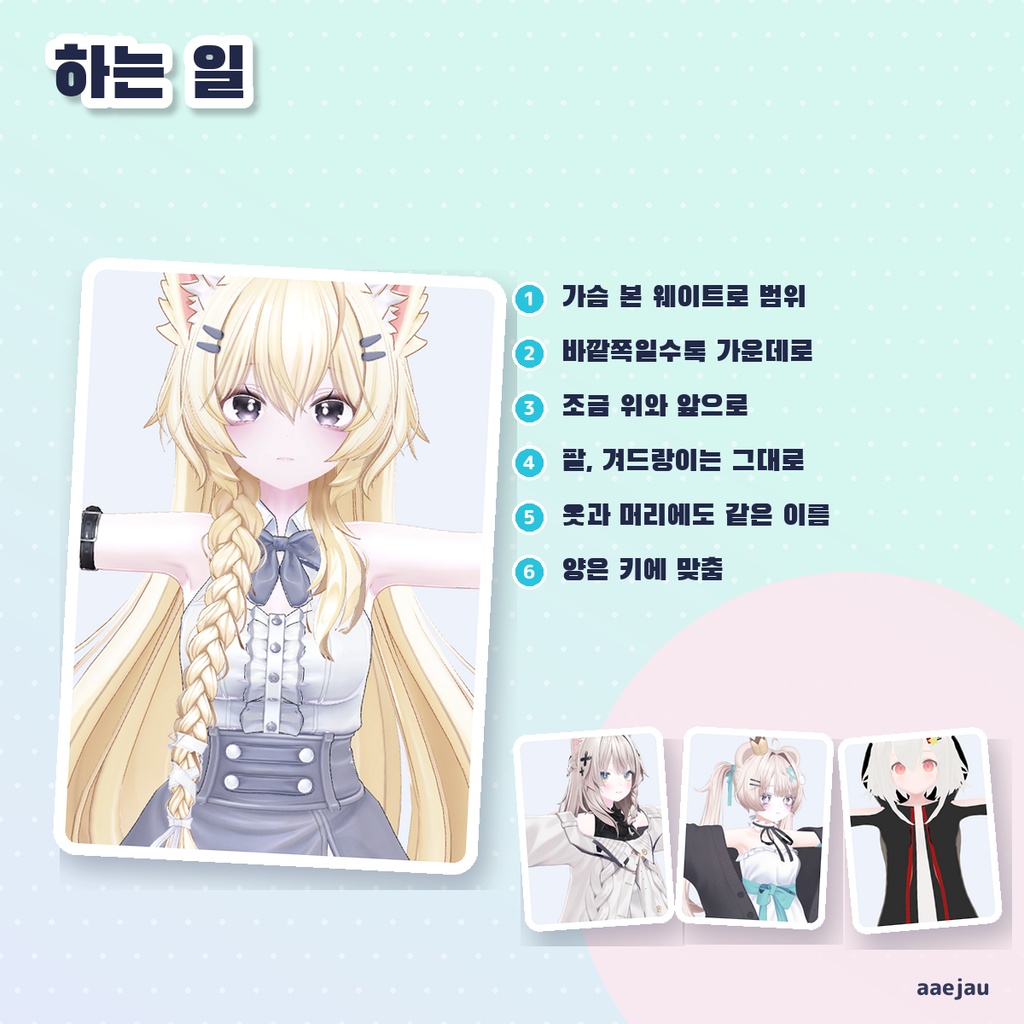
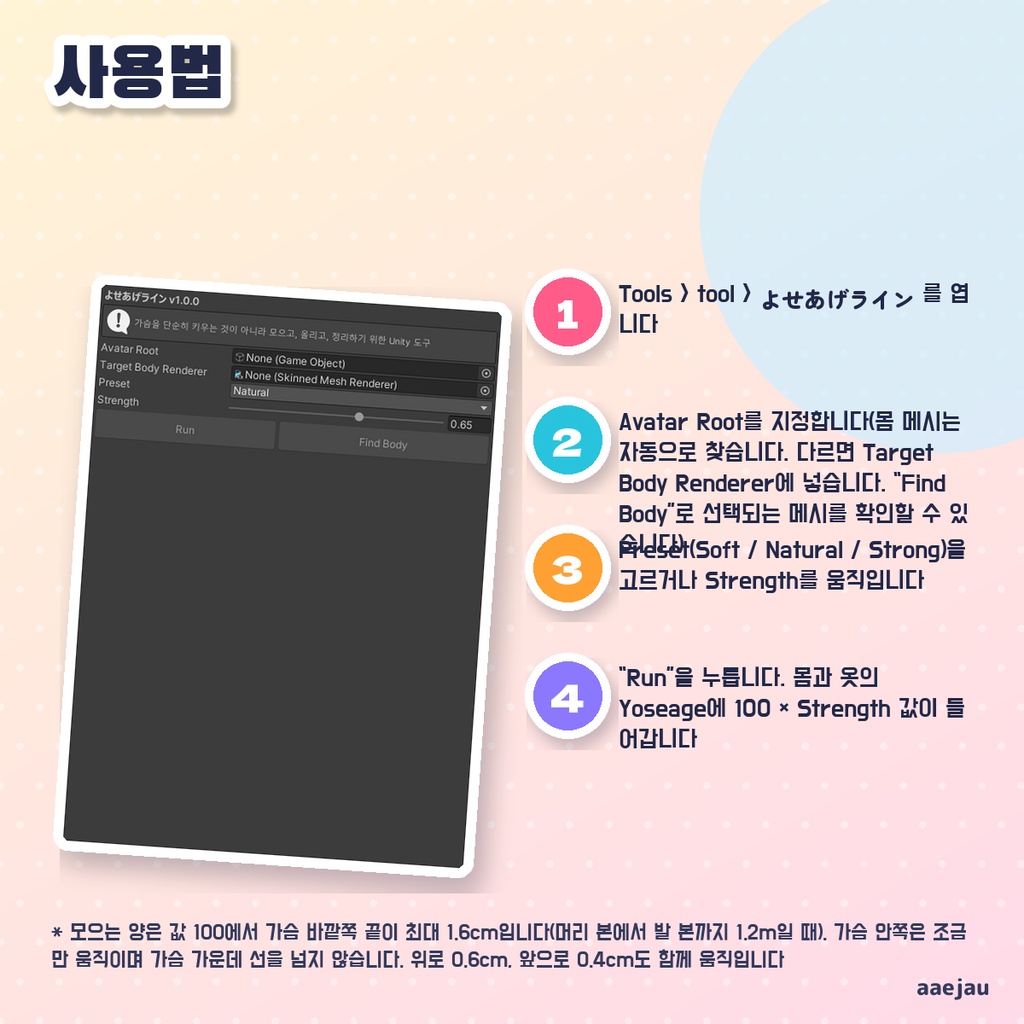


「胸を、服ごと中心に寄せたい。」 Blenderは使いません。Unityの中だけで終わります。 左右の胸をそれぞれ胸の中心へ寄せ、少し上と前へ動かす BlendShape「Yoseage」を体に作ります。胸の範囲は胸の骨(Breast_L / R など)のウェイトから決め(胸の骨が無い素体は肩の位置と体の表面から推定)、胸の外側ほど多く中心へ動かします。腕やわきの骨の頂点は動かしません。服と髪にも同じ名前の BlendShape を作って同じ値を入れるので、服も一緒に寄ります。動く量はアバターの背の高さに合わせます。元のメッシュは複製してから書き込みます。 ◆ 使い方 1. Tools > tool > よせあげライン を開く 2. Avatar Root を指定する(体のメッシュは自動で探します。違うときは Target Body Renderer に入れる。「Find Body」で選ばれるメッシュを確かめられます) 3. Preset(Soft / Natural / Strong)を選ぶか、Strength を動かす 4. 「Run」を押す。体と服の Yoseage に 100 × Strength の値が入ります 5. あとで Inspector で体の Yoseage の値を変えたときは、服の同じ名前の値も同じにしてください ◆ 必要環境 ・Unity 2022.3 ・Humanoid 設定のアバター(体が SkinnedMeshRenderer) ・VRChat SDK は不要です ※ 寄せる量は値 100 で、胸の外側の端で最大 1.6cm です(頭の骨から足の骨まで 1.2m のとき)。胸の内側はあまり動かさず、胸の中心線は越えません。上へ 0.6cm・前へ 0.4cm も一緒に動きます ※ 胸の骨が無いアバターでは、肩の位置と体の表面から胸の場所を推定するため、範囲がずれることがあります ※ 胸の骨のウェイトの付け方によっては、胸のまわり(わきの下など)が一緒に少し動くことがあります ※ 服は体の近く(約 7cm までは体と同じだけ、12cm より遠いと動かない)だけが動きます。顔・目・歯・舌は動かしません ※ 作ったメッシュは Assets/AaejauGenerated/YoseageLine に保存します。もう一度「Run」を押すと同じ名前の Yoseage を置き換えます(増えません) ※ 揺れ(PhysBone)の設定は変えません ※ Humanoid 設定のアバターで、置いたままの姿勢(T ポーズ / A ポーズ)で実行してください ※ しなの・Felis・MAYO・ミルフィで、値100のとき左右の胸の重心が 13〜20mm 寄り、腕・肩・手の頂点は動かず、服も一緒に動くこと(服の外へ出る頂点 しなの 554→39・ミルフィ 574→199)を確かめました。胸の前に垂れる細いリボンは形が少し乱れることがあります(ミルフィ) 内容物: unitypackage / README / CHANGELOG / TEST_REPORT / LICENSE / 画面のスクリーンショット ━━━━━━━━━━━━━━━━━━━━ English ━━━━━━━━━━━━━━━━━━━━ Creates a BlendShape "Yoseage" on the body that moves each breast toward the middle of the chest and slightly up and forward. The bust area is found from the weights of the breast bones (Breast_L / R etc.; on avatars without breast bones it is estimated from the shoulders and the body surface), and the outer side of each breast moves toward the middle the most. Vertices of the arm and armpit bones do not move. The outfits and hair get a BlendShape with the same name and the same value, so the clothing moves with the bust. The amount scales with the avatar's height. The original meshes are duplicated before anything is written. ◆ How to use 1. Open Tools > tool > よせあげライン 2. Assign Avatar Root (the body mesh is found automatically; if it picks the wrong one, set Target Body Renderer. Find Body shows which mesh is picked) 3. Choose a Preset (Soft / Natural / Strong) or move Strength 4. Click Run. Yoseage on the body and the outfits is set to 100 x Strength 5. If you later change the body's Yoseage value in the Inspector, set the same value on the outfits' shape with the same name ◆ Requirements ・Unity 2022.3 ・A Humanoid avatar whose body is a SkinnedMeshRenderer ・The VRChat SDK is not required * At a value of 100 the outer edge of each breast moves up to 1.6 cm toward the middle (for an avatar whose head bone is 1.2 m above the foot bone). The inner side moves little and never crosses the middle of the chest. It also moves 0.6 cm up and 0.4 cm forward * On avatars without breast bones, the bust position is estimated from the shoulders and the body surface, so the area can be off * Depending on how the breast bones are weighted, the area around the bust (such as under the arms) can move slightly too * Only clothing near the body moves (as much as the body up to about 7 cm away, not at all beyond 12 cm). The face, eyes, teeth and tongue never move * The meshes are saved in Assets/AaejauGenerated/YoseageLine. Clicking Run again replaces the Yoseage shape (it does not pile up) * PhysBone (jiggle) settings are not changed * Use a Humanoid avatar in the pose it was placed in (T pose / A pose) * Checked on Shinano, Felis, MAYO and Milfy: at 100 the breast centres move 13-20mm closer, arm, shoulder and hand vertices do not move, and outfits follow (vertices outside the outfit: Shinano 554→39, Milfy 574→199). Thin ribbons hanging on the chest can get slightly messy (Milfy) Contents: unitypackage / README / CHANGELOG / TEST_REPORT / LICENSE / screenshot ━━━━━━━━━━━━━━━━━━━━ 한국어 ━━━━━━━━━━━━━━━━━━━━ 좌우 가슴을 각각 가슴 가운데로 모으고 살짝 위·앞으로 움직이는 BlendShape 「Yoseage」를 몸에 만듭니다. 가슴 범위는 가슴 본(Breast_L / R 등)의 웨이트로 정하고(가슴 본이 없는 소체는 어깨 위치와 몸 표면으로 추정), 가슴의 바깥쪽일수록 가운데로 많이 움직입니다. 팔과 겨드랑이 본의 정점은 움직이지 않습니다. 옷과 머리카락에도 같은 이름의 BlendShape를 만들고 같은 값을 넣으므로 옷도 함께 모입니다. 움직이는 양은 아바타의 키에 맞춥니다. 원본 메시는 복제한 뒤에 기록합니다. ◆ 사용법 1. Tools > tool > よせあげライン 를 엽니다 2. Avatar Root를 지정합니다(몸 메시는 자동으로 찾습니다. 다르면 Target Body Renderer에 넣습니다. 「Find Body」로 선택되는 메시를 확인할 수 있습니다) 3. Preset(Soft / Natural / Strong)을 고르거나 Strength를 움직입니다 4. 「Run」을 누릅니다. 몸과 옷의 Yoseage에 100 × Strength 값이 들어갑니다 5. 나중에 Inspector에서 몸의 Yoseage 값을 바꾸면 옷의 같은 이름 값도 똑같이 맞춰 주세요 ◆ 요구 환경 ・Unity 2022.3 ・Humanoid 설정이고 몸이 SkinnedMeshRenderer인 아바타 ・VRChat SDK는 필요 없습니다 ※ 모으는 양은 값 100에서 가슴 바깥쪽 끝이 최대 1.6cm입니다(머리 본에서 발 본까지 1.2m일 때). 가슴 안쪽은 조금만 움직이며 가슴 가운데 선을 넘지 않습니다. 위로 0.6cm, 앞으로 0.4cm도 함께 움직입니다 ※ 가슴 본이 없는 아바타는 어깨 위치와 몸 표면으로 가슴 위치를 추정하므로 범위가 어긋날 수 있습니다 ※ 가슴 본 웨이트를 넣은 방식에 따라 가슴 주변(겨드랑이 아래 등)이 조금 같이 움직일 수 있습니다 ※ 옷은 몸 가까운 부분만 움직입니다(약 7cm까지는 몸과 같은 만큼, 12cm보다 멀면 움직이지 않음). 얼굴·눈·이·혀는 움직이지 않습니다 ※ 만든 메시는 Assets/AaejauGenerated/YoseageLine에 저장합니다. 「Run」을 다시 누르면 같은 이름의 Yoseage를 바꿔 넣습니다(늘어나지 않습니다) ※ 흔들림(PhysBone) 설정은 바꾸지 않습니다 ※ Humanoid로 설정된 아바타에서, 놓아 둔 자세(T 포즈 / A 포즈)로 실행해 주세요 ※ 시나노·Felis·MAYO·밀피에서 값 100일 때 좌우 가슴 중심이 13~20mm 모이고, 팔·어깨·손 정점은 움직이지 않으며, 옷도 함께 움직이는 것(옷 밖으로 나오는 정점 시나노 554→39, 밀피 574→199)을 확인했습니다. 가슴 앞의 가는 리본은 모양이 조금 흐트러질 수 있습니다(밀피) 내용물: unitypackage / README / CHANGELOG / TEST_REPORT / LICENSE / 스크린샷