

ピーチライン - お尻の形を4つのスライダーで整える【JA,EN,KO】
- ダウンロード商品¥ 700
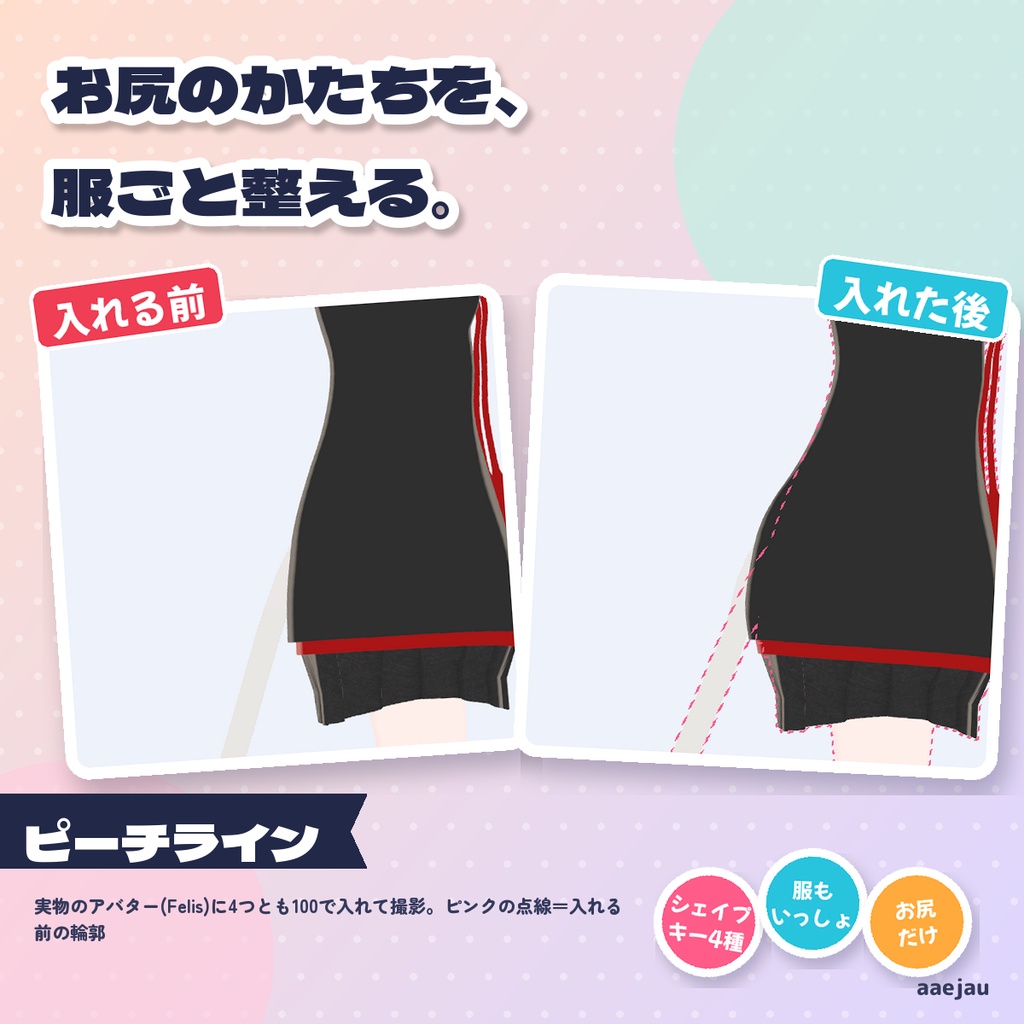
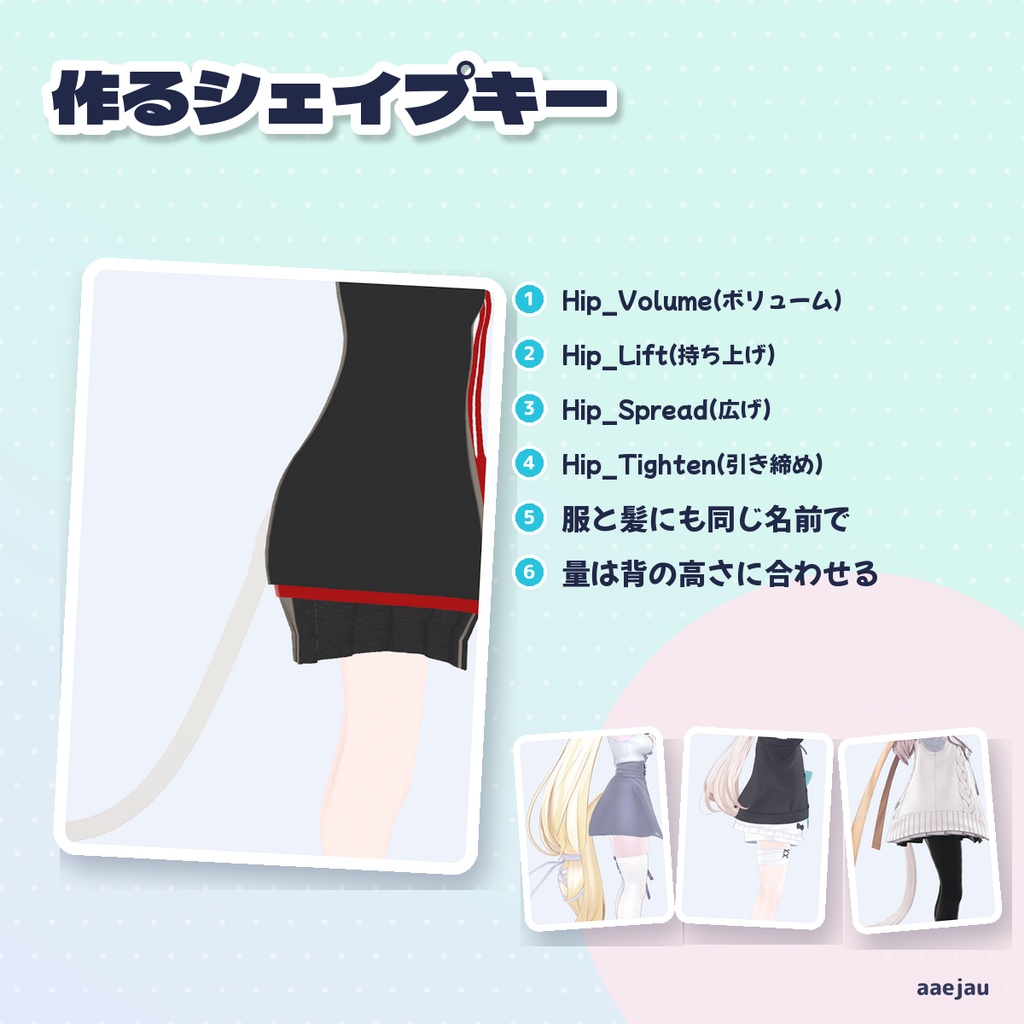
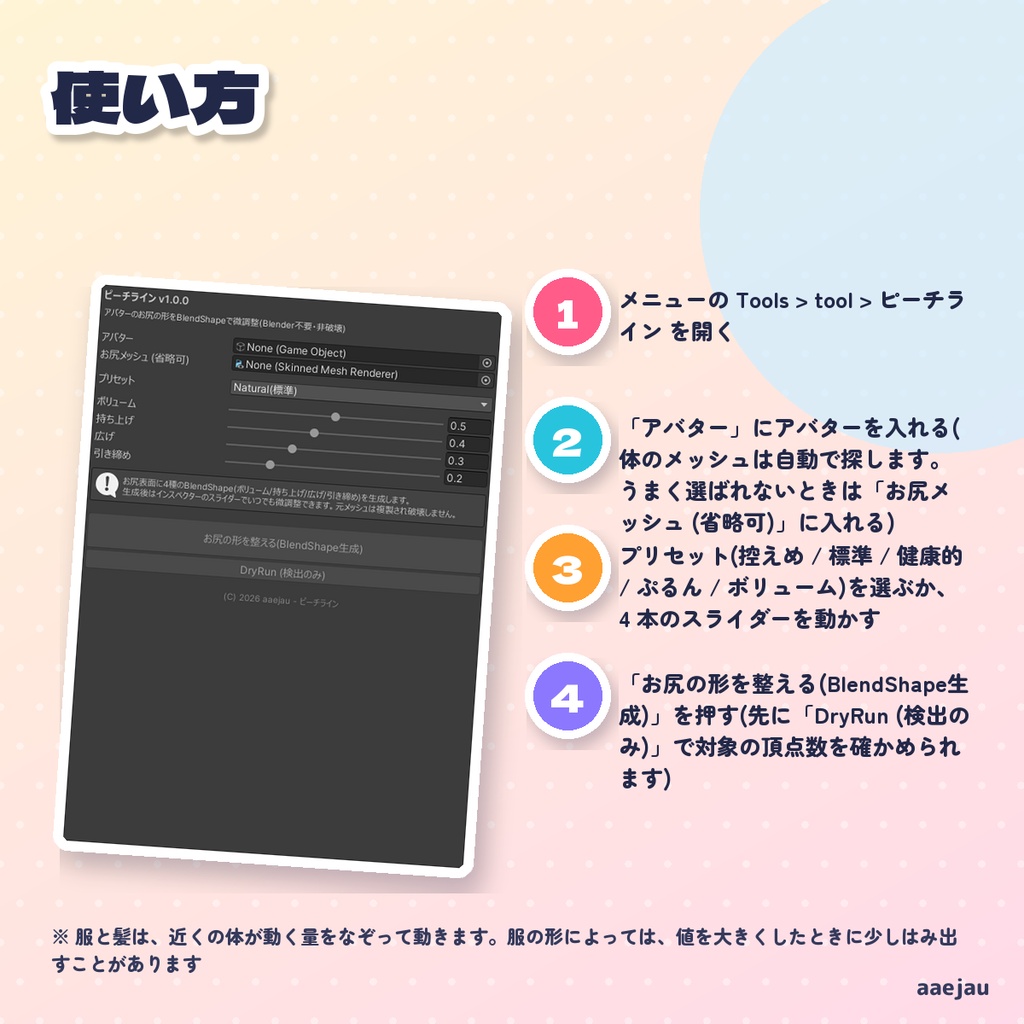
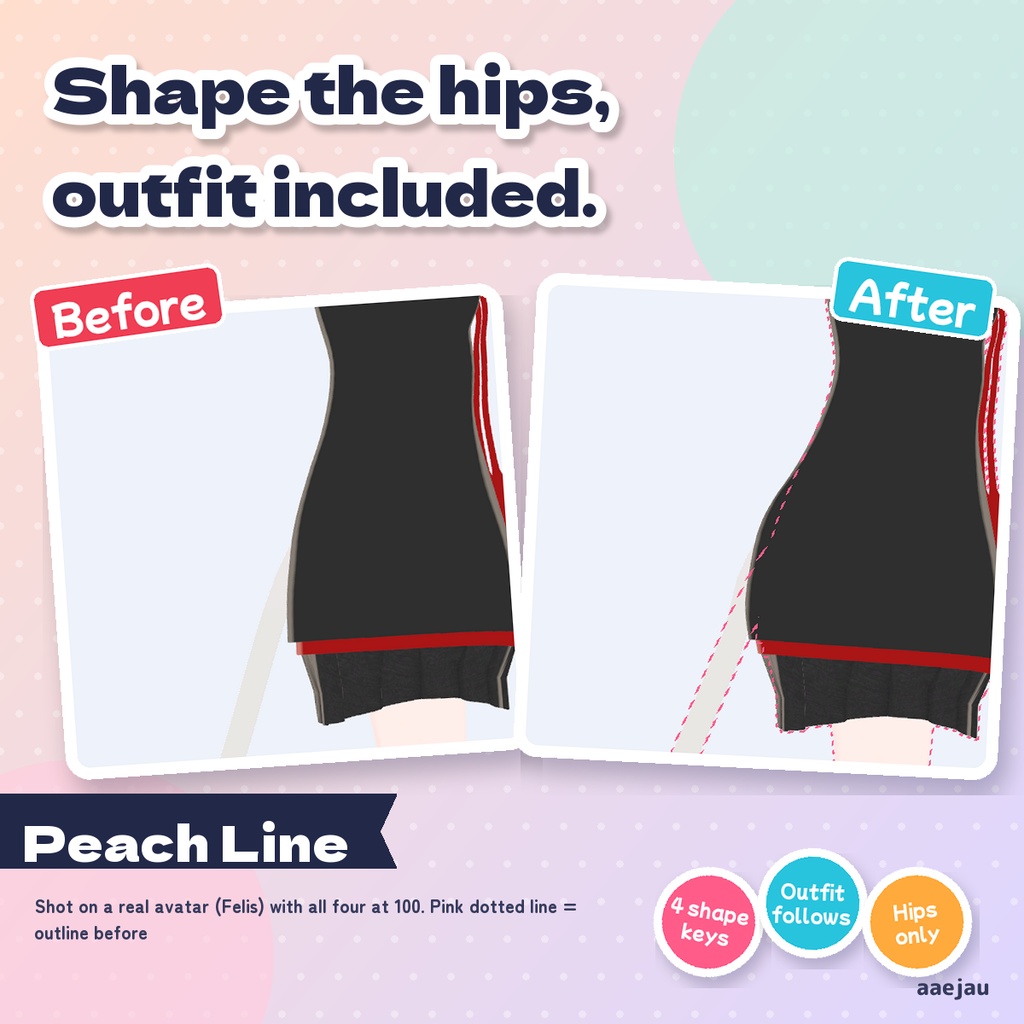
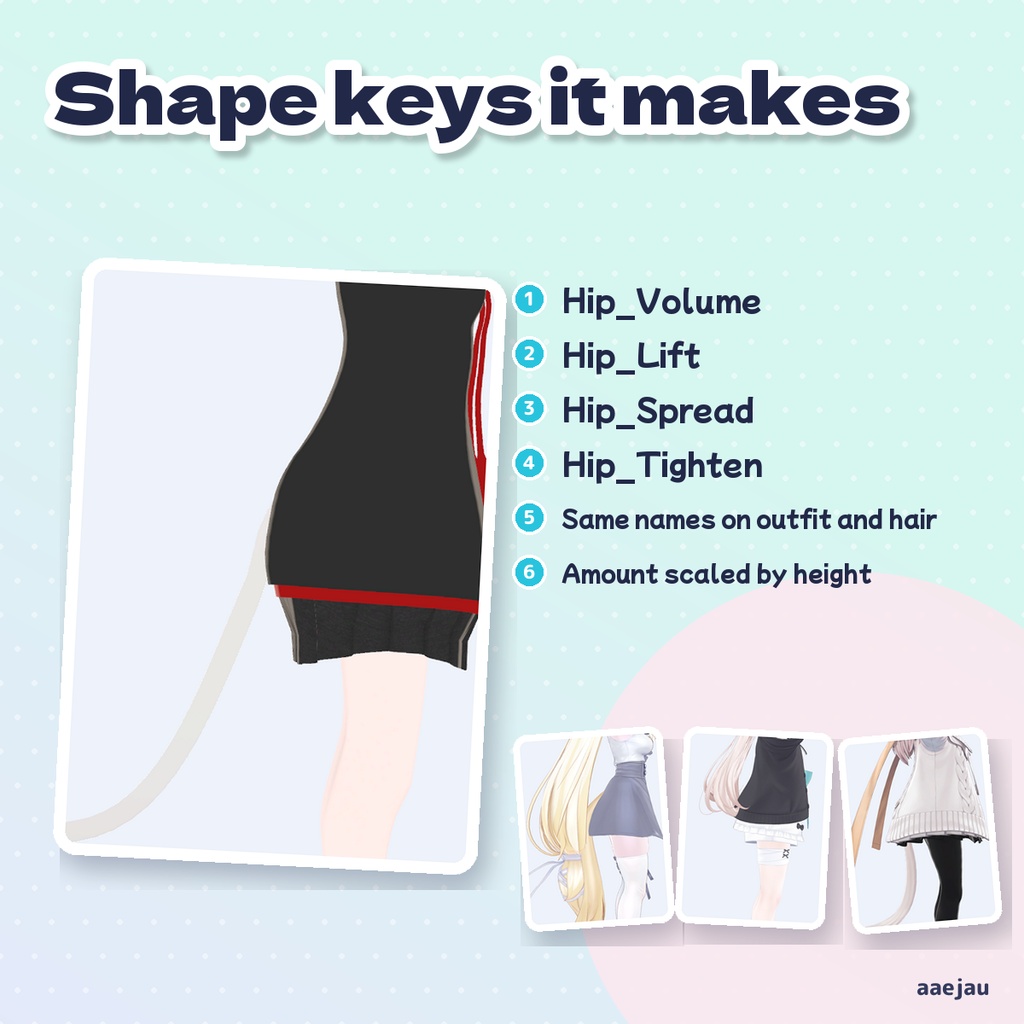
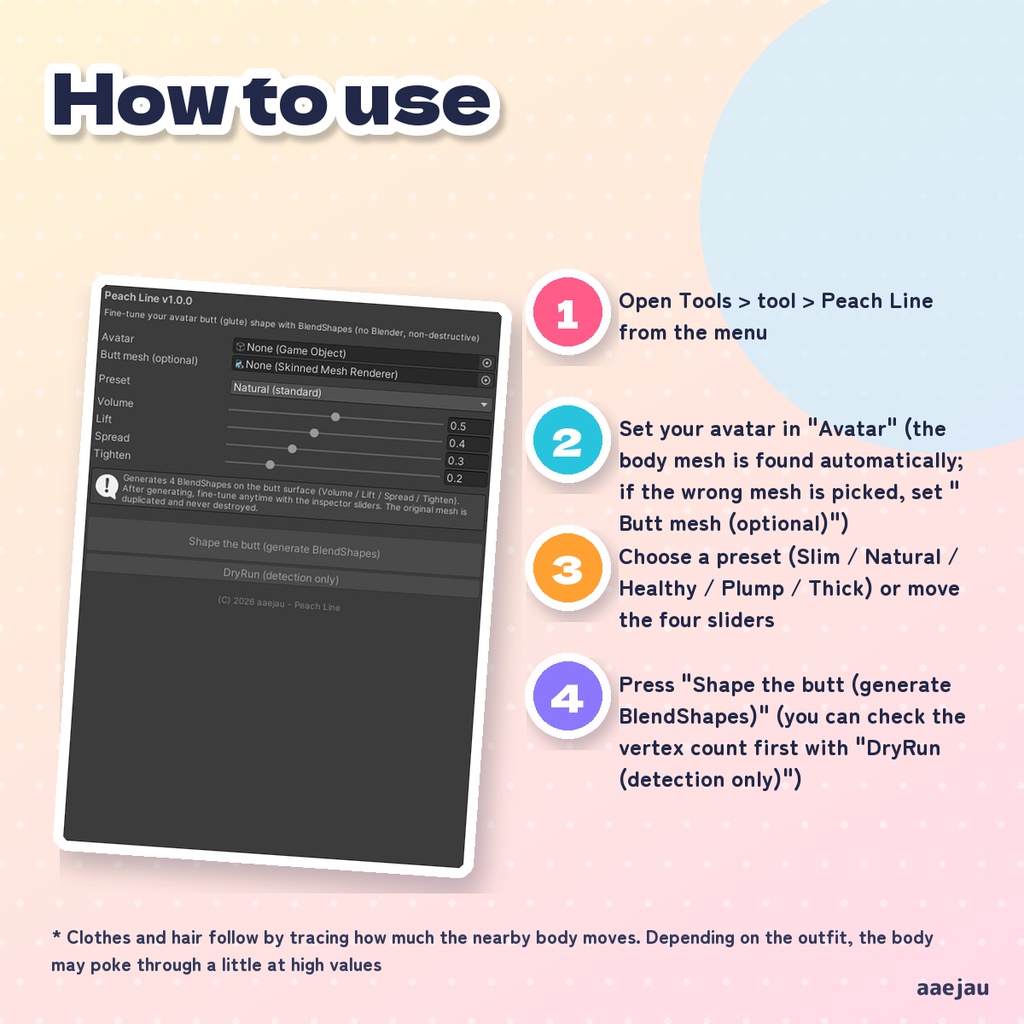
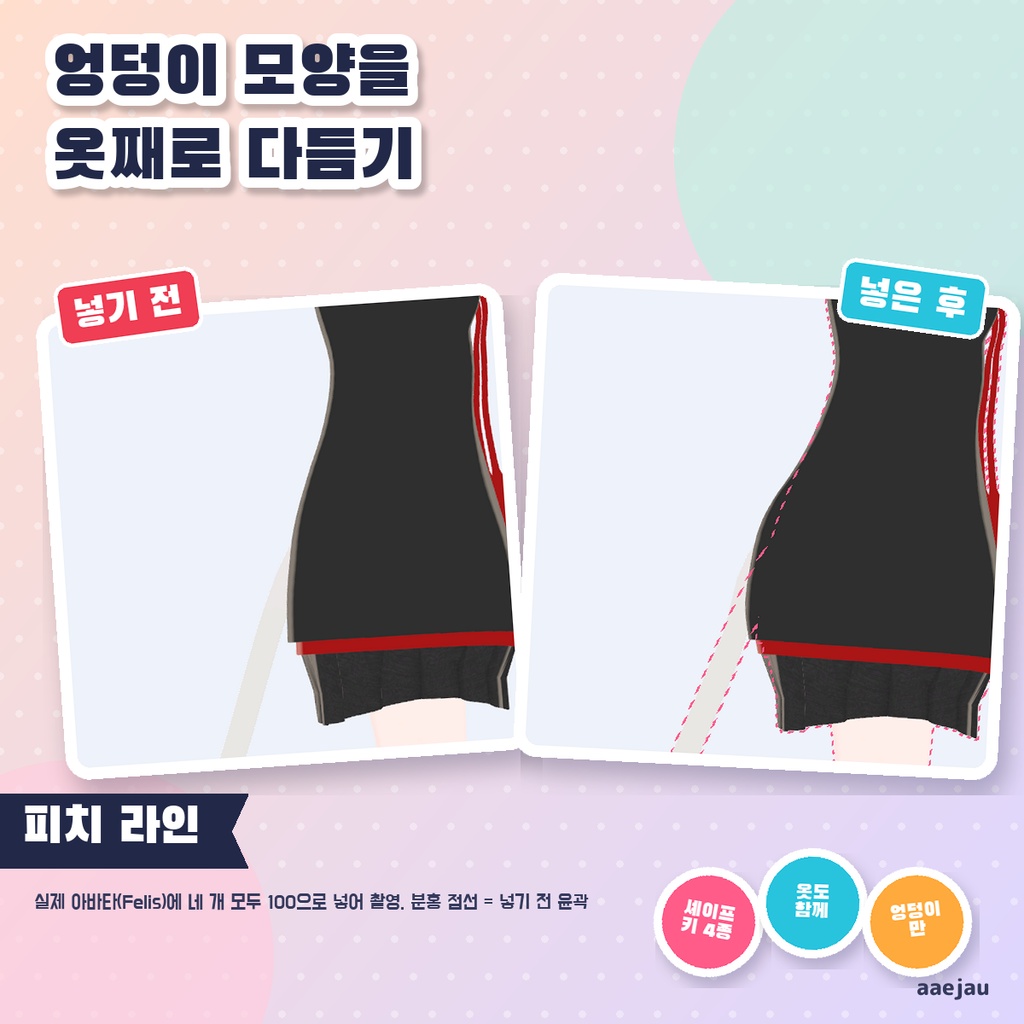
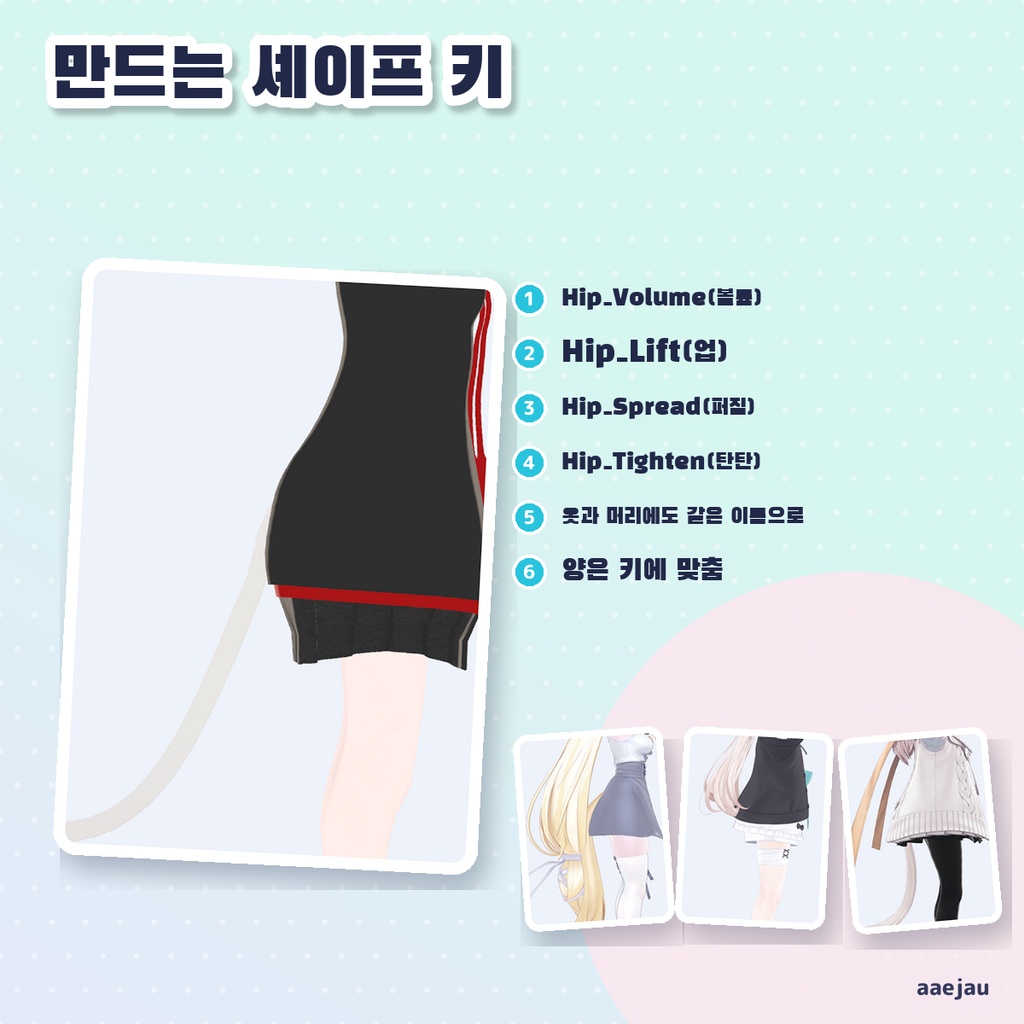
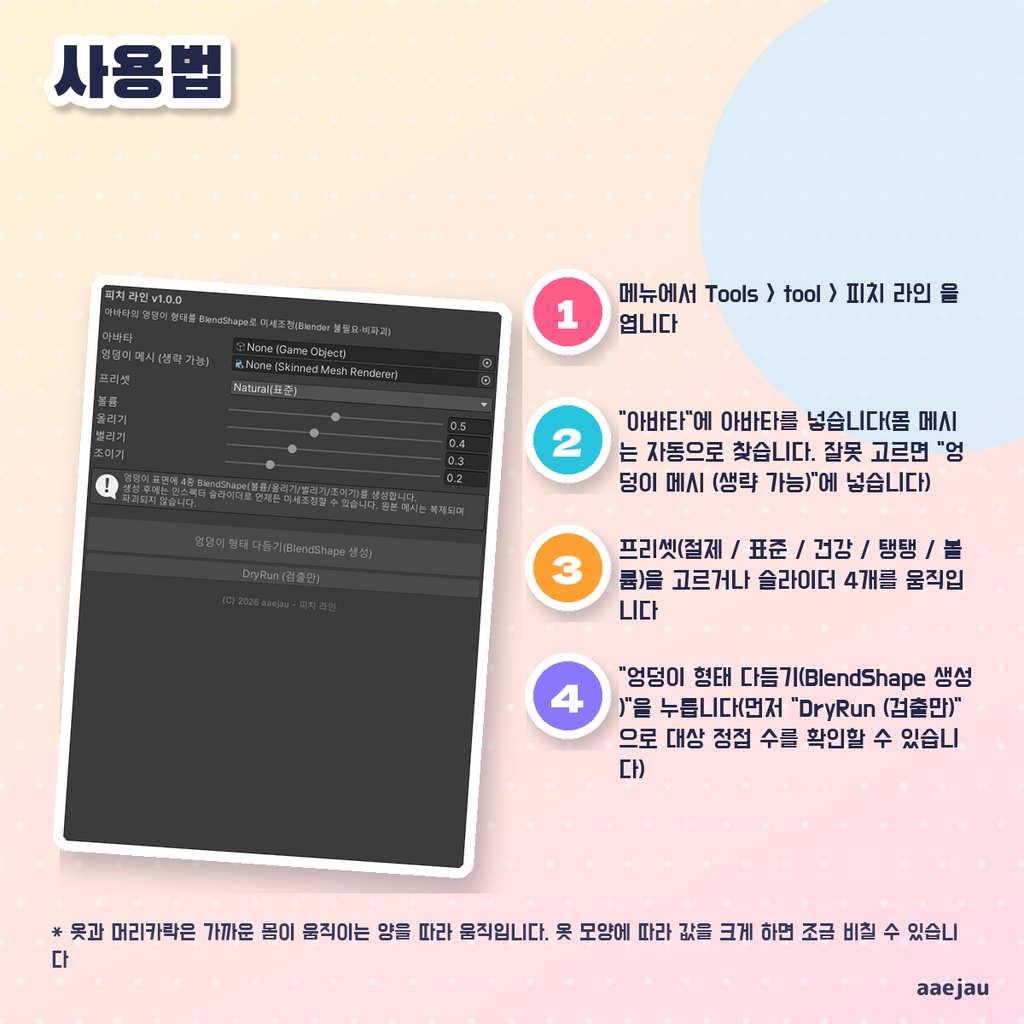


「お尻の形を、きれいに整えたい。」 Blenderは使いません。Unityの中だけで終わります。 アバターのお尻に、ボリューム・持ち上げ・広げ・引き締めの 4 つの BlendShape(Hip_Volume / Hip_Lift / Hip_Spread / Hip_Tighten)を作ります。お尻の場所は、脚の付け根と体のいちばん後ろの面から左右別々に決めるので、骨の向きがアバターごとに違っても同じ所が動きます。動く量は背の高さに合わせて変わります。上に重なる服と髪にも同じ名前の BlendShape を作って同じ値を入れるので、服から体がはみ出しにくくなっています。元のメッシュは書き換えず、複製へ差し替えます。 ◆ 使い方 1. メニューの Tools > tool > ピーチライン を開く 2. 「アバター」にアバターを入れる(体のメッシュは自動で探します。うまく選ばれないときは「お尻メッシュ (省略可)」に入れる) 3. プリセット(控えめ / 標準 / 健康的 / ぷるん / ボリューム)を選ぶか、4 本のスライダーを動かす 4. 「お尻の形を整える(BlendShape生成)」を押す(先に「DryRun (検出のみ)」で対象の頂点数を確かめられます) 5. 細かい調整は Inspector の Hip_ の 4 つのスライダーで行う。服と髪にも同じ名前のスライダーがあるので、体と同じ値にそろえる ◆ 必要環境 ・Unity 2022.3 ・Humanoid 設定のアバター ・VRChat SDK は不要です ※ 服と髪は、近くの体が動く量をなぞって動きます。服の形によっては、値を大きくしたときに少しはみ出すことがあります ※ Inspector で体の値だけを変えると服は付いてきません。服と髪の同じ名前のスライダーも同じ値にしてください ※ 動く量は自然に見える範囲に抑えてあり(値 100 でボリューム約 3.5cm。背の高さ 1.2m 相当のとき)、大きく作り変えることはできません ※ 左右の太もも(UpperLeg)のボーンがある Humanoid アバター向けです。Hips ボーンが見つからないアバターでは使えません ※ もう一度かけると、前に作った Hip_ の 4 つを作り直します(複製は増えません)。アバターにもともとある別のシェイプキーはそのまま残ります ※ しなの・Felis・MAYO・ミルフィで、動いた頂点が腰と太ももの付け根の骨の所だけにあること(脚の付け根より前は 0)、服と髪も同じ名前のシェイプキーで一緒に動くこと(全部100のときの服のはみ出し しなの 512→67・MAYO 413→19)、2回目で増えないこと、開き直しても残ることを確かめました 内容物: unitypackage / README / CHANGELOG / TEST_REPORT / LICENSE / 画面のスクリーンショット ━━━━━━━━━━━━━━━━━━━━ English ━━━━━━━━━━━━━━━━━━━━ Adds four BlendShapes to your avatar's butt: Volume, Lift, Spread and Tighten (Hip_Volume / Hip_Lift / Hip_Spread / Hip_Tighten). The butt area is found separately for left and right from the hip joints of the legs and the back-most surface of the body, so the same area moves even when bone orientations differ between avatars. The amount of change follows the avatar's height. Clothes and hair on top get BlendShapes with the same names and the same values, so the body is less likely to poke through. The original mesh is not edited; the renderer is switched to a copy. ◆ How to use 1. Open Tools > tool > Peach Line from the menu 2. Set your avatar in "Avatar" (the body mesh is found automatically; if the wrong mesh is picked, set "Butt mesh (optional)") 3. Choose a preset (Slim / Natural / Healthy / Plump / Thick) or move the four sliders 4. Press "Shape the butt (generate BlendShapes)" (you can check the vertex count first with "DryRun (detection only)") 5. Fine-tune with the four Hip_ sliders in the Inspector. Clothes and hair have sliders with the same names; keep them at the same values as the body ◆ Requirements ・Unity 2022.3 ・An avatar set up as Humanoid ・VRChat SDK is not required * Clothes and hair follow by tracing how much the nearby body moves. Depending on the outfit, the body may poke through a little at high values * If you change only the body's values in the Inspector, the clothes do not follow. Set the same-named sliders on the clothes and hair to the same values * The amount of change is kept within a natural-looking range (Volume about 3.5 cm at 100 for an avatar about 1.2 m tall); it cannot reshape the butt drastically * Made for Humanoid avatars with left and right UpperLeg bones. Avatars without a Hips bone are not supported * Running it again rebuilds the four Hip_ shapes made before (no extra copies pile up). Other shape keys the avatar already had are kept * Checked on Shinano, Felis, MAYO and Milfy: moved vertices are only on the hips and upper thigh bones (0 in front of the hip joints), outfits and hair move with same-named shape keys (outfit poke-through at all 100: Shinano 512→67, MAYO 413→19), a second run adds nothing, and results remain after reopening Contents: unitypackage / README / CHANGELOG / TEST_REPORT / LICENSE / screenshot ━━━━━━━━━━━━━━━━━━━━ 한국어 ━━━━━━━━━━━━━━━━━━━━ 아바타의 엉덩이에 볼륨·올리기·벌리기·조이기 BlendShape 4개(Hip_Volume / Hip_Lift / Hip_Spread / Hip_Tighten)를 만듭니다. 엉덩이 위치는 다리 관절과 몸의 가장 뒤쪽 면에서 좌우 따로 정하므로, 아바타마다 본 방향이 달라도 같은 곳이 움직입니다. 움직이는 양은 아바타의 키에 맞춰 바뀝니다. 위에 겹친 옷과 머리카락에도 같은 이름의 BlendShape를 만들어 같은 값을 넣으므로 옷 밖으로 몸이 비치기 어렵습니다. 원본 메시는 수정하지 않고 복제본으로 교체합니다. ◆ 사용법 1. 메뉴에서 Tools > tool > 피치 라인 을 엽니다 2. "아바타"에 아바타를 넣습니다(몸 메시는 자동으로 찾습니다. 잘못 고르면 "엉덩이 메시 (생략 가능)"에 넣습니다) 3. 프리셋(절제 / 표준 / 건강 / 탱탱 / 볼륨)을 고르거나 슬라이더 4개를 움직입니다 4. "엉덩이 형태 다듬기(BlendShape 생성)"을 누릅니다(먼저 "DryRun (검출만)"으로 대상 정점 수를 확인할 수 있습니다) 5. 세밀한 조정은 Inspector의 Hip_ 슬라이더 4개로 합니다. 옷과 머리카락에도 같은 이름의 슬라이더가 있으니 몸과 같은 값으로 맞춥니다 ◆ 요구 환경 ・Unity 2022.3 ・Humanoid로 설정된 아바타 ・VRChat SDK는 필요 없습니다 ※ 옷과 머리카락은 가까운 몸이 움직이는 양을 따라 움직입니다. 옷 모양에 따라 값을 크게 하면 조금 비칠 수 있습니다 ※ Inspector에서 몸의 값만 바꾸면 옷은 따라오지 않습니다. 옷과 머리카락의 같은 이름 슬라이더도 같은 값으로 해 주세요 ※ 움직이는 양은 자연스러운 범위로 제한되어 있어(키 약 1.2m 기준 값 100에서 볼륨 약 3.5cm) 크게 바꿀 수는 없습니다 ※ 좌우 UpperLeg 본이 있는 Humanoid 아바타용입니다. Hips 본을 찾을 수 없는 아바타에서는 쓸 수 없습니다 ※ 다시 실행하면 전에 만든 Hip_ 4개를 다시 만듭니다(복제본이 늘지 않습니다). 아바타에 원래 있던 다른 셰이프 키는 그대로 남습니다 ※ 시나노·Felis·MAYO·밀피에서 움직인 정점이 허리와 허벅지 시작 본 부분에만 있는 것(다리 시작점 앞은 0), 옷과 머리도 같은 이름의 셰이프 키로 함께 움직이는 것(전부 100일 때 옷 밖으로 나옴 시나노 512→67, MAYO 413→19), 두 번째 실행에서 늘지 않는 것, 다시 열어도 남는 것을 확인했습니다 내용물: unitypackage / README / CHANGELOG / TEST_REPORT / LICENSE / 스크린샷